![]()
What is Ninja Tables
Ninja Tables is a popular plugin for WordPress that allows you to create amazing looking tables and charts.
Using the free Ninja Tables plugin and our PRO plugin you can build tables and charts from the data returned from your JSON API.
Requirements
To get this integration up and running, you will need:
- Ninja Tables Plugin
- Free WPGetAPI Plugin
- PRO Plugin
- An API that returns JSON data suitable for a table
How it works
This is a no-code integration to create tables from API data.
Once the plugins are installed and you have setup your API and endpoint, you will see a new Ninja Tables button within each endpoint.
Clicking this button will create a new table within Ninja Tables. You then simply need to copy the shortcode for that table and add to the page wherever you want the table to be shown.
When viewing the table on the front end, the API will be called and the table data updated on page load.
Step by Step Instructions
Let’s look a bit deeper at how we can create amazing looking charts and tables using API data.
Step 1: Create API & endpoint
The first step is to add a new API and a new endpoint. Follow the Quick Start guide if you haven’t done this already.
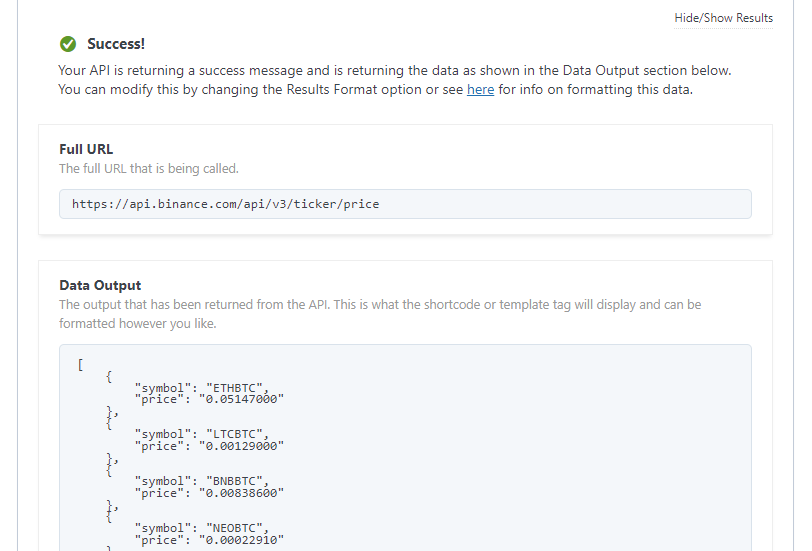
Step 2: Test the endpoint
Once your endpoint is setup, you should test it by clicking on the Test Endpoint button. The data returned should be in JSON string format like shown below.
Step 3: Create a Ninja Tables
Once you are happy that the data returned looks good, you simply need to scroll to the bottom of the endpoint and click the Create Ninja Tables from this endpoint button.
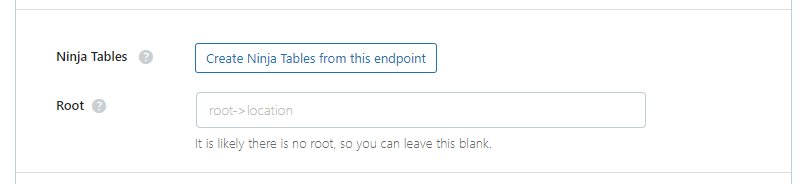
Root field is optional and may not be required, depending on your API.
In the example below, the Root will be products. The reason for this is that we need to find the point at where the array of items begins.

Clicking this button will create a new table within Ninja Tables that will be associated with this endpoint. After successfully creating the table, you should see some new options and information as shown below.
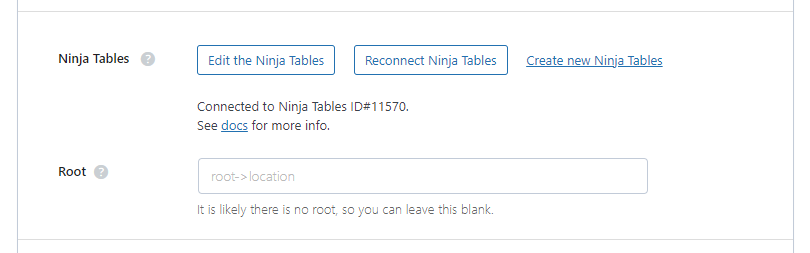
It tells us we are connected to the new Ninja Tables we just created.
There are also options to Edit the Ninja Tables, Reconnect Ninja Tables and Create new Ninja Tables. These options will do the following:
- Edit the Ninja Tables – this will take you to the Ninja Tables to edit and test the layout of the table
- Reconnect Ninja Tables – this will refresh the table and the API data within the table
- Create new Ninja Tables – this will create a new Ninja Tables that will be associated with this endpoint
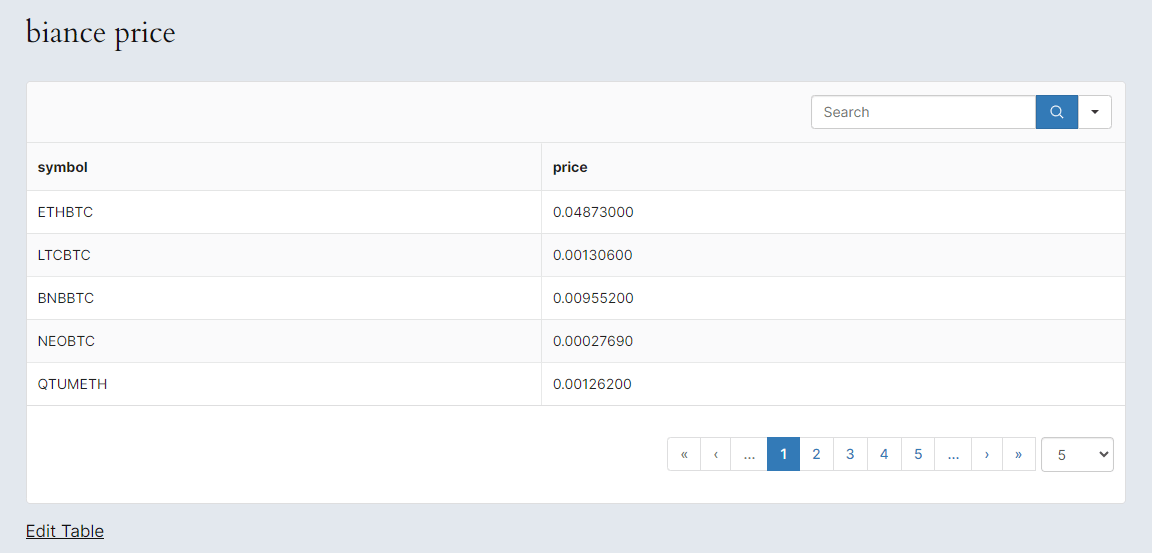
Step 4: Edit the Ninja Tables
Click on the Edit the Ninja Tables button to be taken to the table. This is where you can edit the table and setup how it should look.
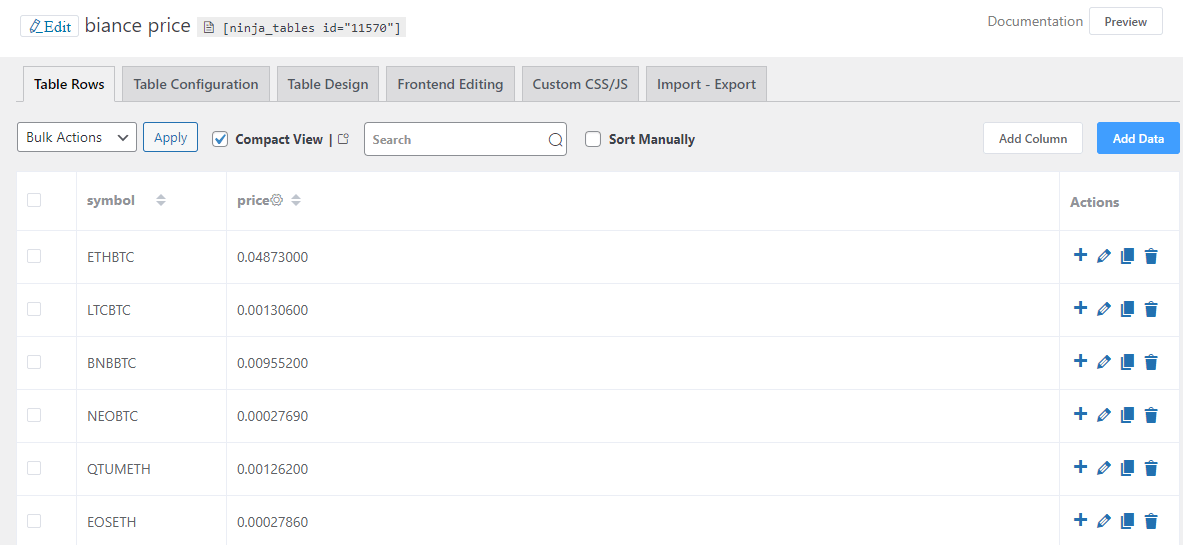
You can now setup your Ninja Tables any way you like using the options within this page.
Step 5: Add the Ninja Tables
Now you simply need to copy the Ninja Tables shortcode and paste it into your page or wherever you like.
When the page is viewed, our plugin will recognise that this table is tied to the endpoint and will call the API before displaying the data, meaning that the table data is always fresh.
You can also set a cache time within the endpoint if you want to avoid calling the API on every single page load.
Technical Details
When creating a new table by pressing the Create Ninja Tables from this endpoint button, a few things are happening in the background which are worth mentioning here.
Firstly, a new Ninja Tables is created and we grab the id of that new table.
Next, the PRO plugin will call your endpoint and then insert data in the Ninja Tables.
Finally, when you add the Ninja Tables shortcode to a page, the PRO plugin will grab the id from the shortcode and check if it this table is tied to an endpoint. If it is, it will call the endpoint and update the data in the Ninja Tables with the new API data, leaving you with fresh data in the table.