Gravity Forms is a hugely popular WordPress forms plugin that allows you to easily create any type of form on your website. WPGetAPI can interact with Gravity Forms to gather the data that is submitted through a form, and then use this data as a variable to send to any external API.
There are 2 methods that you can use, with Method 1 being the simplest as it does not require any coding.
Method 1 – Using Tokens (no code)
How it works
This method is so simple with Gravity Forms and only has 3 steps. We need to create our form, create our endpoint using tokens, and then add the endpoint shortcode into the form confirmation.
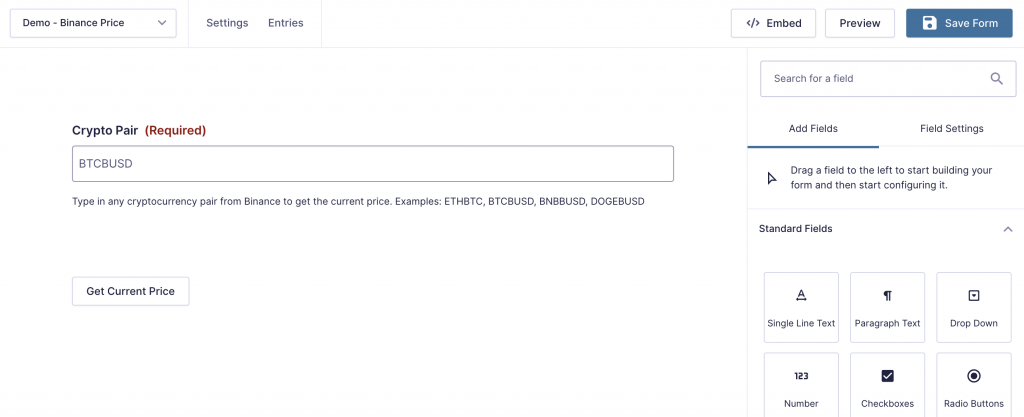
Step 1: Setup Gravity Forms
We have set up our form with a single field called Crypto Pair – this is what we will use to send to our API. The ID of this field is #1, so Gravity Forms names this as input_1 on the front end. This is important for the next step.
Now we just need to add this form into our page using their shortcode.
Step 2: Setup the endpoint
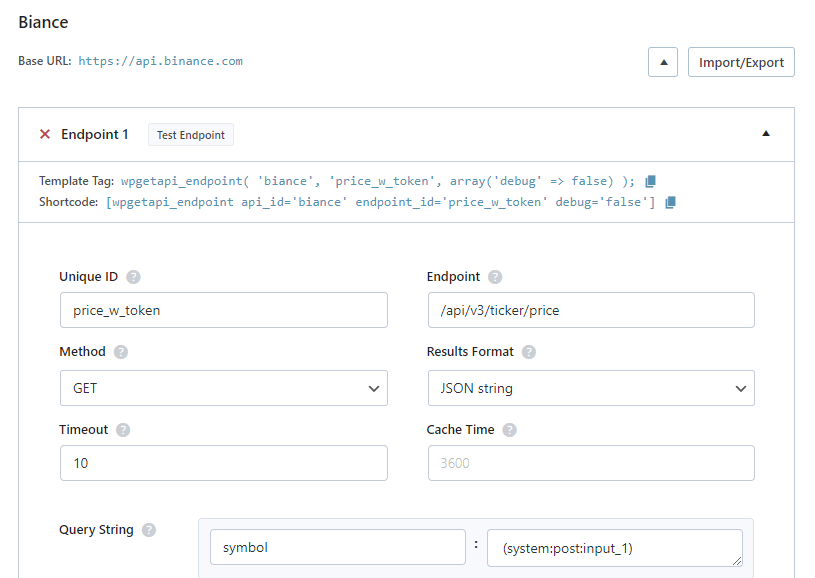
We are setting up our endpoint to query the Binance API and get the price of any crypto currency.
Within the Query String fields is where we are using a token to capture the value of ‘input_1’ when the form is submitted.
The token (system:post:input_1) will capture the data from the form’s ‘input_1’ field. So if the user enters ‘DOGEBUSD’ into this field, ‘DOGEBUSD’ will be sent as the value and we will retrieve the current price of DOGEBUSD.
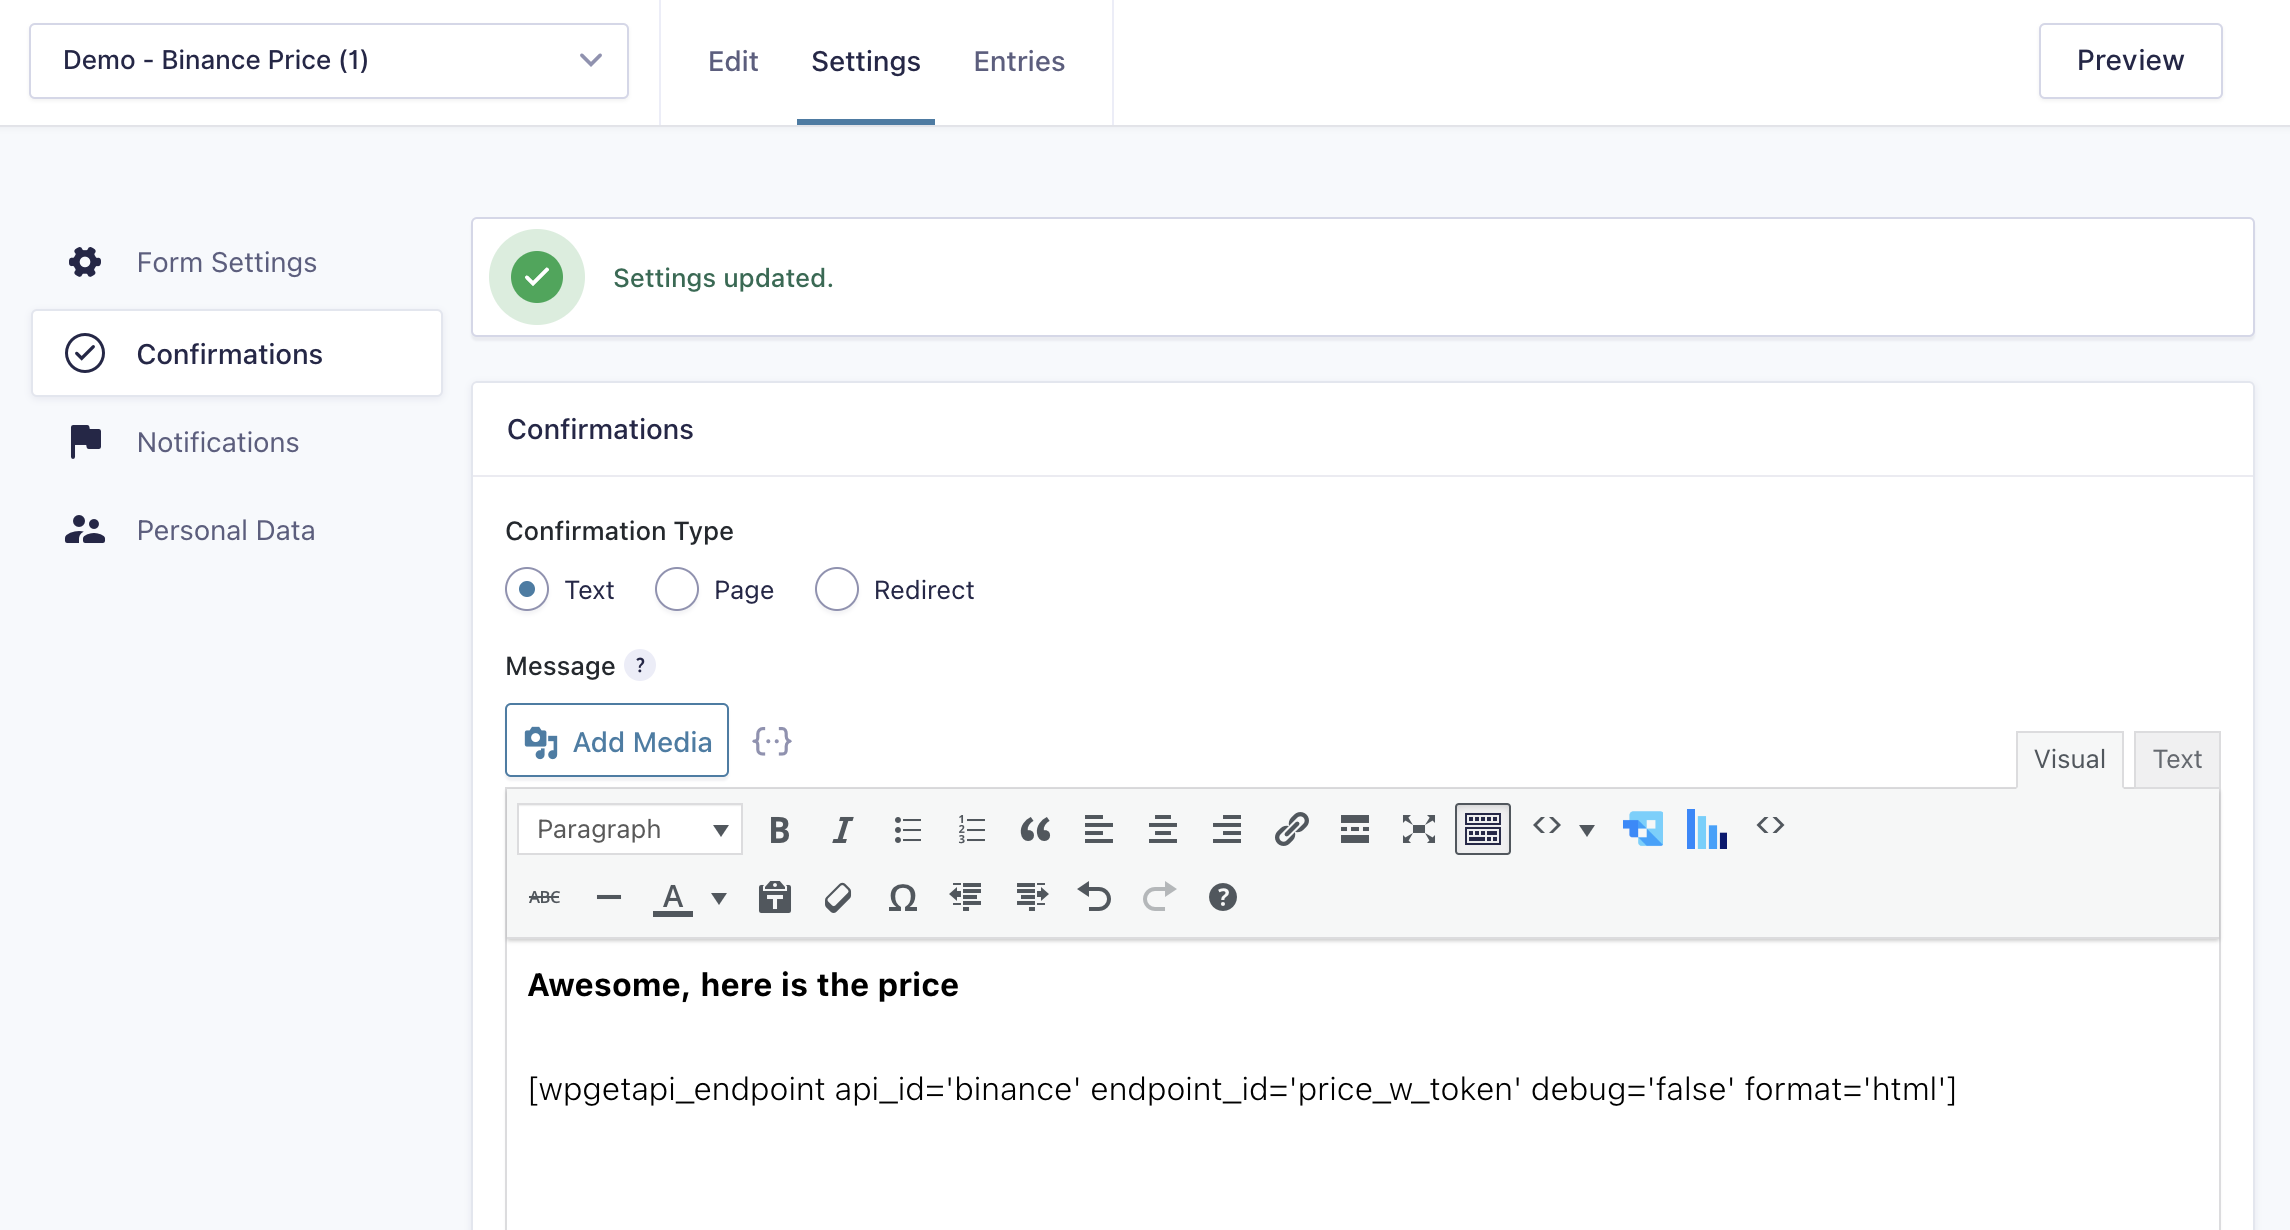
Step 3: Add shortcode to confirmation
Here we simply need to grab the shortcode from the endpoint screen and then past this into the confirmation. We’ve also set the format attribute to html.
Step 4: Add the form and test it
Here is a working version of the form that is making the API call:
Method 2 – Using query_variables (coding required)
Step 1: Setup Gravity Forms
We have set up our form with a single field called Crypto Pair – this is what we will use to send to our API. The ID of this field is #1, so Gravity Forms names this as input_1 on the front end. This is important for the next step.
Now we just need to add this form into our page using their shortcode.
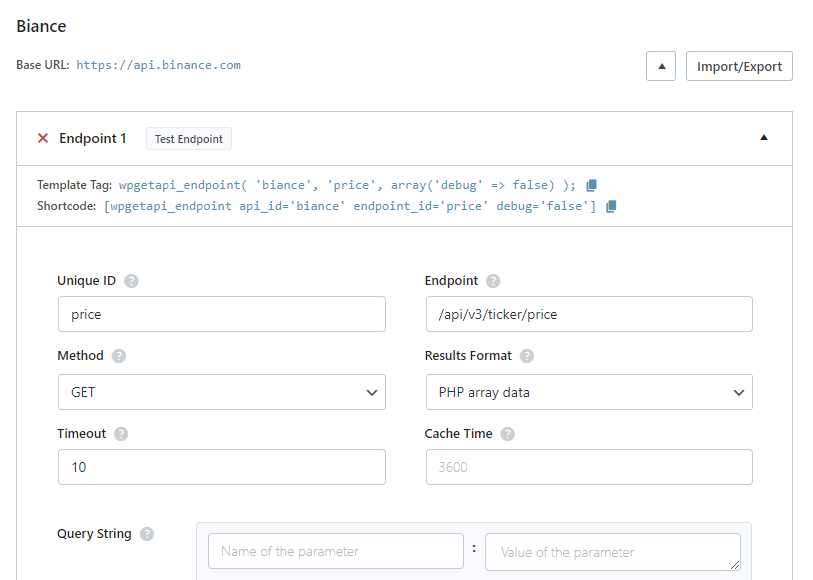
Step 2: Setup the Binance API
The settings for our Binance API are shown in the screenshot below and you can see that we are using the endpoint: https://api.binance.com/api/v3/ticker/price
Step 3: Process the form and get the API data
We now need to add the following code into our themes functions.php file. This will basically get our form value, which will be a cryptocurrency pair and then send this as a query variable to the Binance API and then the API will send back our data, retrieving the price. We are then modifying the confirmation message of the form to display the price. Very simple and basic.
add_filter( 'gform_confirmation_7', 'wpgetapi_get_current_price_from_binance', 10, 4 );
function wpgetapi_get_current_price_from_binance( $confirmation, $form, $entry, $ajax ) {

    // gets the crypto pair that was sent from the form
    $pair = rgar( $entry, '1' );

    // call the binance api and retrieve the 'price' key
	$price = wpgetapi_endpoint( 'binance', 'price',
		array(
		    'debug' => false,
		    'query_variables' => 'symbol=' . $pair,
		),
		array(
			'price'
		)
	);

	// output our message to the user
	$confirmation = 'Current '. $pair . ' price is ' . $price;

	return $confirmation;

}
View the results
Here is a live working example of the form.