Data that is returned from the API can then be displayed as part of the confirmation message – but please note that Contact Form 7 does not allow HTML within their confirmation message, so the resulting message can only ever be simple text.
There are 2 methods that you can use, with Method 1 being the simplest as it does not require any coding.
Method 1 – No Code
How it works
Contact Form 7 has a feature called custom ‘form-tags‘, which look similar to a shortcode and can be placed within your forms.
We’ve built a custom form-tag which allows us to use tokens to capture the data from form fields, without writing a single line of code.
Let’s jump straight into an example.
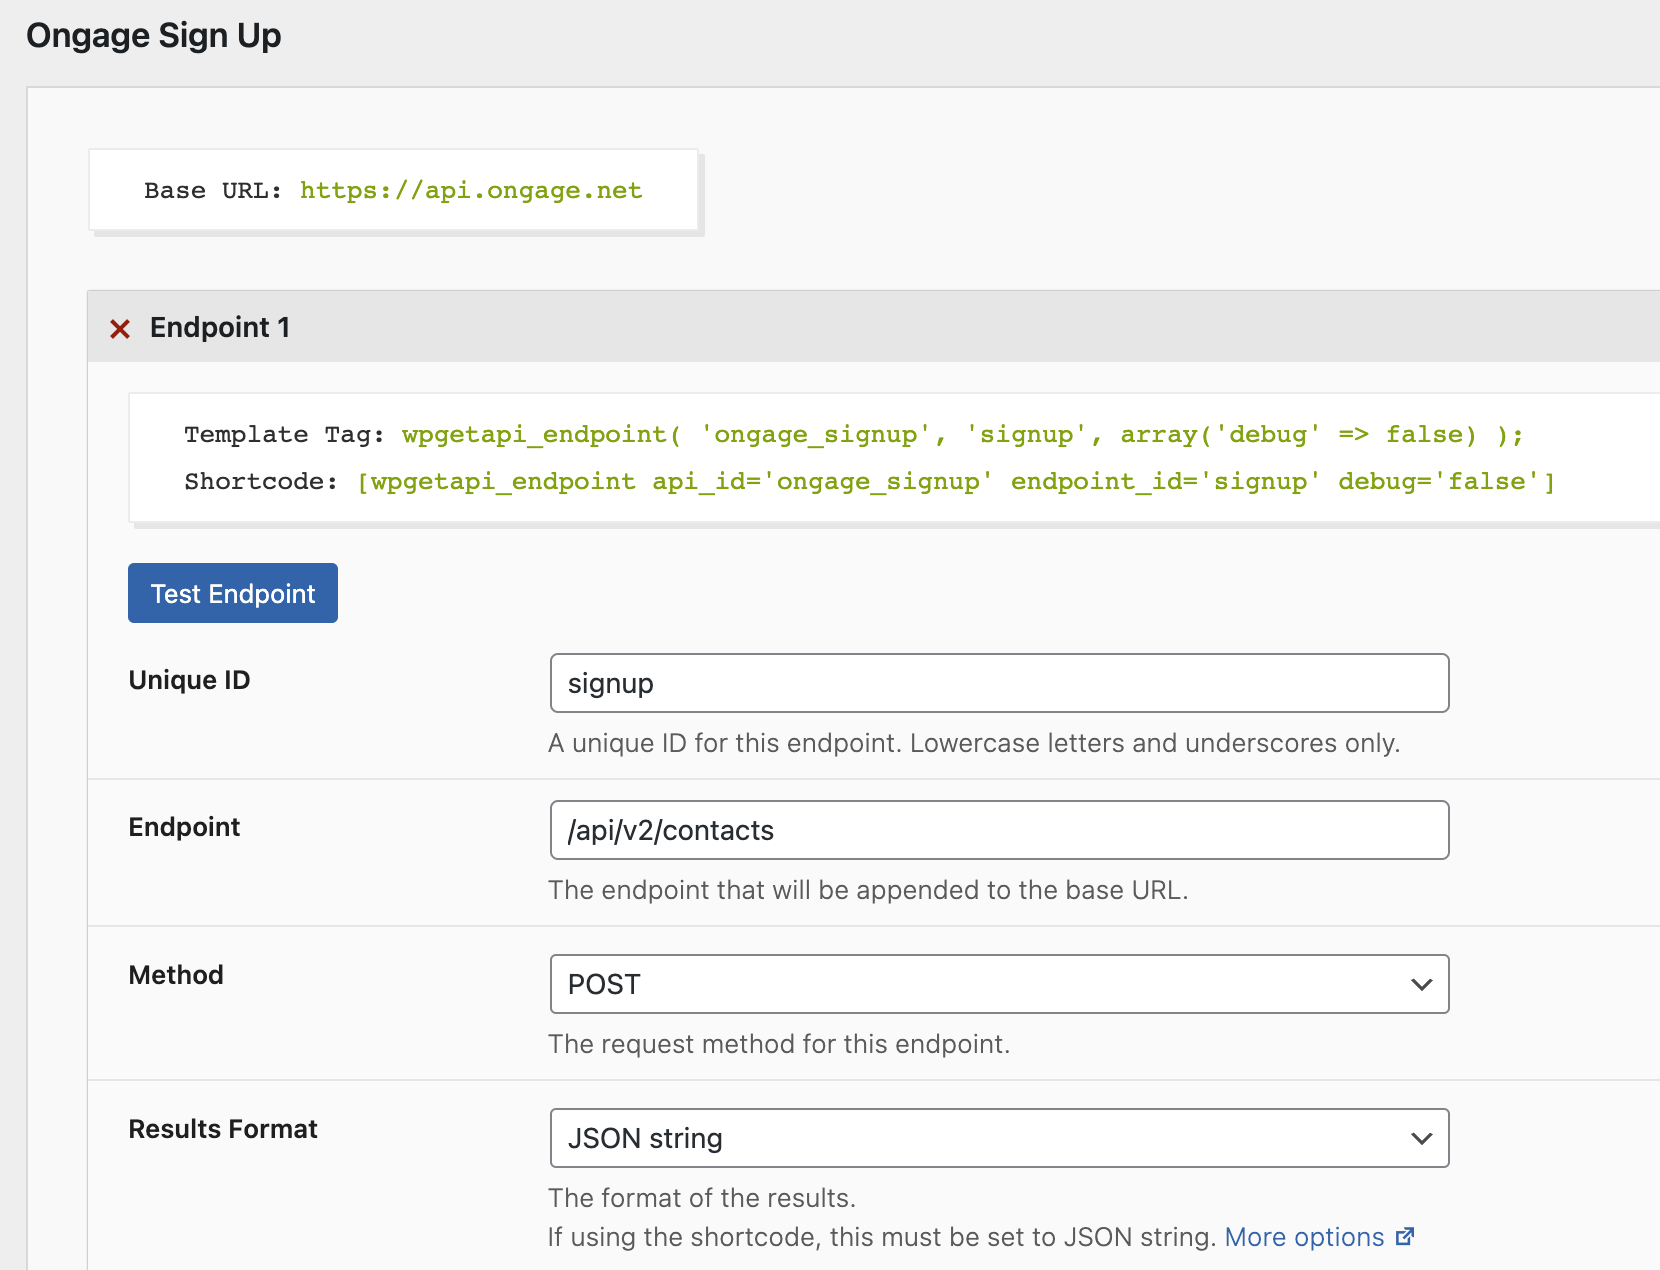
Step 1: Setup the API & endpoint
We are setting up our API to send some user data to the Ongage API. Take note of the api_id and the endpoint_id shown below within the shortcode and template tag. That is what we use in the form-tag shown in the next step.
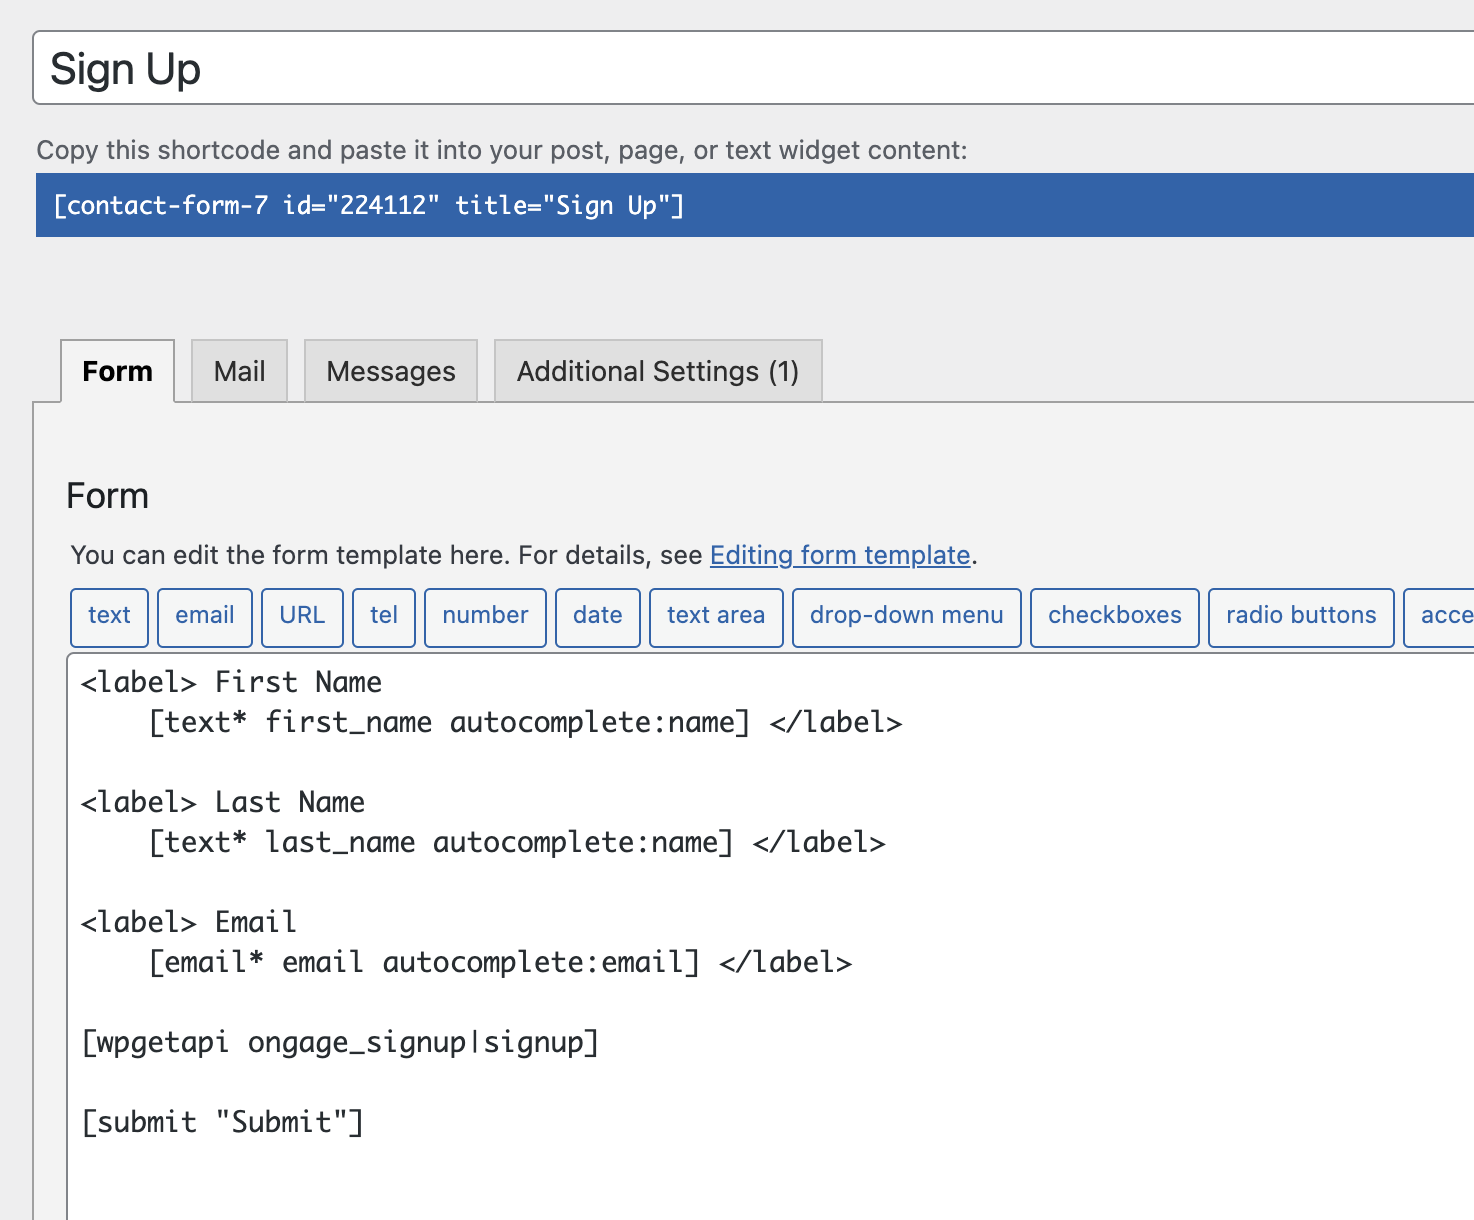
Step 2: Add the form-tag
We’ve created a Sign Up form with some text fields and have included our custom [wpgetapi] form-tag.
Step 3: Capture our fields
Now back in our endpoint settings, we can capture the data coming from each field by using tokens.
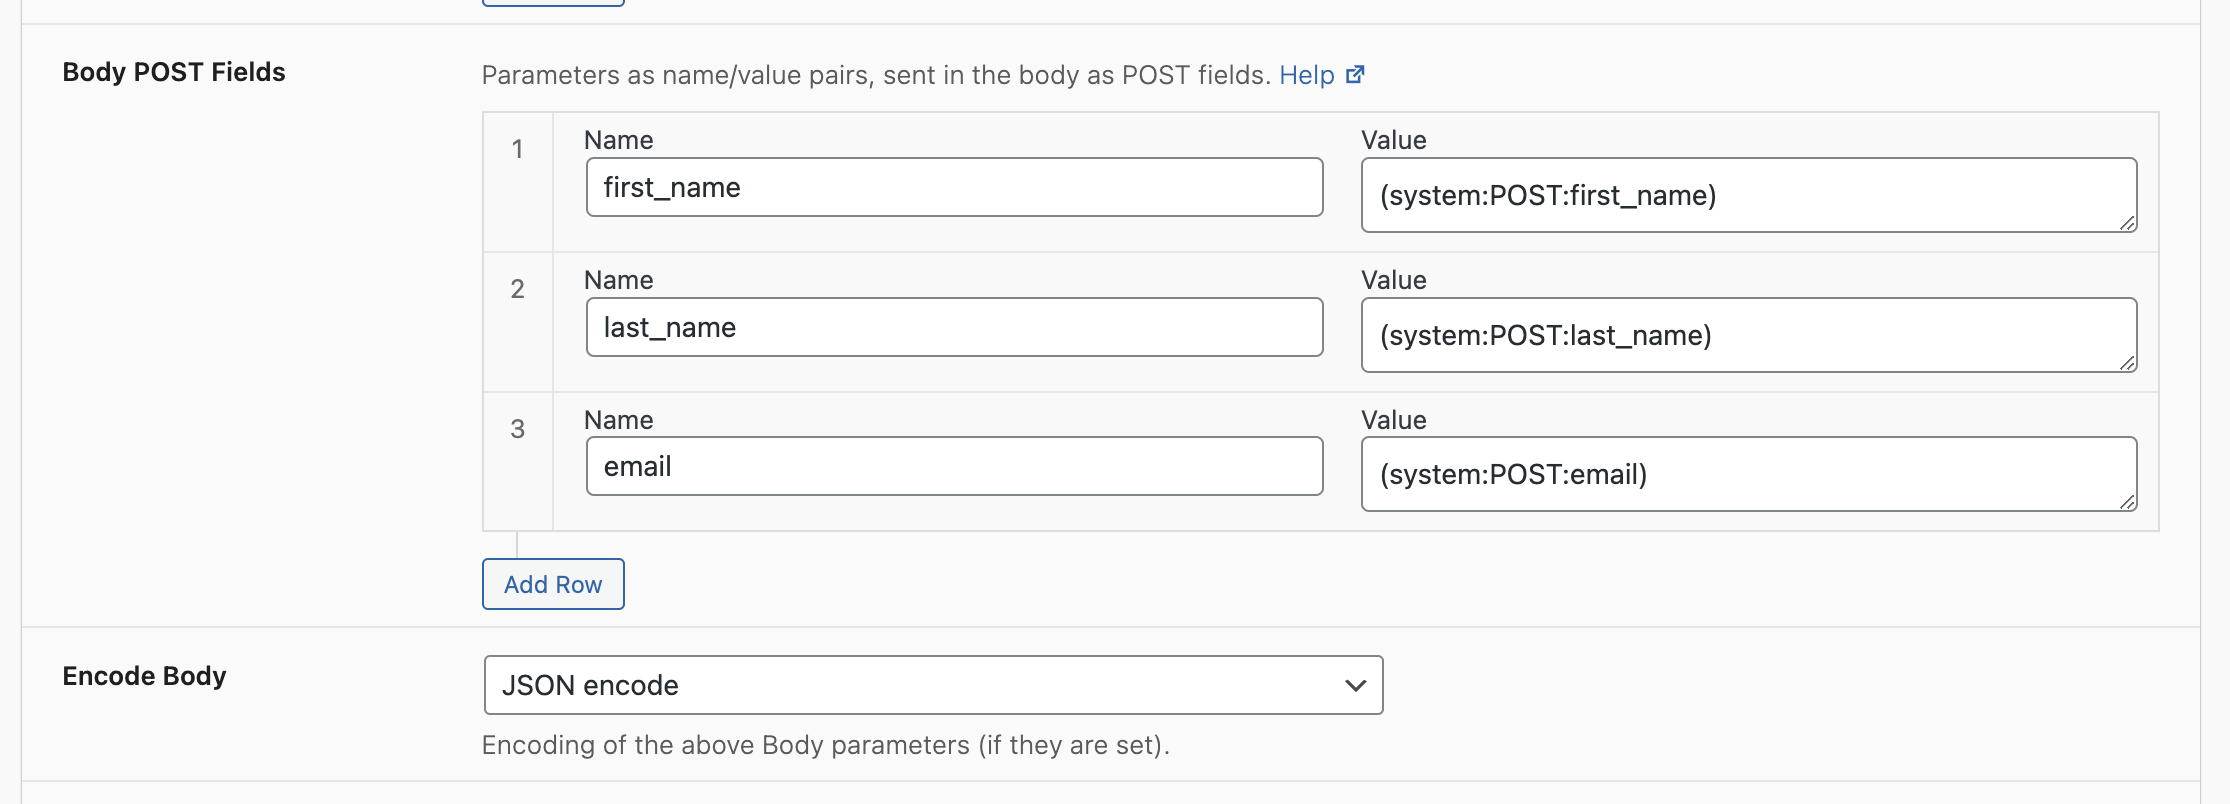
The token (system:POST:first_name) captures the data from the form’s ‘first_name’ field. So if the user enters ‘Bob’ into this field, ‘Bob’ will be sent as the value.
Essentially, what we setup in the image above will be sent to the API like this:
{
    "email": "[email protected]",
    "first_name": "Bob",
    "last_name": "Smith"
}
The form-tag attributes
The form-tag is placed within your form and follows this format: [wpgetapi api_id|endpoint_id|message_type "keys"]
To use the form-tag, we simply declare it with an opening bracket and then the keyword wpgetapi followed by our attributes.
The attributes are:
- api_id: the API ID that you wish to use and that you have setup in the API Setup page
- endpoint_id: change this to the endpoint ID of the endpoint you wish to use
- message_type: (optional) defaults to ‘none’. What this will do is inject the returned data from the API into the thank you message after the form is submitted.
- none – will not use the returned data from the API. Uses the message that you set within CF7
- replace – completely removes the default CF7 message and replaces it with the returned API data
- append – this appends the API data to the standard CF7 message
- prepend – this prepends the API data to the standard CF7 message
- keys – (optional) must be declared with quotation marks. This steps down into the returned API data. It follows the same syntax as the nested data feature.
A complete form tag might look like this: [wpgetapi ongage_signup|signup|append "data,0,timestamp"]
Method 2 – Some Coding
This method requires some PHP coding knowledge.
We will outline the steps that will allow you to integrate Contact Form 7 with WPGetAPI. In our example we are just using a quick test example to connect to the Binance API and retrieve the price of a cryptocurrency pair. Other more suitable uses for this could be something like sending a subscriber email address to your email marketing platform.
Step 1: Setup Contact Form 7
Once you have Contact Form 7 installed, you will need to add a form. Visit the Contact Form 7 docs for help in setting this up – https://contactform7.com/getting-started-with-contact-form-7/
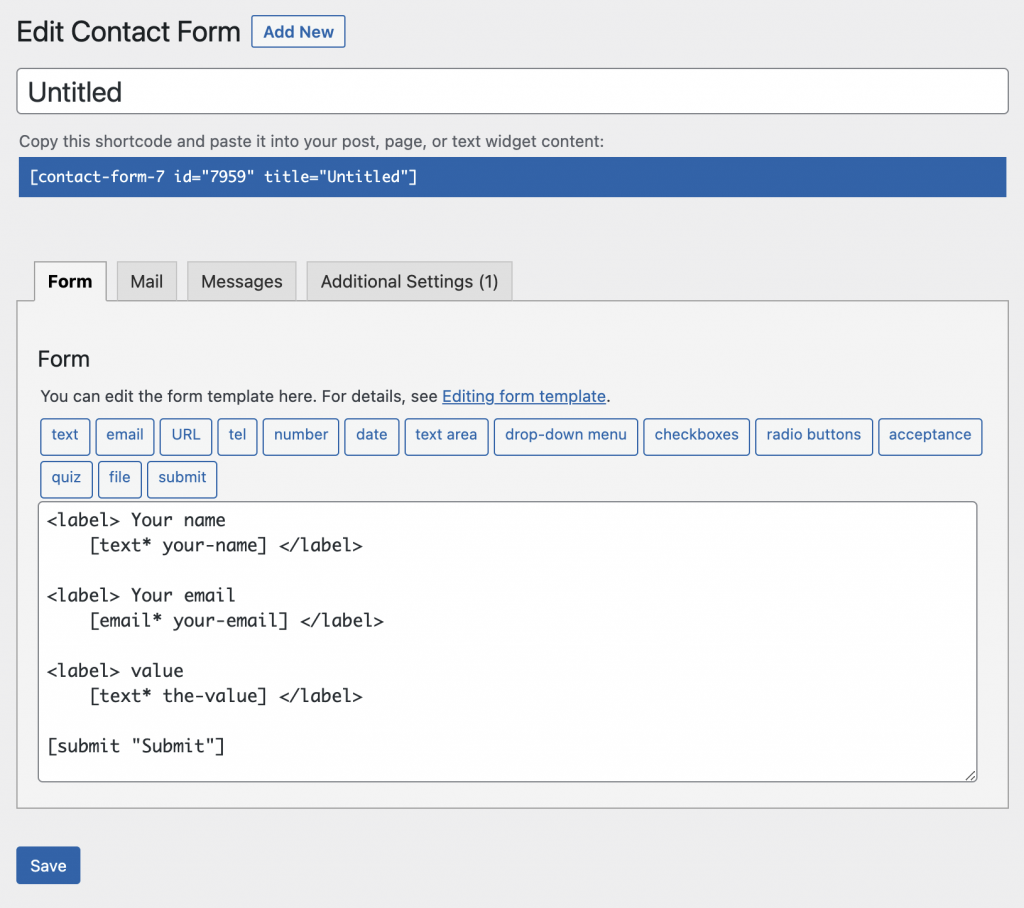
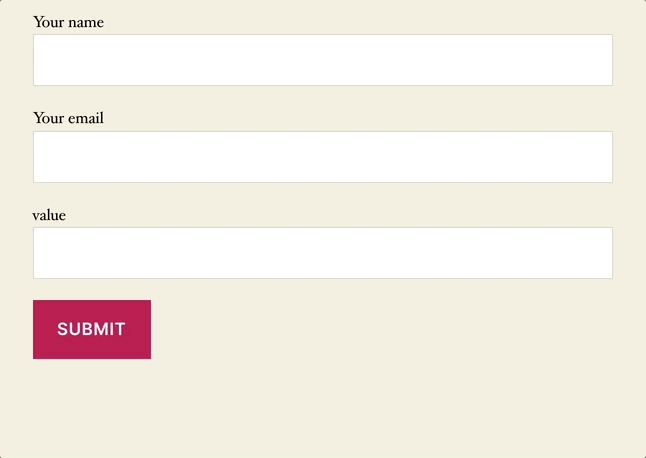
We have set up our form with the following fields:
- your-name
- your-email
- the-value – this is what we will use to send to our API
In the Additional Settings tab we have also added “skip_mail: on” which stops the email being sent (which is default for Contact Form 7 as it is a contact form).
Now we just need to add the shortcode [contact-form-7 id=”7959″ title=”Untitled”] to our page and it will display our form.
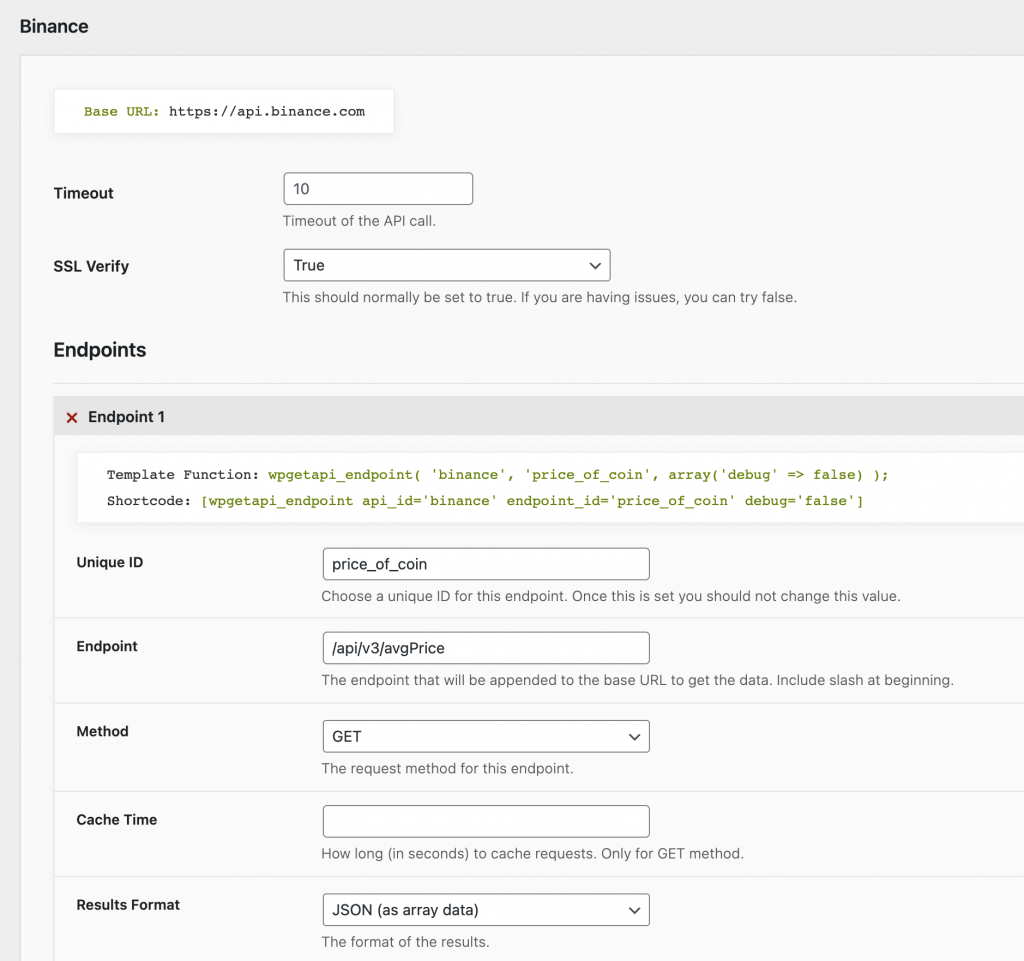
Step 2: Setup the Binance API
The settings for our Binance API are shown in the screenshot below and you can see that we are using the endpoint: https://api.binance.com/api/v3/avgPrice
Step 3: Process the form and get the API data
This is a feature of the PRO plugin.
We now need to add the following code into our themes functions.php file. This will basically get our form value, which will be a cryptocurrency pair and then send this as a query variable to the Binance API to retrieve the price. We are then modifying the output of the forms message to give us the price.
// hook into the contact form 7 action upon processing the form
add_action( 'wpcf7_before_send_mail', 'wpgetapi_send_data_to_api', 10, 3 );

function wpgetapi_send_data_to_api( $contact_form, &$abort, $submission ) {

    // Getting user input through the the-value field
    $the_value = $submission->get_posted_data( 'the-value' );

    // call the binance api and retrieve the 'price' key
	$price = wpgetapi_endpoint( 'binance', 'price_of_coin',
		array(
		    'debug' => false,
		    'query_variables' => 'symbol=' . $the_value,
		),
		array(
			'price'
		)
	);

	// get the form properties
	$properties = $contact_form->get_properties();

	// set the success message
	$properties['messages']['mail_sent_ok'] = 'Current '. $the_value . ' price is ' . $price;
	$contact_form->set_properties($properties);

}
Step 4: View the results
Now it is just a matter of testing our form to see the results, which will be the current live price of a cryptocurrency pair from Binance.