Skip to content
  • Why WPGetAPI?
  • Examples
  • Pricing
  • Plugins
    • PRO Plugin
    • API to Posts Plugin
    • OAuth 2.0 Plugin
  • Docs
  • Support
    • Frequently Asked Questions
    • Feature Request
    • Support Ticket
  • account_circle
PRO Plugin
Howdy! How can we help you?
  • Introduction

    • Quick Start
    • Frequently Asked Questions
    • Will this work with my API?
    • Understanding API docs
    • Step by Step Example
  • Setup

    • Setup Page
    • Endpoint Page
    • Parameters - Query String
    • Parameters - Headers
    • Parameters - Body POST
    • Shortcode
    • Template Tag
    • Gutenberg Block
  • Connecting your API

    • API Key in Headers
    • API Key in Query String
    • Authentication & Authorization
  • Output API Data

    • Format API to HTML
    • Format API to HTML Table
    • Format API to Image Gallery
    • Format JSON Data
  • Integrations

    • Send form data to API
    • WPForms to API
    • Gravity Forms to API
    • Contact Form 7 to API
    • WooCommerce to API
    • WooCommerce API Product Sync
    • wpDataTables to API
    • Connect WordPress to OpenAI
    • Connect RapidAPI to WordPress
    • Connect Zoho CRM to WordPress
    • Page Builders (Elementor, DIVI)
    • Formidable Forms to API
    • Elementor Form to API
    • JetFormBuilder to API
    • Fluent Forms to API
    • WS Form to API
    • Ninja Tables to API
    • Easy Digital Downloads(EDD) API Product Sync
    • Ultimate Member Forms to API
  • Tips & Tricks

    • Filters & Action Hooks
    • Code Snippets Plugin
    • Troubleshooting
    • Code Snippets
  • PRO Plugin

    • Installation
    • Actions
    • Tokens
    • Caching
    • Nested data
    • Chaining API calls
    • Dynamic Variables
    • Format API to HTML
    • Call API on user registration
    • Using AJAX to trigger API call
    • Base64 Encoding
    • Licensing
    • Filters & Action Hooks
  • OAuth 2.0 Plugin

    • Installation
    • How it works
    • Grant Type - Client Credentials
    • Grant Type - Authorization Code
    • Licensing
  • API to Posts Plugin

    • Installation
    • Getting Started
    • Multiple Endpoints
    • Mapping Fields
    • Filters & Action Hooks
    • Pagination

Using the shortcode to display your API data is very easy and there are just 2 required attributes: api_id and endpoint_id.

[wpgetapi_endpoint api_id='your_api_id' endpoint_id='your_endpoint_id' debug='false']

In the example above, you would replace the ‘your_api_id’ and ‘your_endpoint_id’ with the actual id’s that you have setup in the admin area. You can then add the shortcode to any post, page, widget or other area that shortcodes are accepted.

Shortcode attributes

The following shortcode attributes are available:

  • api_id – (required) this is the ID of the API as set by you in the Setup page
  • endpoint_id – (required) this is the ID of the endpoint as set by you in the API page
  • debug – can be set to true or false and will display debug information if set to true

Using the shortcode

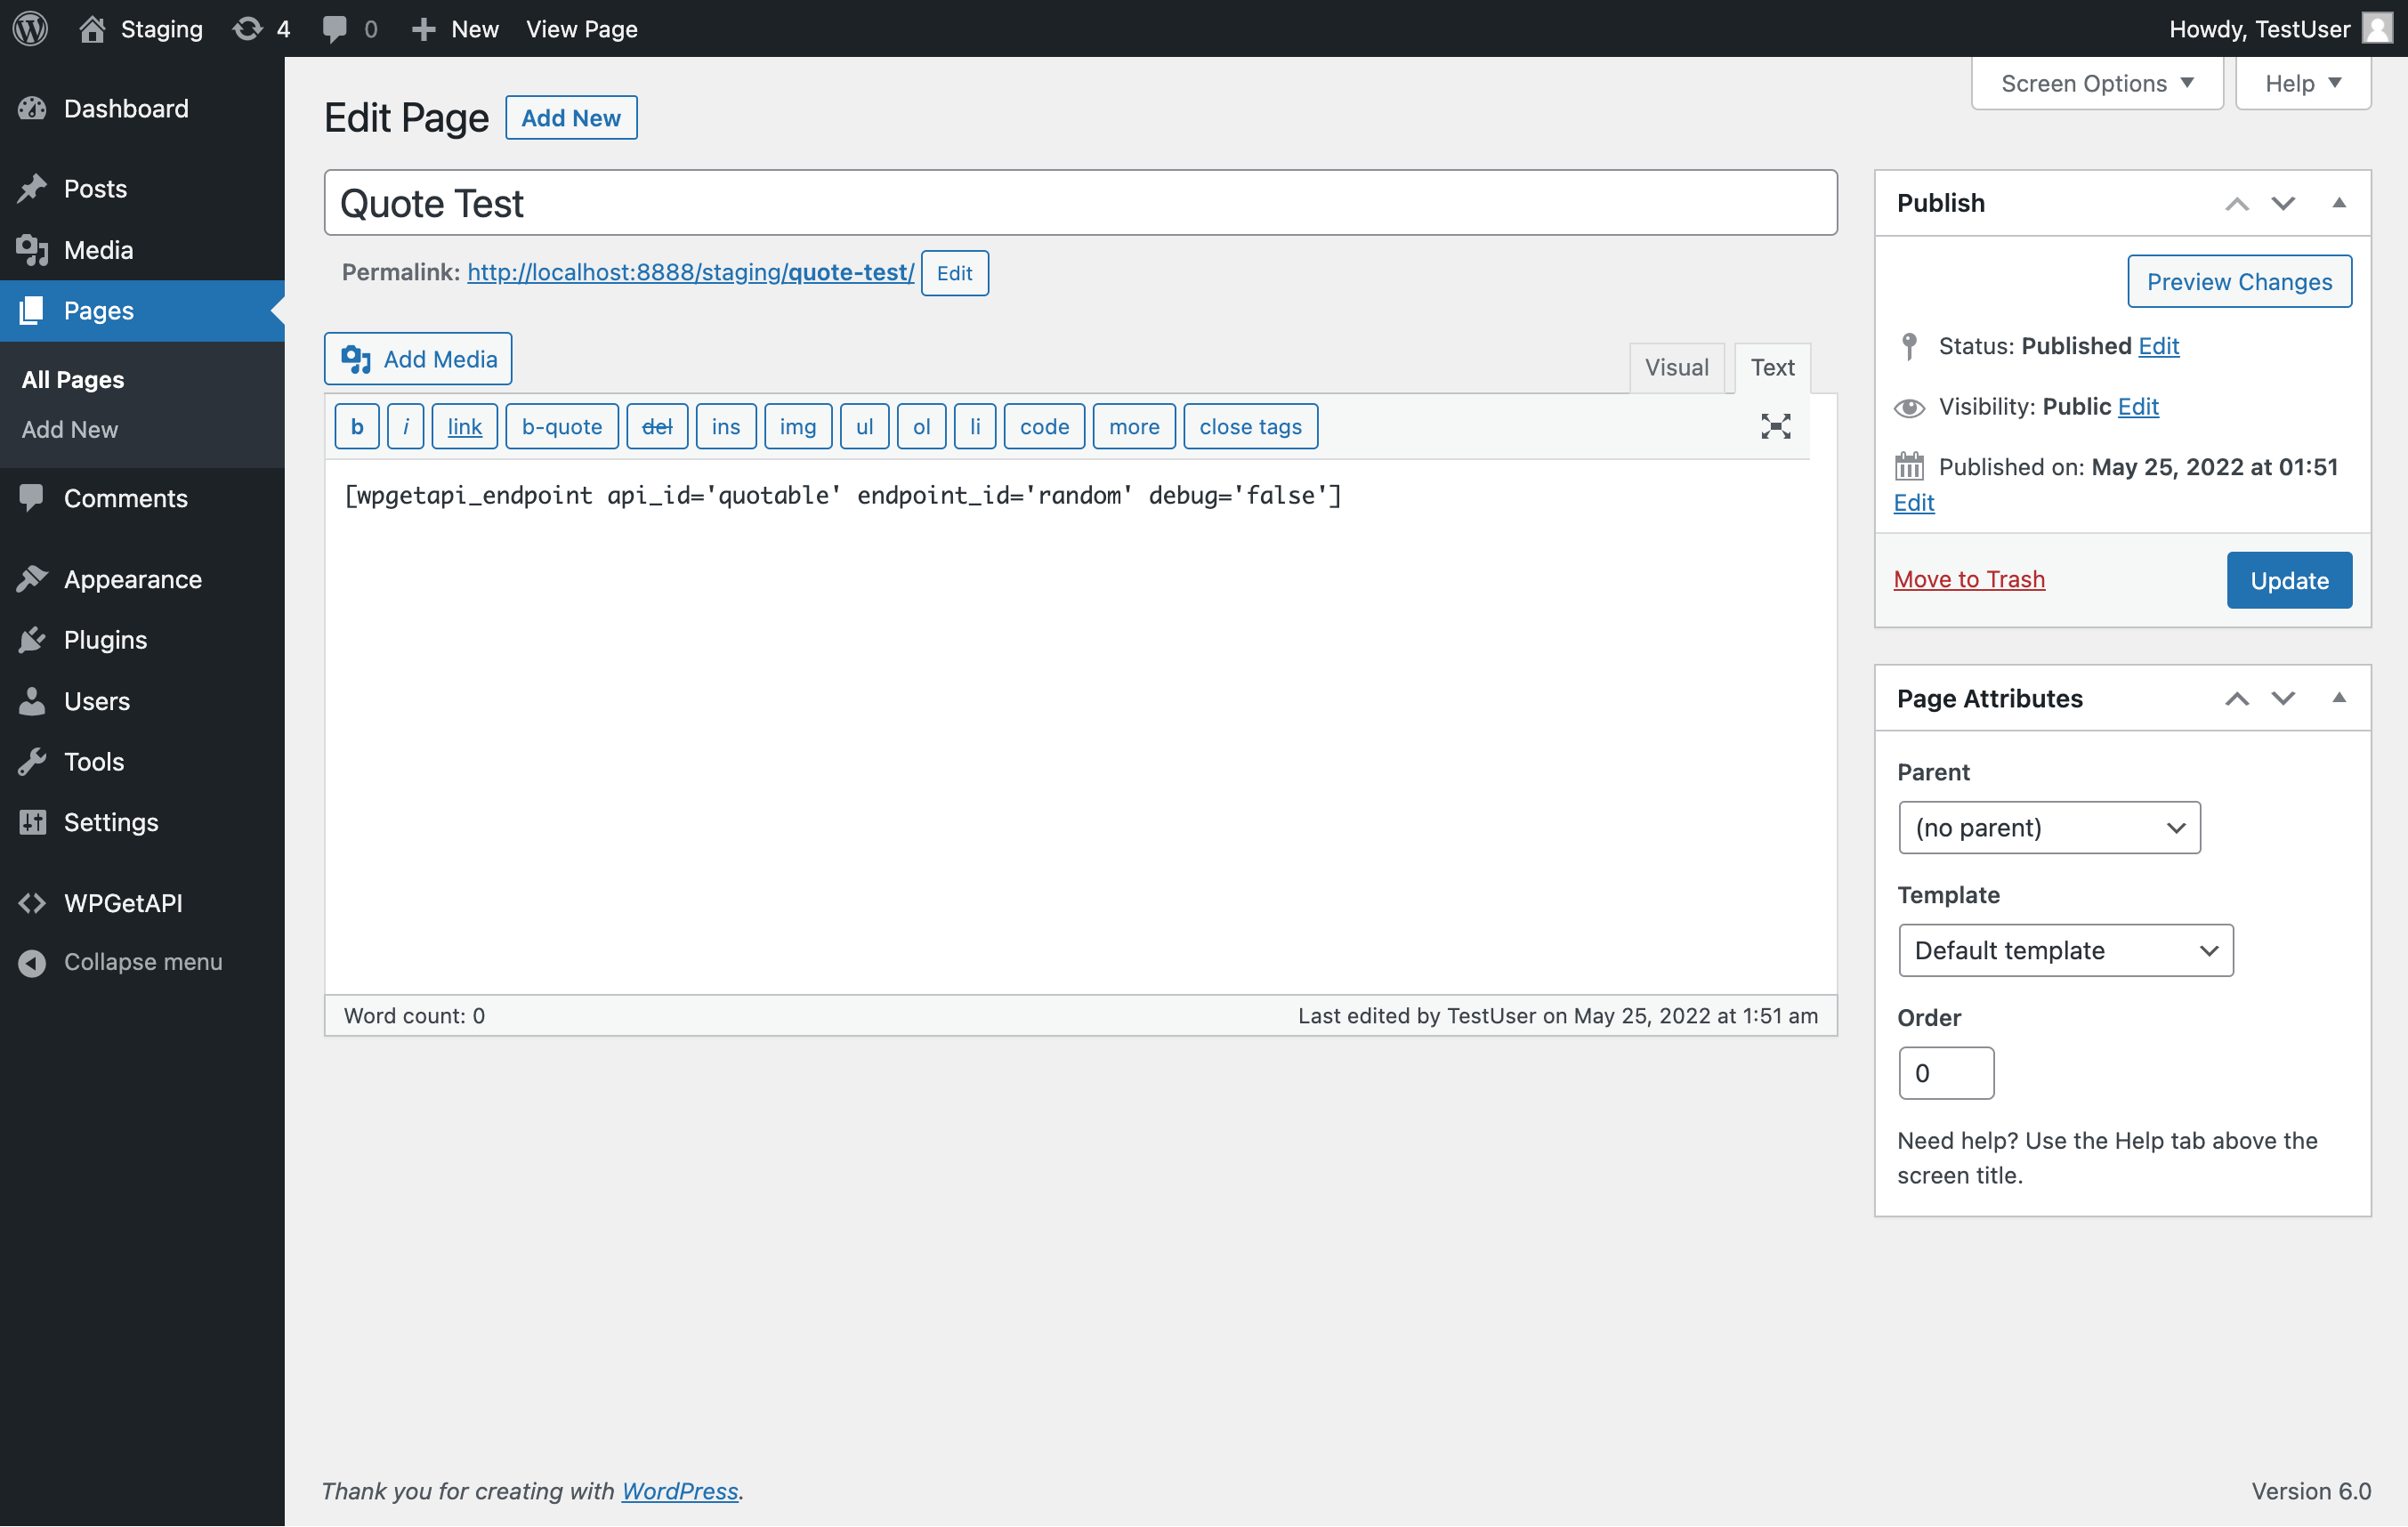
Below is what the shortcode looks like pasted into a test page we have set up.You can see we have setup this API in our WordPress backend as shown below.

The debug option is set to false to not show debugging info. Changing false to true will output a bunch of debugging information on your page/post, which can be handy for troubleshooting if you are running into issues with the API call.

The data looks strange

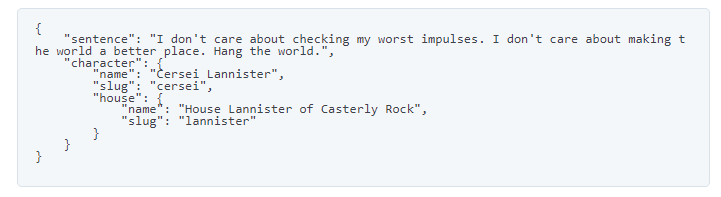
The returned data might look something like the below. This is a JSON string and it would require formatting.

See our docs on how to format JSON data or how to format JSON to HTML.

Extra shortcode attributes in the Pro Plugin

The Pro Plugin adds 12 extra attributes to the shortcode that further enhance its features:

  • keys – grab data from a specific key or index within nested, multidimensional array data – view docs
  • query_variables – set dynamic variables in the query string – view docs
  • endpoint_variables – set dynamic variables within endpoints – view docs
  • format – can be set to “html”, “number” or “no_display”
  • html_tag– can be set to “div”, “li” or “span” when using format=”html”
  • html_labels – can be set to true or false on whether to display labels when using format=”html”
  • html_url – capture a URL from a field/key from the API, that can then be used as a link when using “html_to_link” below
  • html_to_link – set this to the field/key from the API that you want to add the link to when using “html_url” above
  • on – set to “woocommerce_order” to capture data after successful WooCommerce order. Set to “ajax” to output a button that will call your API when the button is clicked
  • button_text – the text to be used in the button when on=”ajax”. Use like button_text=”Call My API”
  • hide_button – set to “true” to hide the AJAX button after receiving a response from the API
  • button_spinner – set to “true” to enable a loading button spinner on the AJAX button after it is clicked
On this page
contact_support

Still not sure?

APIs can be daunting and sometimes downright confusing.

But we are here to help! Our support is amazing and we can assist you with any setup required and ensure your API integrations are a success!

Ask Us Anything

Connect your WordPress website to external APIs without writing a single line of code. Send data from WordPress to your API or display data from your API within WordPress.

Support

  • Documentation
  • Support Ticket
  • Refund Policy
  • Contact Us
  • About Us
  • Affiliates

Articles

  • Quick Start Guide
  • WooCommerce Orders to API
  • WooCommerce API Products Sync
  • Contact Form 7 to API
  • WPForms to API
  • Gravity Forms to API
  • WordPress to RapidAPI

WordPress API Plugins

  • Free WPGetAPI Plugin
  • PRO Plugin
  • API to Posts Plugin Plugin
  • OAuth 2.0 Authorization Plugin

© 2025 WPGetAPI. All Rights Reserved.

"*" indicates required fields

Name*
This field is for validation purposes and should be left unchanged.