After adding an API to the Setup Page, you will see that the API now gets its own tab – clicking on the tab will take us to the Endpoint Page as shown below.
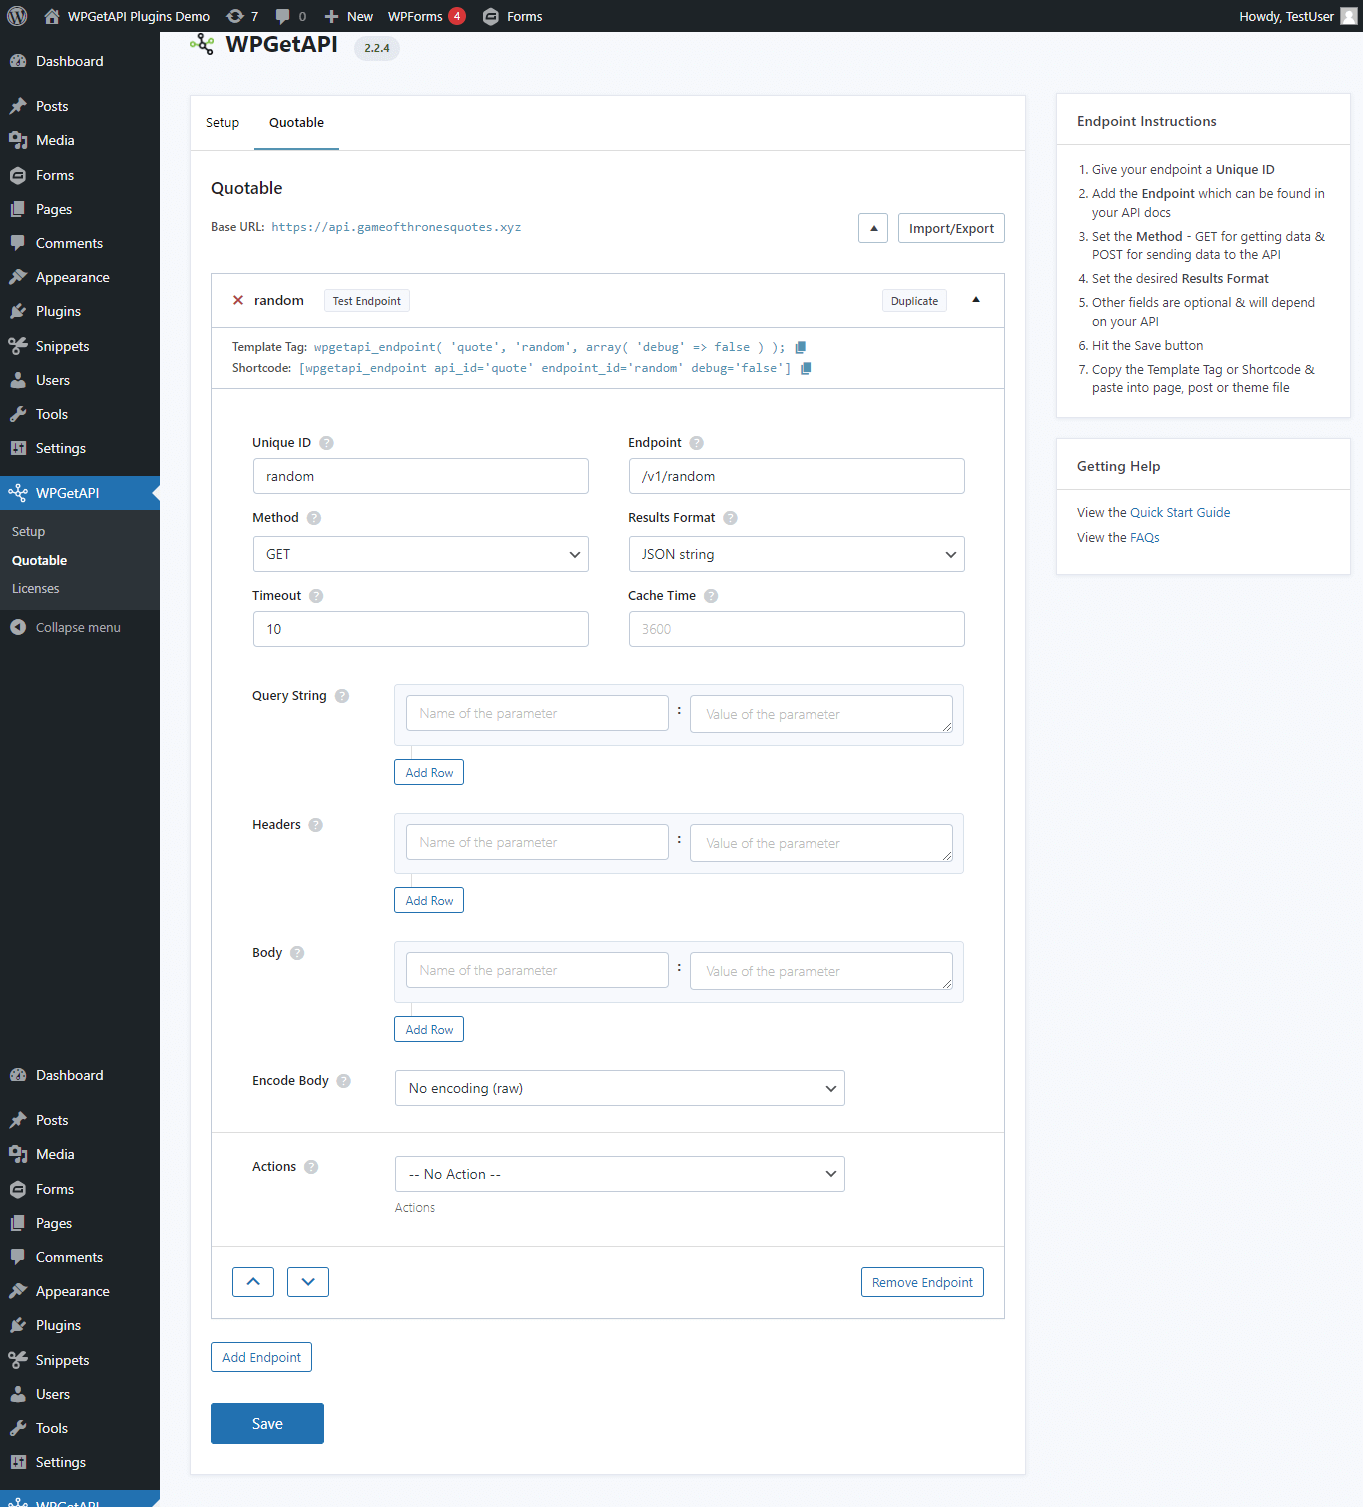
Along with the fields for configuring the endpoint, we can see that this page shows the Base URL that we set up in the Setup page. It also shows the Test Endpoint button as well as the Template Tag and Shortcode that can be used for each endpoint to display or send data.
You can add unlimited endpoints within the endpoint page, simply by clicking the Add Endpoint button.
Let’s look what each field does within the endpoint page.
Unique ID field
The Unique ID field is used to identify an endpoint within the shortcode or the template tag. If you are using multiple different endpoints, then you must ensure this is unique.
It is usually a good idea for the Unique ID to be the same (or similar) name as the endpoint.
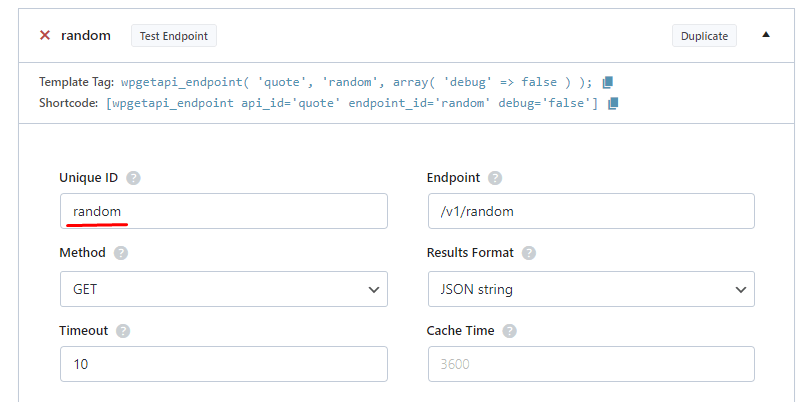
In the example below, the endpoint is ‘/v1/random’ so we have set the Unique ID as random.
We can also see how this Unique ID is used within the shortcode and template tag. It is used to identify the endpoint.
Endpoint field
The Endpoint field is used to add the endpoint. This endpoint will be appended to the Base URL to create a complete URL that will be called when using this endpoint. You can find the endpoint details within your API’s documentation.
This field should begin with a /
Method field
The Method field is a drop down with the following options: GET, POST, PUT, PATCH, DELETE
This is used to set the desired request method for your API call. You can find this within your API docs, but as a general rule you would use a GET request to display data from an API and you would use the other methods to send data to the API.
Results Format field
The Results Format field determines the output of the API data and there are 2 options: PHP array data or JSON string
The format you choose will largely depend on how you are going to use the returned data.
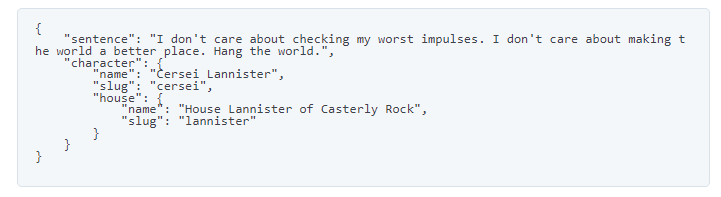
JSON string
When set to JSON string, the output will look something like the below.
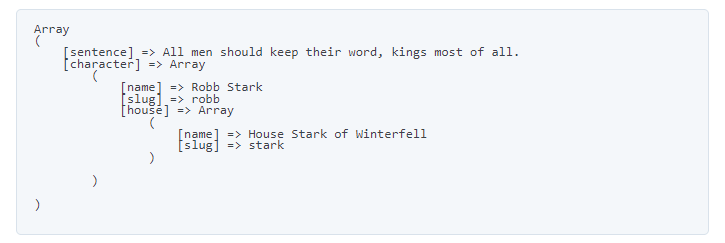
PHP array data
When set to PHP array data, the output will look something like the below.
As a rule of thumb, set this to JSON string when you are using the shortcode and set to PHP array data when using the template tag.
Query String fields
You can add unlimited query string parameters using the Query String name/value fields.
We have a detailed article on these fields here: https://wpgetapi.com/docs/adding-query-string-parameters/
Headers fields
You can add unlimited header parameters using the Headers name/value fields.
We have a detailed article on these fields here: https://wpgetapi.com/docs/sending-headers-in-request/
Body POST fields
You can add unlimited body POST parameters using the Body POST name/value fields. This field does not work with GET requests.
We have a detailed article on these fields here: https://wpgetapi.com/docs/sending-post-fields-in-request/
Encode Body field
The Encode Body field is only used when you have data within the Body POST fields and the Request Method is set to POST, PUT, PATCH or DELETE.
You will need to choose the option that your API says to use in their API documentation. If your API docs do not mention the type, you can experiment to see which one will work.
The options for this field are:
- No encoding (raw)
- JSON encode
- URL encode (x-www-form-urlencoded)
- Base64 encode
- XML format (available in PRO Plugin only)
Next Steps
With the API and the endpoint setup, you will now want to use the template tag or the shortcode to call your API from the front end.