Introduction
This video runs through the step by step example shown below.
Getting Started
In this step by step example, we will be using the Binance API which will simply return a exchange for trading cryptocurrencies based in China. This API is about as simple as an API can be as there are no API keys or authentication required. If you’ve never done anything with API’s before, this should be very easy to follow along.
Here are some handy references before we get stuck in:
- API documentation: https://github.com/binance/binance-spot-api-docs/
- API Base URL: https://api.binance.com
- Endpoint we will use: /api/v3/ticker/price
Step 1: Setting up the API
After installing WPGetAPI and activating the plugin, click on the WPGetAPI link at the bottom of the sidebar. This will take you to the Setup page where you can add your first API.
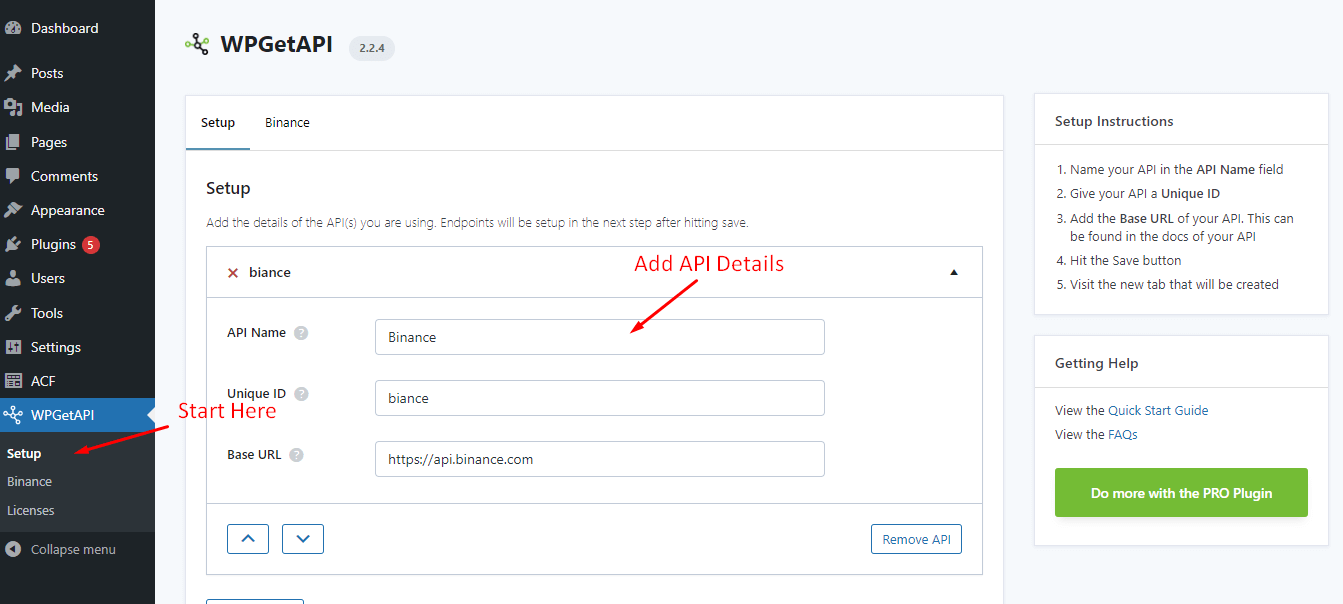
There are 3 fields that are required:
- API Name – this can be whatever you like. The API is called ‘Binance’, so this makes sense to name it the same.
- Unique ID – this can be whatever you like also. Must be lowercase letters only and underscores (no spaces). This ID is used within the shortcode or template tag to identify the API. We will call it ‘binance’
- Base URL – this is the base URL of the API, which can be found in your API’s documentation. Ours will be ‘https://api.binance.com’
Once you have filled in all 3 fields, click the Save button and a new tab called Binance will appear. Now click on this tab to be taken to the endpoint setup for this API.
Step 2: Setting up the endpoint
In the documentation for your API you should see information about all of the endpoints that your API can connect to. In our case here, we are wanting to get a latest price for a symbol or symbols so we will use the ‘/api/v3/ticker/price’ endpoint shown here – https://binance.github.io/binance-api-swagger/
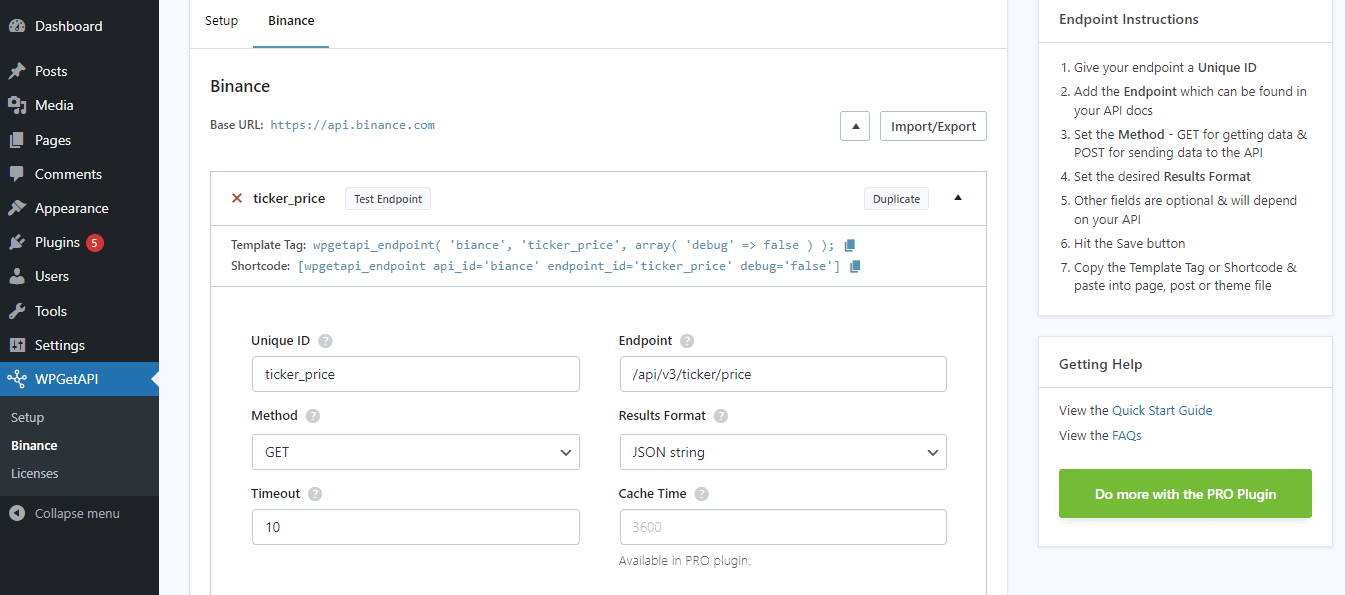
Lets look at the fields for connecting to our chosen endpoint:
- Unique ID – a unique ID for our endpoint. This unique ID will be used in the shortcode or template tag to identify this endpoint.
- Endpoint – this is the actual endpoint of the URL that will be appended to the Base URL that was setup earlier.
- Method – the request method for our endpoint. We need to use the GET request method.
- Results Format – the format of the data we receive back from the endpoint.
- Data can be returned as either JSON string or PHP array.
- JSON string can be used with the shortcode or the template tag to display data.
- PHP array data can only be used with the template tag. It will return the data as a PHP array that can then be manipulated further (if you know basic PHP).
This is all the info we need for this API, so we can hit the Save button and we are now ready to test our endpoint.
Step 3: Testing the endpoint
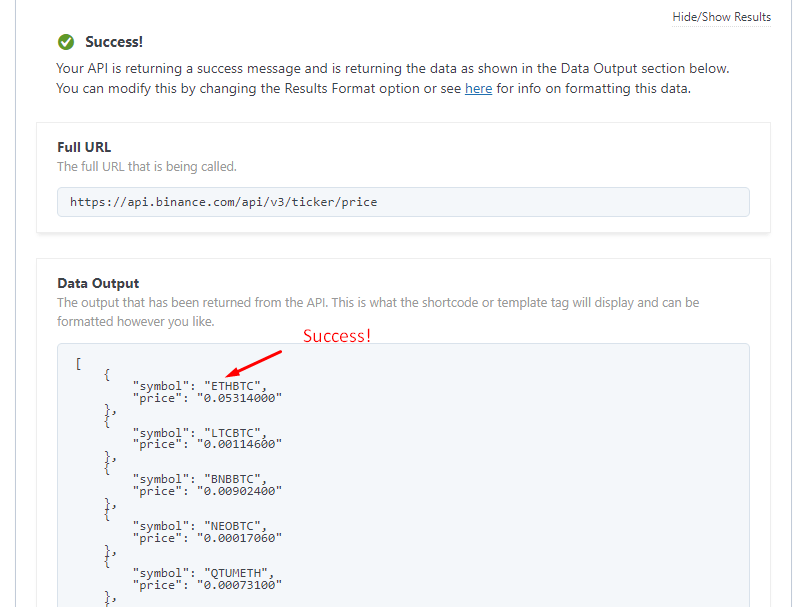
Once the fields are filled in and you have saved the endpoint, you will see the Test Endpoint button become active. Clicking on this will call our endpoint and return some data as well as some extra debugging information. We are just concerned with the Data Output section and should see an array that contains our price symbols.
Step 4: Displaying the API data
Our API is working correctly and it is returning the data we expect. We now want to display this on the front end of our website.
We have 2 options of how we can display the data – the template tag or the shortcode.
Whichever method you choose, you can simply copy either the template tag or the shortcode from the top of the endpoint that we just setup and add it to the appropriate place on your website such as in a page or within your template files as shown below.
4a: Using the template tag
The template tag will allow the most flexibility in formatting the data but some knowledge of PHP will be required for this. With the template tag you can get the results of the API call and put them into a variable which can then be used or manipulated however you choose.
At its simplest, you would add the template tag to one of your WordPress theme files where you want the API data to be displayed. In our example below, using the wpgetapi_pp() function will simply output the raw data from the API call.
// use the wpgetapi_endpoint() function to call our endpoint
// and save into the $ticker_price variable
$ticker_price= wpgetapi_endpoint( 'binance', 'ticker_price' );

// use the wpgetapi_pp() function to output $ticker_price
// as raw data
wpgetapi_pp( $ticker_price );
To get the individual parts of the API response such as the author and the content, it would look something like the below.
// use the wpgetapi_endpoint() function to call our endpoint
// and save into the $ticker_price variable
$ticker_price = wpgetapi_endpoint( 'binance', 'ticker_price' );

if ( ! empty( $ticker_price ) && is_array( $ticker_price ) ) {
    foreach( $ticker_price as $data ) {
        // display the symbol
        echo $data['symbol'];

        // display the price
        echo $data['price'];
    }
}
Please see the guide on using the template tag.
4b: Using the shortcode
You can add the shortcode into your pages and posts to output API data. This option is more limited than using the template tag as the Results Format option must be set to JSON string.
Using our PRO plugin however, opens up many features and extra shortcode attributes that allows much greater flexibility for formatting your API data.
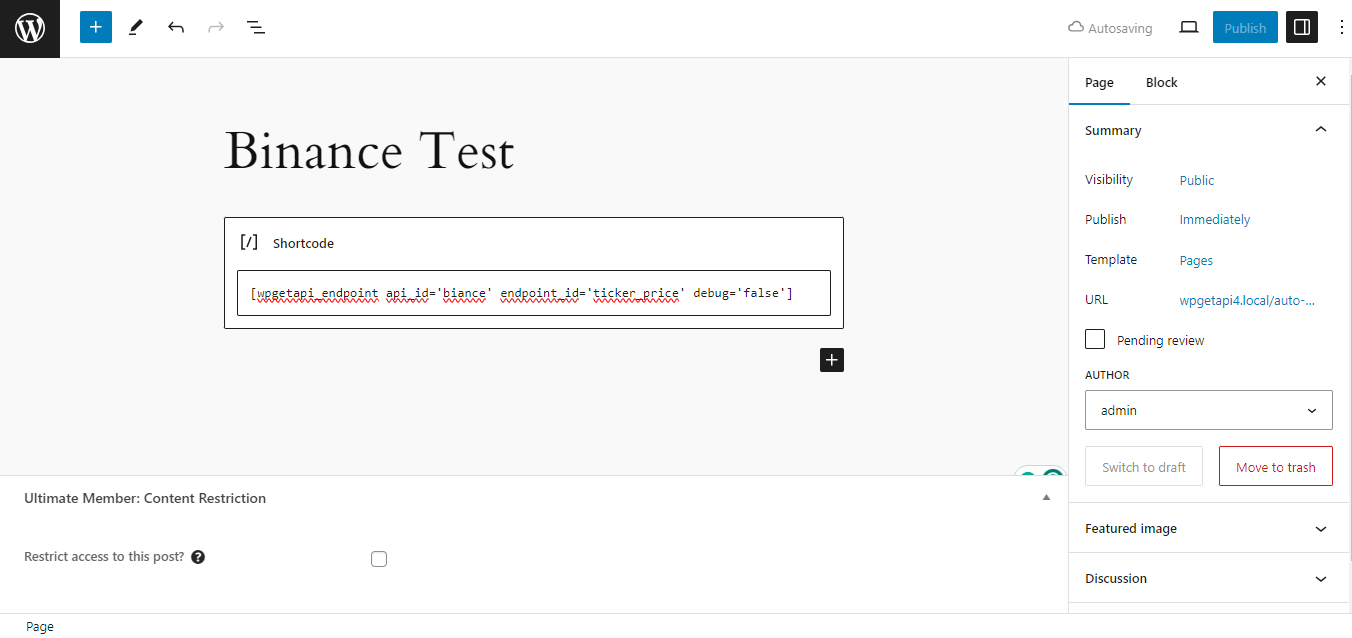
After adding the shortcode to the page, we can now view the page and see the results of the API call.
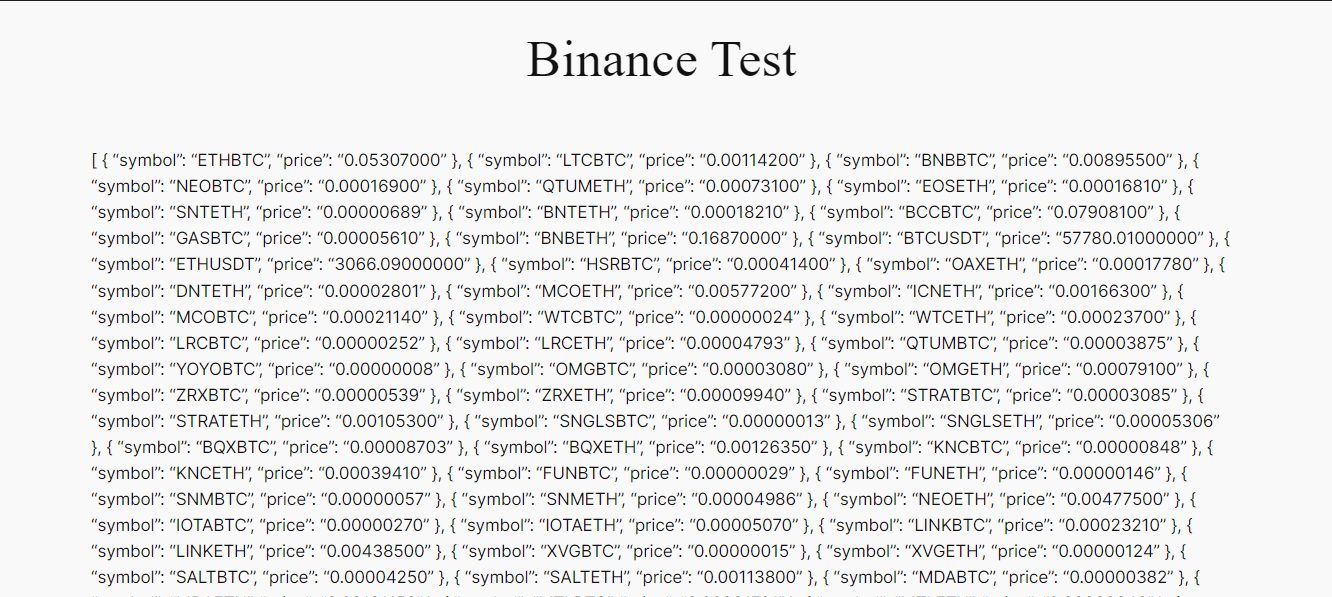
The results above look strange as this is the raw JSON string that the API returns. View our tutorial on how to format API data to HTML if you want to easily make this look prettier.
Please also see our full guide on using the shortcode.
4c: Using the block
You can add the WPGetAPI block into your pages and posts to output API data if you are using the WordPress Block Editor. This option is more limited, like a shortcode.
Using our PRO plugin, however, opens up many features and extra options that allow much greater flexibility for formatting your API data, such as formatting the API data as HTML or formatting numbers, and setting HTML Tag to either “div”, “li”, or “span”.
Please see our full guide on using the block.