Sending form data to an API is made easy using Actions, which is a feature of the PRO plugin. You simply select your form from the Actions dropdown and then set which fields you want to capture and send to your API.

Which form plugins are supported?
We currently have the following form plugins available in the Actions dropdown:
- Gravity Forms
- WPForms
- Contact Form 7
- JetFormBuilder
- Formidable Forms
- Fluent Forms
- Elementor Forms
We are working to add more plugins so that we cover all of the major WordPress form plugins. If you have a plugin you would like included, please let us know.
How do Actions work?
Actions are always run in the background when an ‘action’ happens on your website. In this case the action is a form submission.
We have detailed documentation on how Actions work here.
Note: because Actions are run in the background, the API response data is not displayed to the user after submitting the form. If you need to display the API response to the user, we also have these options:
Step by Step
Let’s take a step by step look at how to send form data to your API.
Step 1: Create your form
Using one of the plugins above, create your form as you normally would and include whatever fields you need. Embed your form into the page that you want the form to appear on.
Step 2: Setup the API & endpoint
If you have not yet setup your endpoint, follow our Quick Start guide or Step by Step Example on how to setup your API and your endpoint. This is the endpoint where your form data will be sent.
Within your endpoint, select your form from the Actions dropdown and then hit the save button.

Step 3: Test form & check Action Log
Visit the page that your form is on, fill in the form and hit submit.
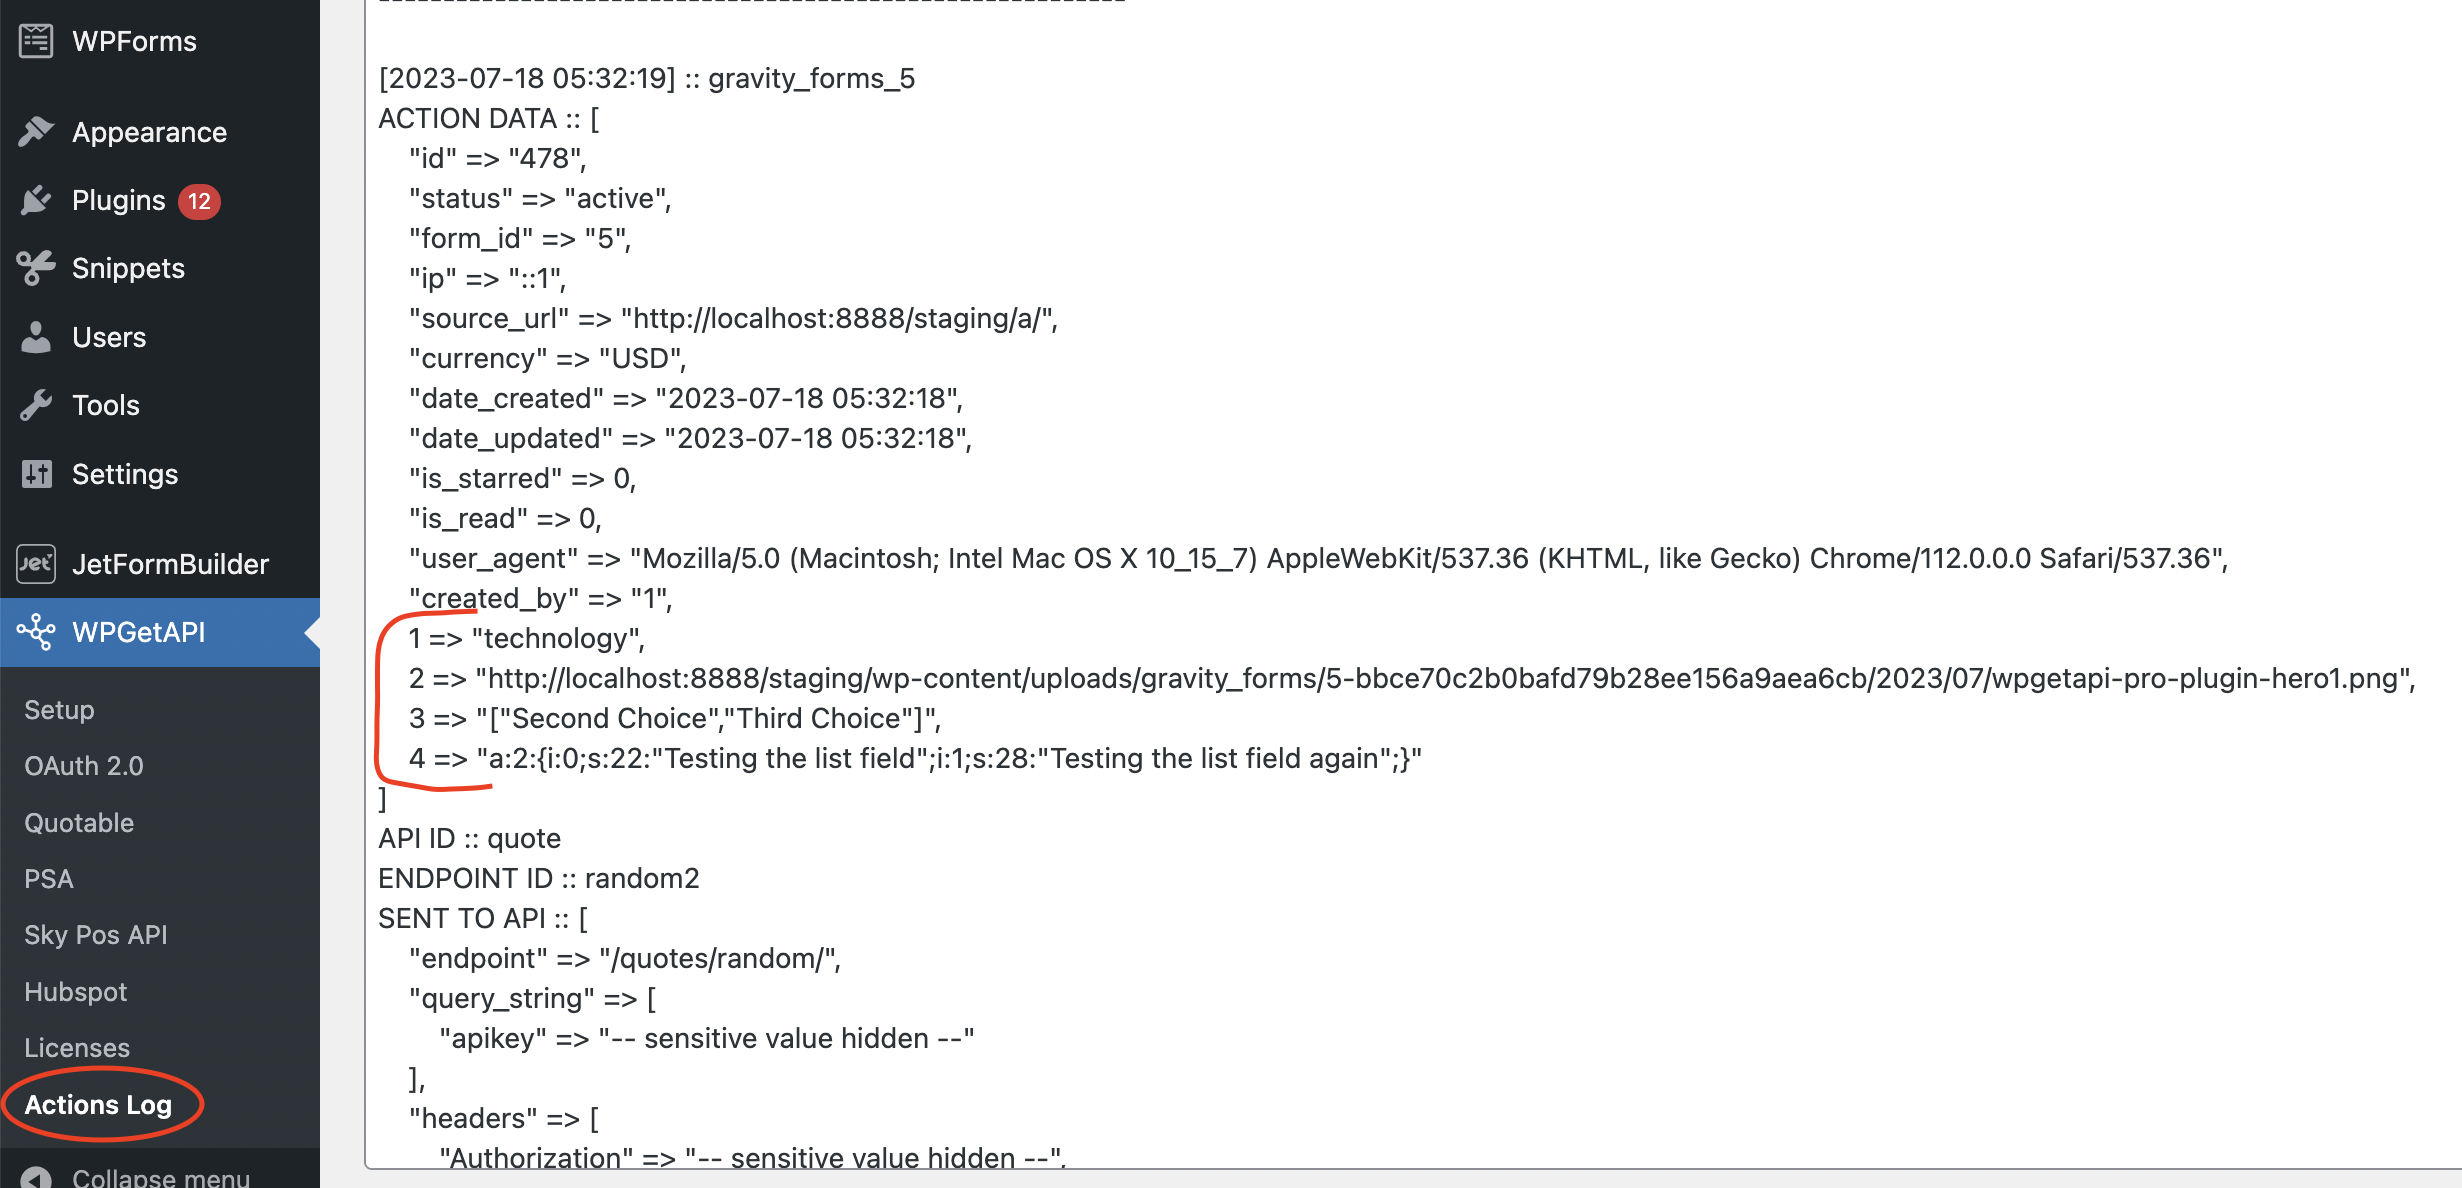
After submitting the form, your API endpoint should have been called and you will now see a log of this API call within the Actions Log. Every time an API called using an Action, a log entry will be created which gives valuable information about the data that is available to use for the action.
Looking at the log below, we can see that the action being used was gravity_forms_5 – this indicates we are using Gravity Forms with a form ID of 5.
The ACTION DATA section contains all the form data that was submitted. The highlighted section with 1, 2, 3, 4 represents the field ID’s that we have on this particular form.

Step 4: Capture data in the endpoint
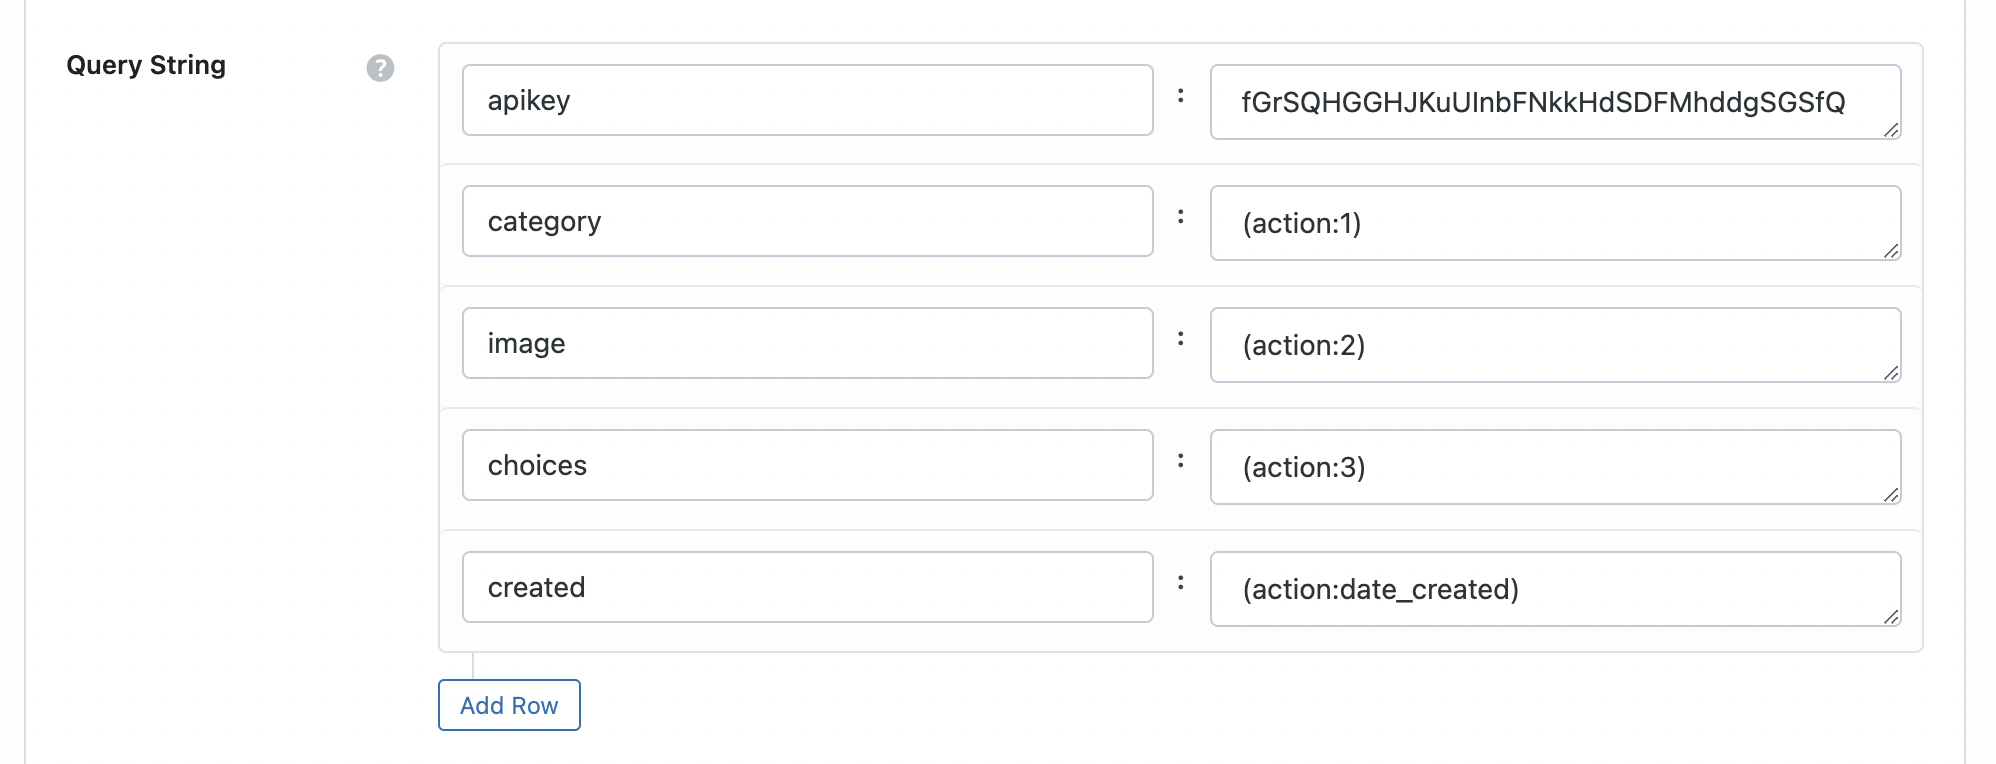
To capture our field values as shown above, we add a token into the endpoint where we want that particular piece of data. It could look something like the below where we have added our tokens into the query string (your API would dictate where the values need to go).

The tokens shown above would capture whatever is in the field with ID 1, ID 2 and ID 3 and this would be sent to your API.
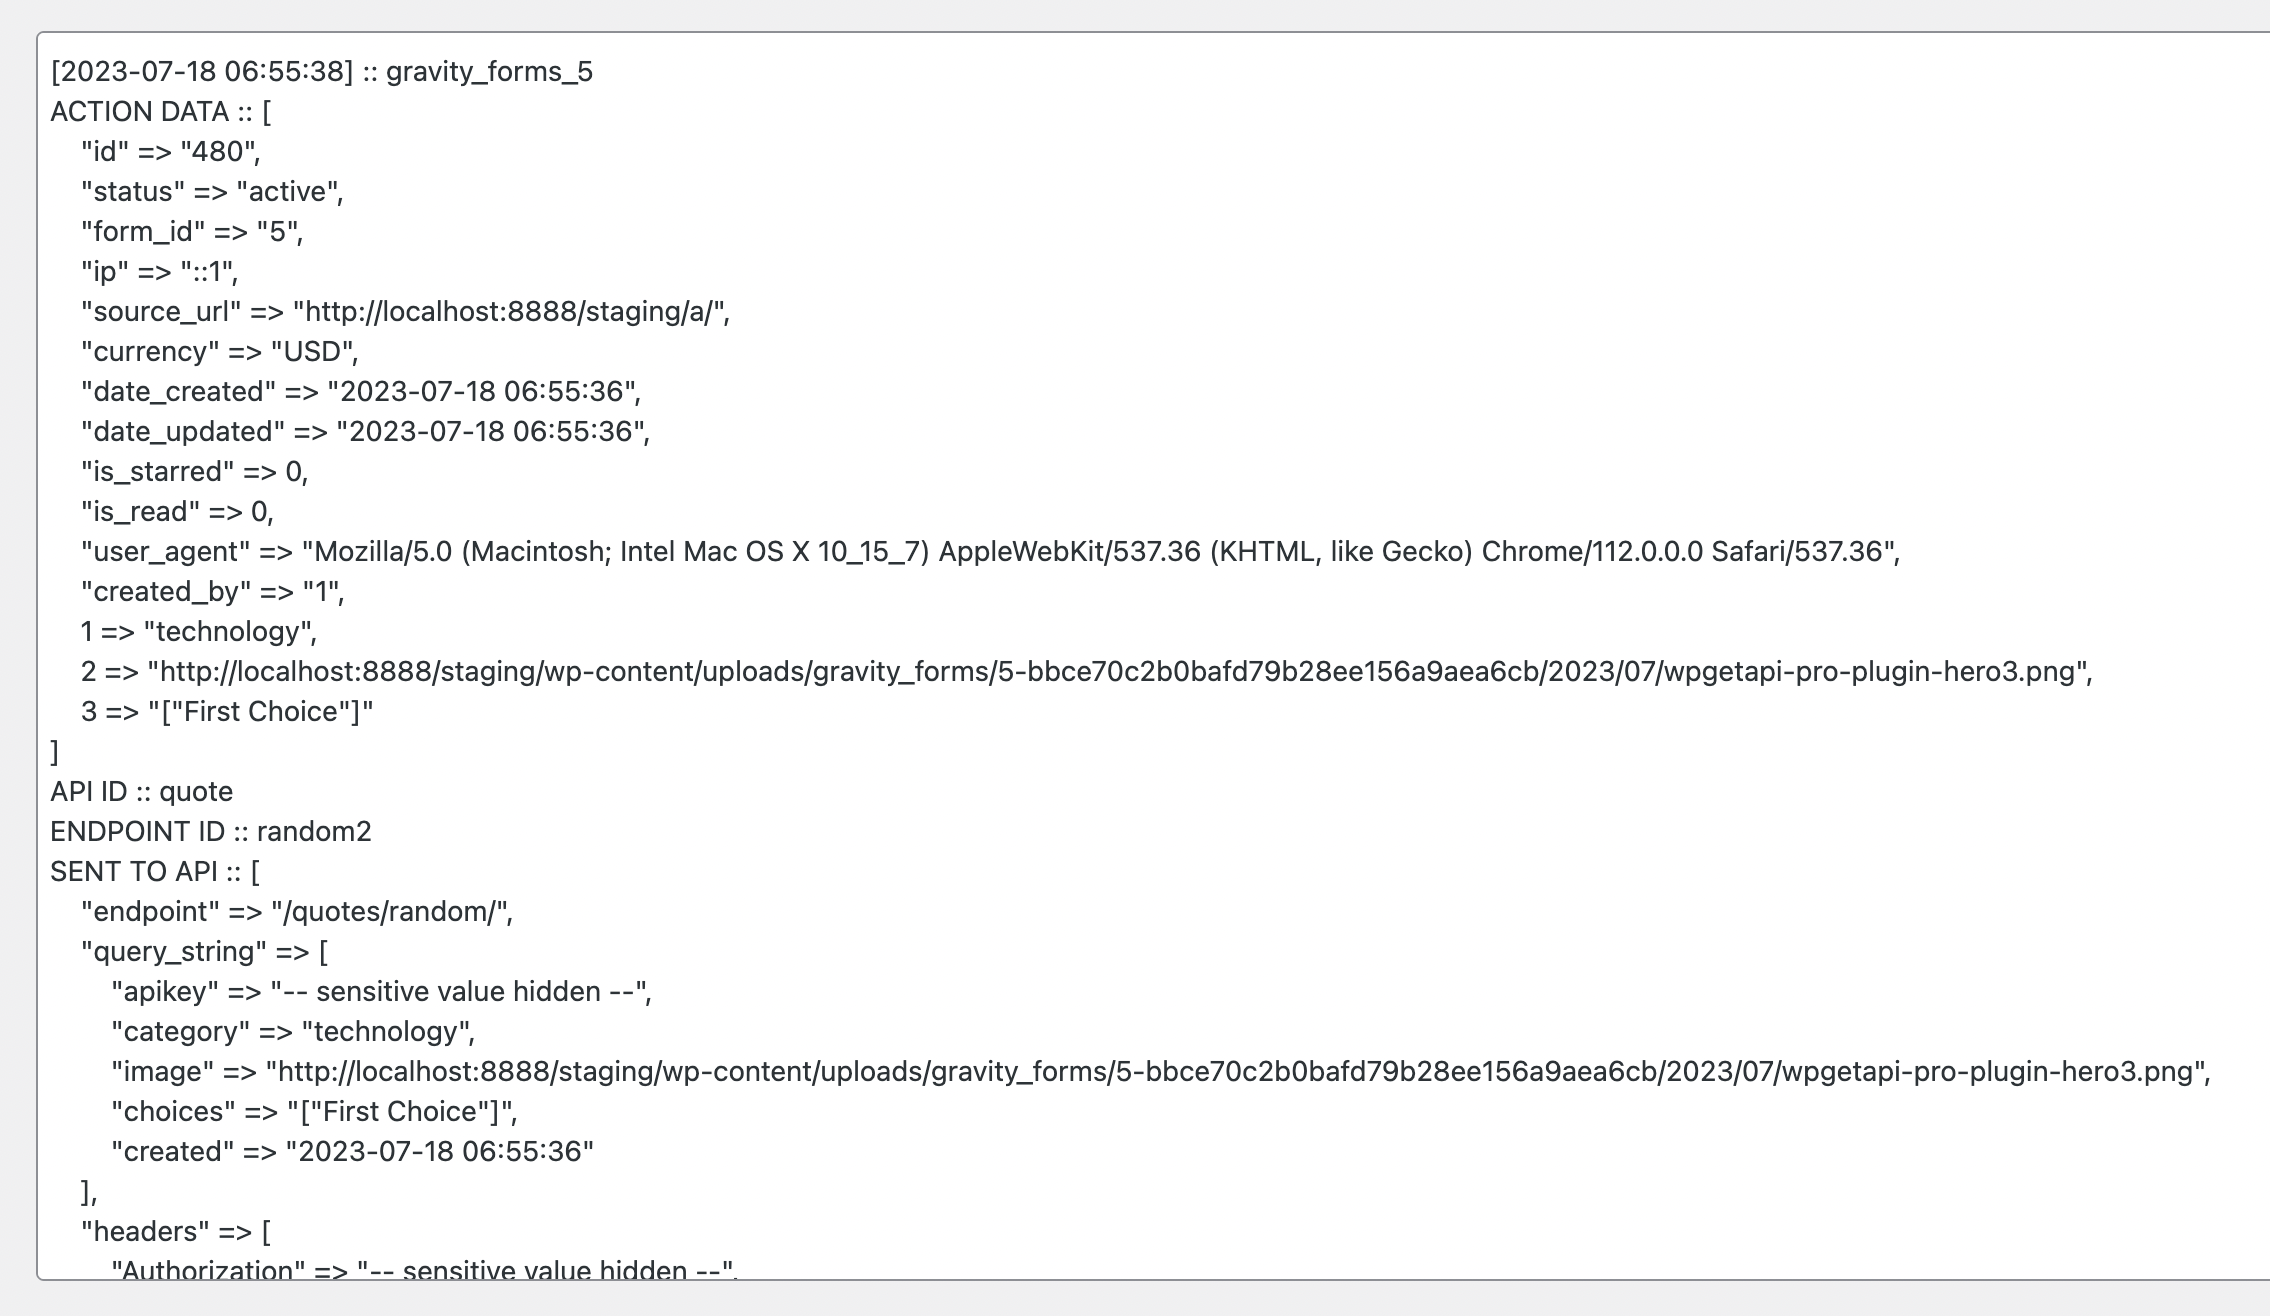
After sending the form again with these action tokens now in place, we can see in the next log entry below that the data is being sent to the API in the SENT TO API section.

That’s it!
You’re now capturing form data on your WordPress site & sending it to an API without writing any code!
Note: Keep in mind that this example uses Gravity Forms. If you use a different forms plugin, these instructions will be exactly the same except for the action tokens that you use. Tokens for the other plugins may use field names instead of field IDs, and you would need to check the Action docs here or check the log after doing a test.
Check out the PRO plugin for more awesome features for your API integrations.
