This article will show you how to setup OAuth 2.0 Authorization using the Grant Type of Client Credentials.
We won’t be going into great depths about what each feature is, we will simply look at how to set it up OAuth 2.0 with our plugin. Here is an article explaining what OAuth 2.0 is if you want to learn more about it before we get started.
Getting Started
For this article, we are going to connect to the Amadeus Self-Service APIs and retrieve the Flight Offers Price from Amadeus. Anyone can create a free Amadeus test account to follow along.
- The docs for creating an account and getting the access keys from Amadeus are here.
- The docs for the Flight Offers Price can be found here.
Step 1 – Register an application
The first step with any OAuth 2.0 authorization is to register an app.
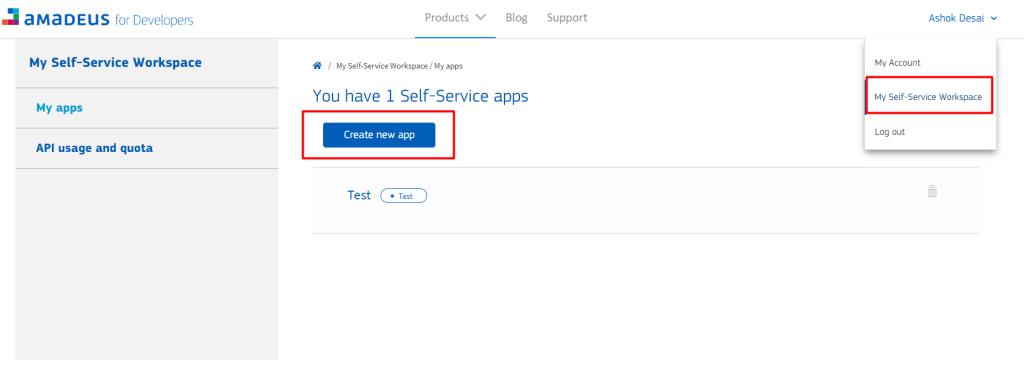
Most services will have a ‘Developers Console’ or ‘App Console’ where you can register your apps. Here is a link to the Amadeus Developer Console where you will be asked to log in or register and once logged in, Go to My Self-Service Workspace and click on Create New App button.

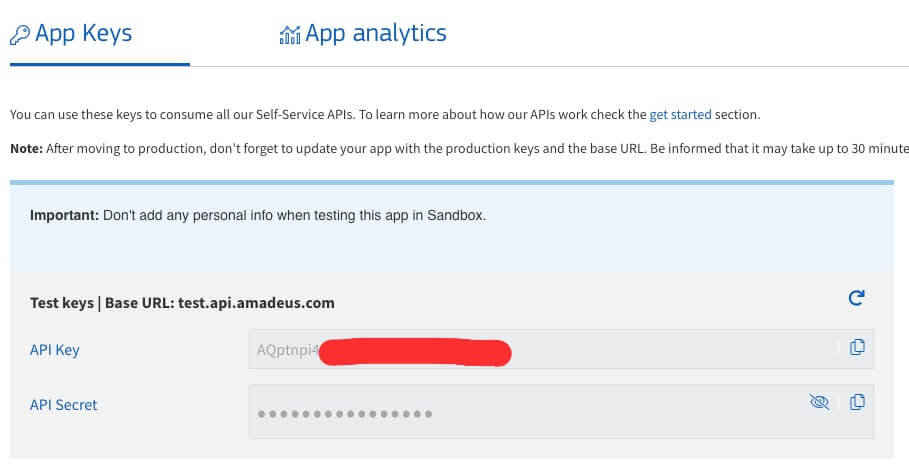
After clicking Create, you will then get the API Key and the API Secret, which we will use in the next step.
Step 2 – Configure settings in WPGetAPI
We now need to add all of our app details and some Amadeus API details to our OAuth 2.0 settings page within the WordPress admin – the page looks something like the image below.
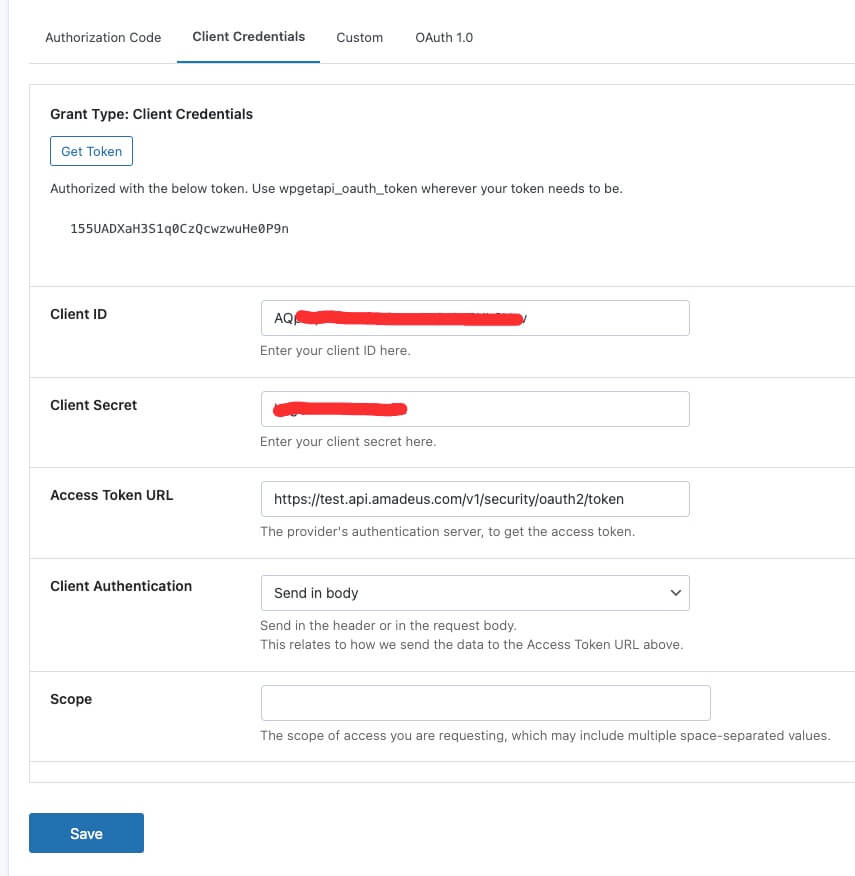
The fields are:
- Client ID – this is the API Key from our app
- Client Secret – the API Secret from our app
- Access Token URL – https://test.api.amadeus.com/v1/security/oauth2/token
- Client Authentication
- This is the method that we use to send data (in the background) to the Access Token URL above. Your API docs will tell you which method to use and in our case, Amadeus will Send in the body
- Scope
- For the Scope, we need to go searching a bit here. We need to look at the endpoints that we are going to eventually use and get the scope value from there.
- Here in Amadeus, there is no scope option so it should be blank.
Step 3 – Authorize our application
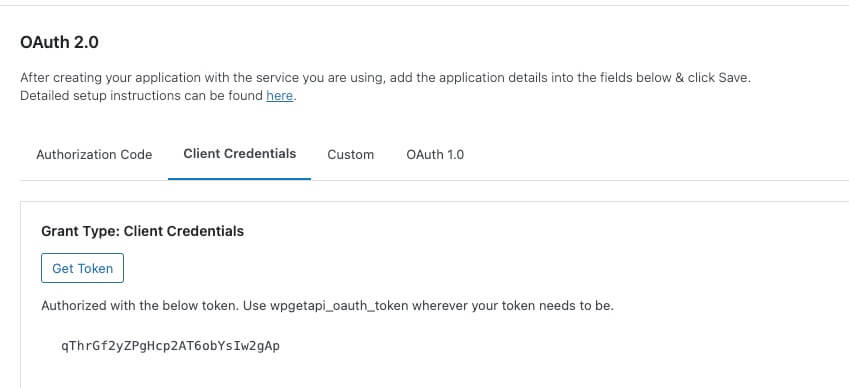
With our details saved, we will now see the Get Token button become active as shown below and we can also see that we have ‘No token yet’.
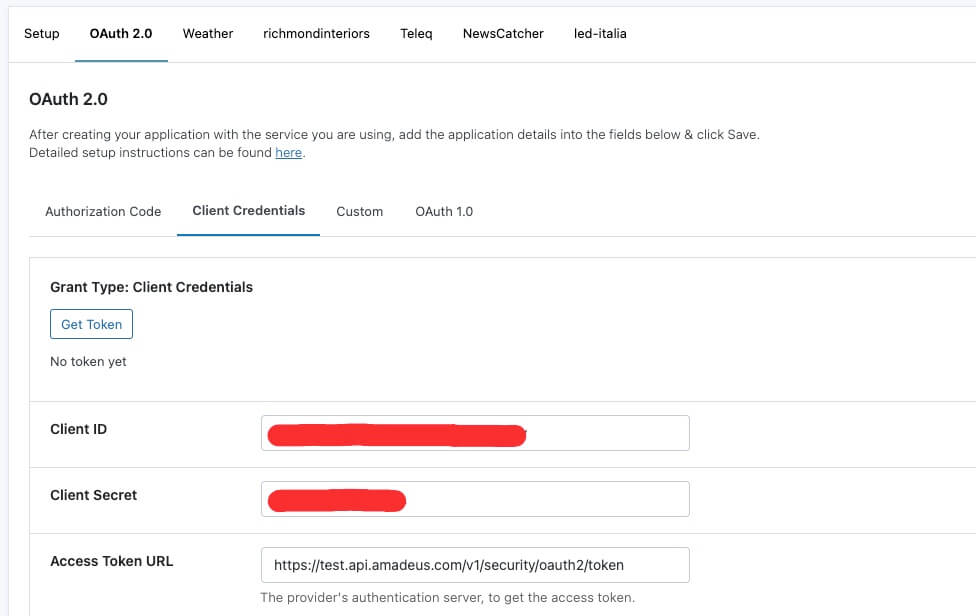
If we are happy that all the details we have entered are correct, we can click the button where the page is refreshed and the token is generated. We can now make our API call with the use of wpgetapi_oauth_token keyword in our Endpoint setup page.
Step 4 – Using the token to make API calls
We have a token now and we want to use our token to start making API calls, but we don’t want to actually copy the token and use it anywhere with WPGetAPI.
Access tokens have a limited life and usually expire within minutes or hours of being created. So if we add our token to any API calls, it will not work after the token expiry time. Tokens need to be refreshed when they expire, and this is what our OAuth 2.0 plugin does automatically in the background.
So instead of adding the actual token that we have received, we need to use the keyword ‘wpgetapi_oauth_token’ instead. This keyword basically tells our OAuth 2.0 plugin where we need the token. The plugin will see this keyword and replace the keyword with our refreshed and up-to-date token.
Looking at the Amadeus API Docs, it shows us that the token needs to be used in the header. Some API’s might also use the token in the query string.
Authorization: Bearer d92d4xxxxxxxxxxxxxxxxxx15f52But we will use the keyword ‘wpgetapi_oauth_token’ instead of the token, so that it would now look like this:
Authorization: Bearer wpgetapi_oauth_tokenNow when we setup our endpoint, we just need to add Authorization within the Name field and Bearer wpgetapi_oauth_token within the Value field of our headers.
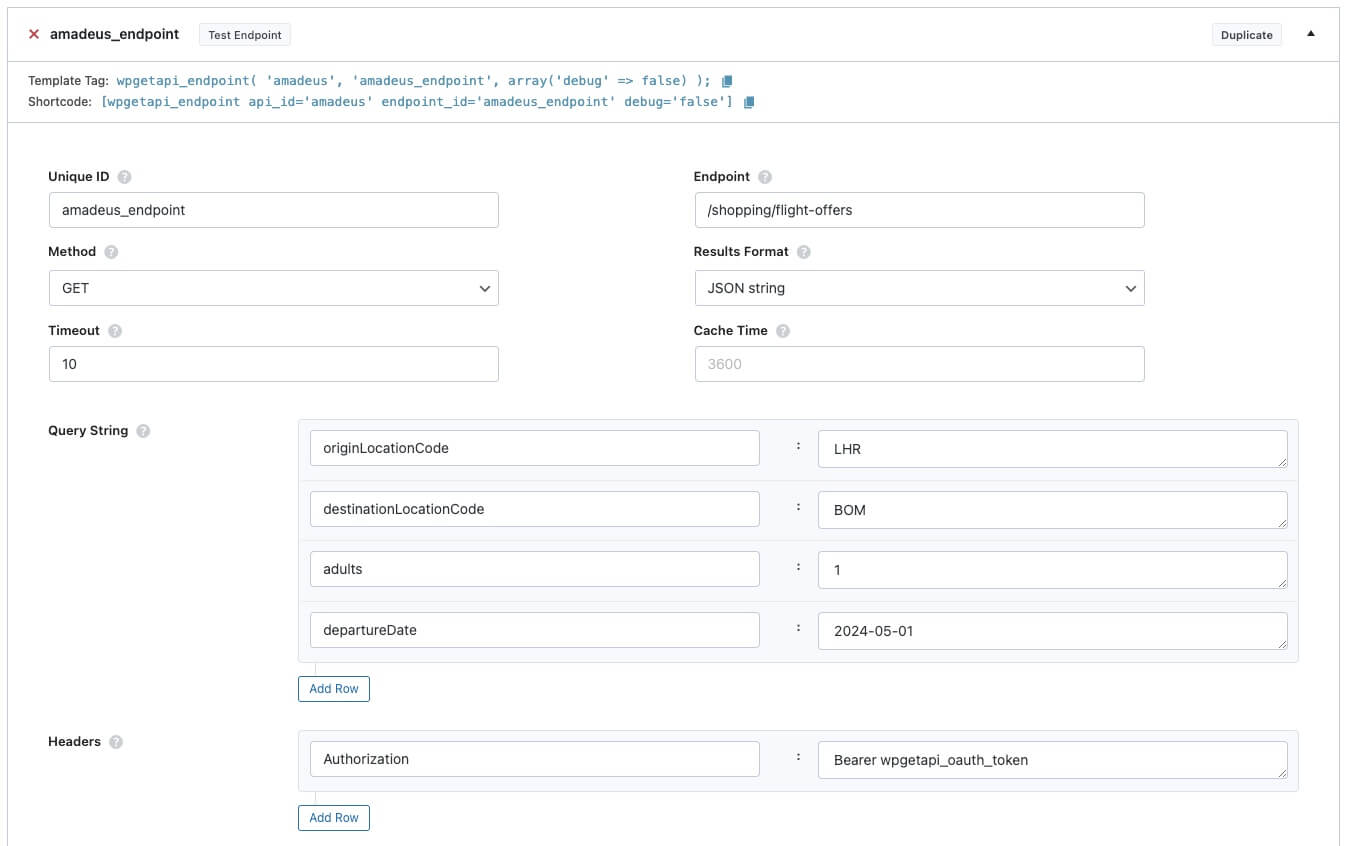
You can now use the template tag or the shortcode to call your API endpoints.