In a previous article, we explained how to set up a Zoho application and how to configure your WordPress website to communicate with Zoho CRM through the use of our OAuth 2.0 Authorization plugin. This article will delve a little deeper into setting up endpoints for the Zoho API and actually sending data to your Zoho CRM as well as receiving and displaying data from Zoho.
Specifically we will look at capturing a new lead with a WordPress forms plugin and sending the lead direct to the Zoho CRM. This is perfect for a newsletter signup or even a contact form with an ‘opt-in to marketing emails’ checkbox setup. This can also be adapted to be used with any other Zoho API endpoint.
Requirements
- A Zoho CRM account
- Free WPGetAPI plugin
- A free forms plugin such as Gravity Forms, Contact Form 7 or WPForms
- Premium plugins – Pro plugin & OAuth 2.0 plugin
- Your website connected to Zoho CRM as shown in this article.
Capturing form data to send to Zoho CRM API
To capture the form data, we will use a forms plugin (Gravity Forms in this case) and then send this data to the Zoho API which then creates a new Lead within the Zoho CRM.
Step 1: Setup the endpoint
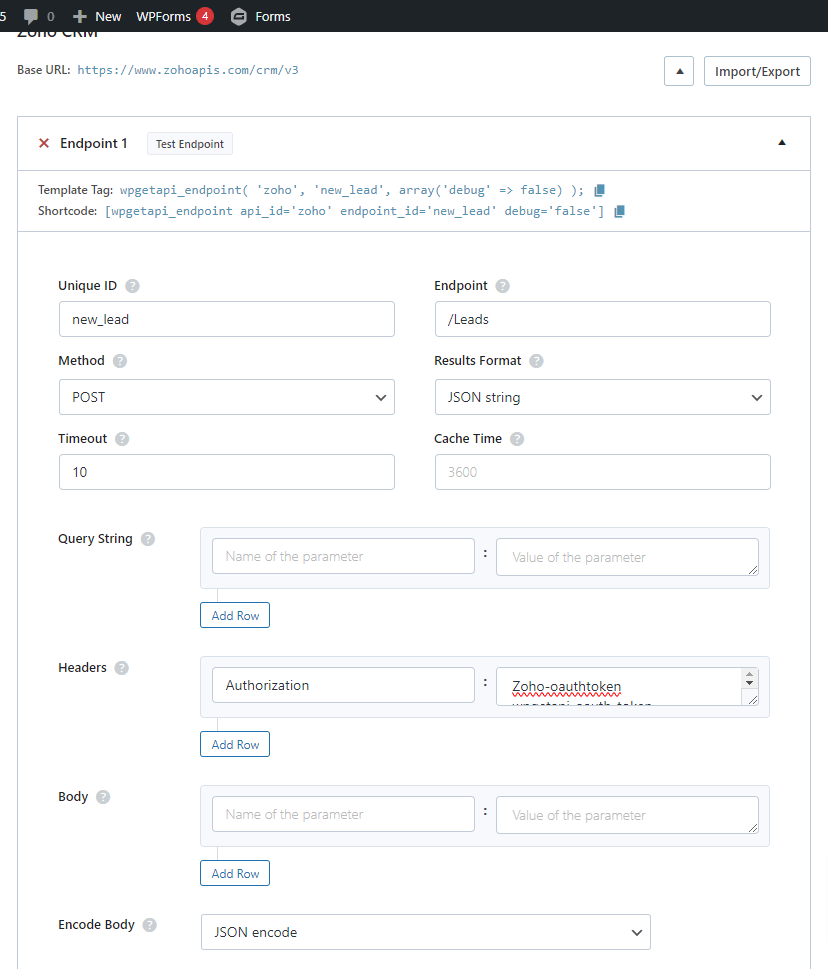
The first step is to set up our new_lead endpoint (Zoho docs for this endpoint are here). The endpoint should look something like what we have in the image below. The values for the fields should be as follows:
- Unique ID – new_lead
- Endpoint – /Leads
- Method – POST
- Results Format – PHP array data
- Encode Body – JSON encode
(not that our Base URL is a .com.au address as we are based in Australia. Check your Base URL, depending on your location here)
Step 2: Setup the form
We now need to setup our form – as mentioned we will use Gravity Forms for this, but you can also use Contact Form 7, WPForms or any other forms plugin that allows you to run code upon form submission.
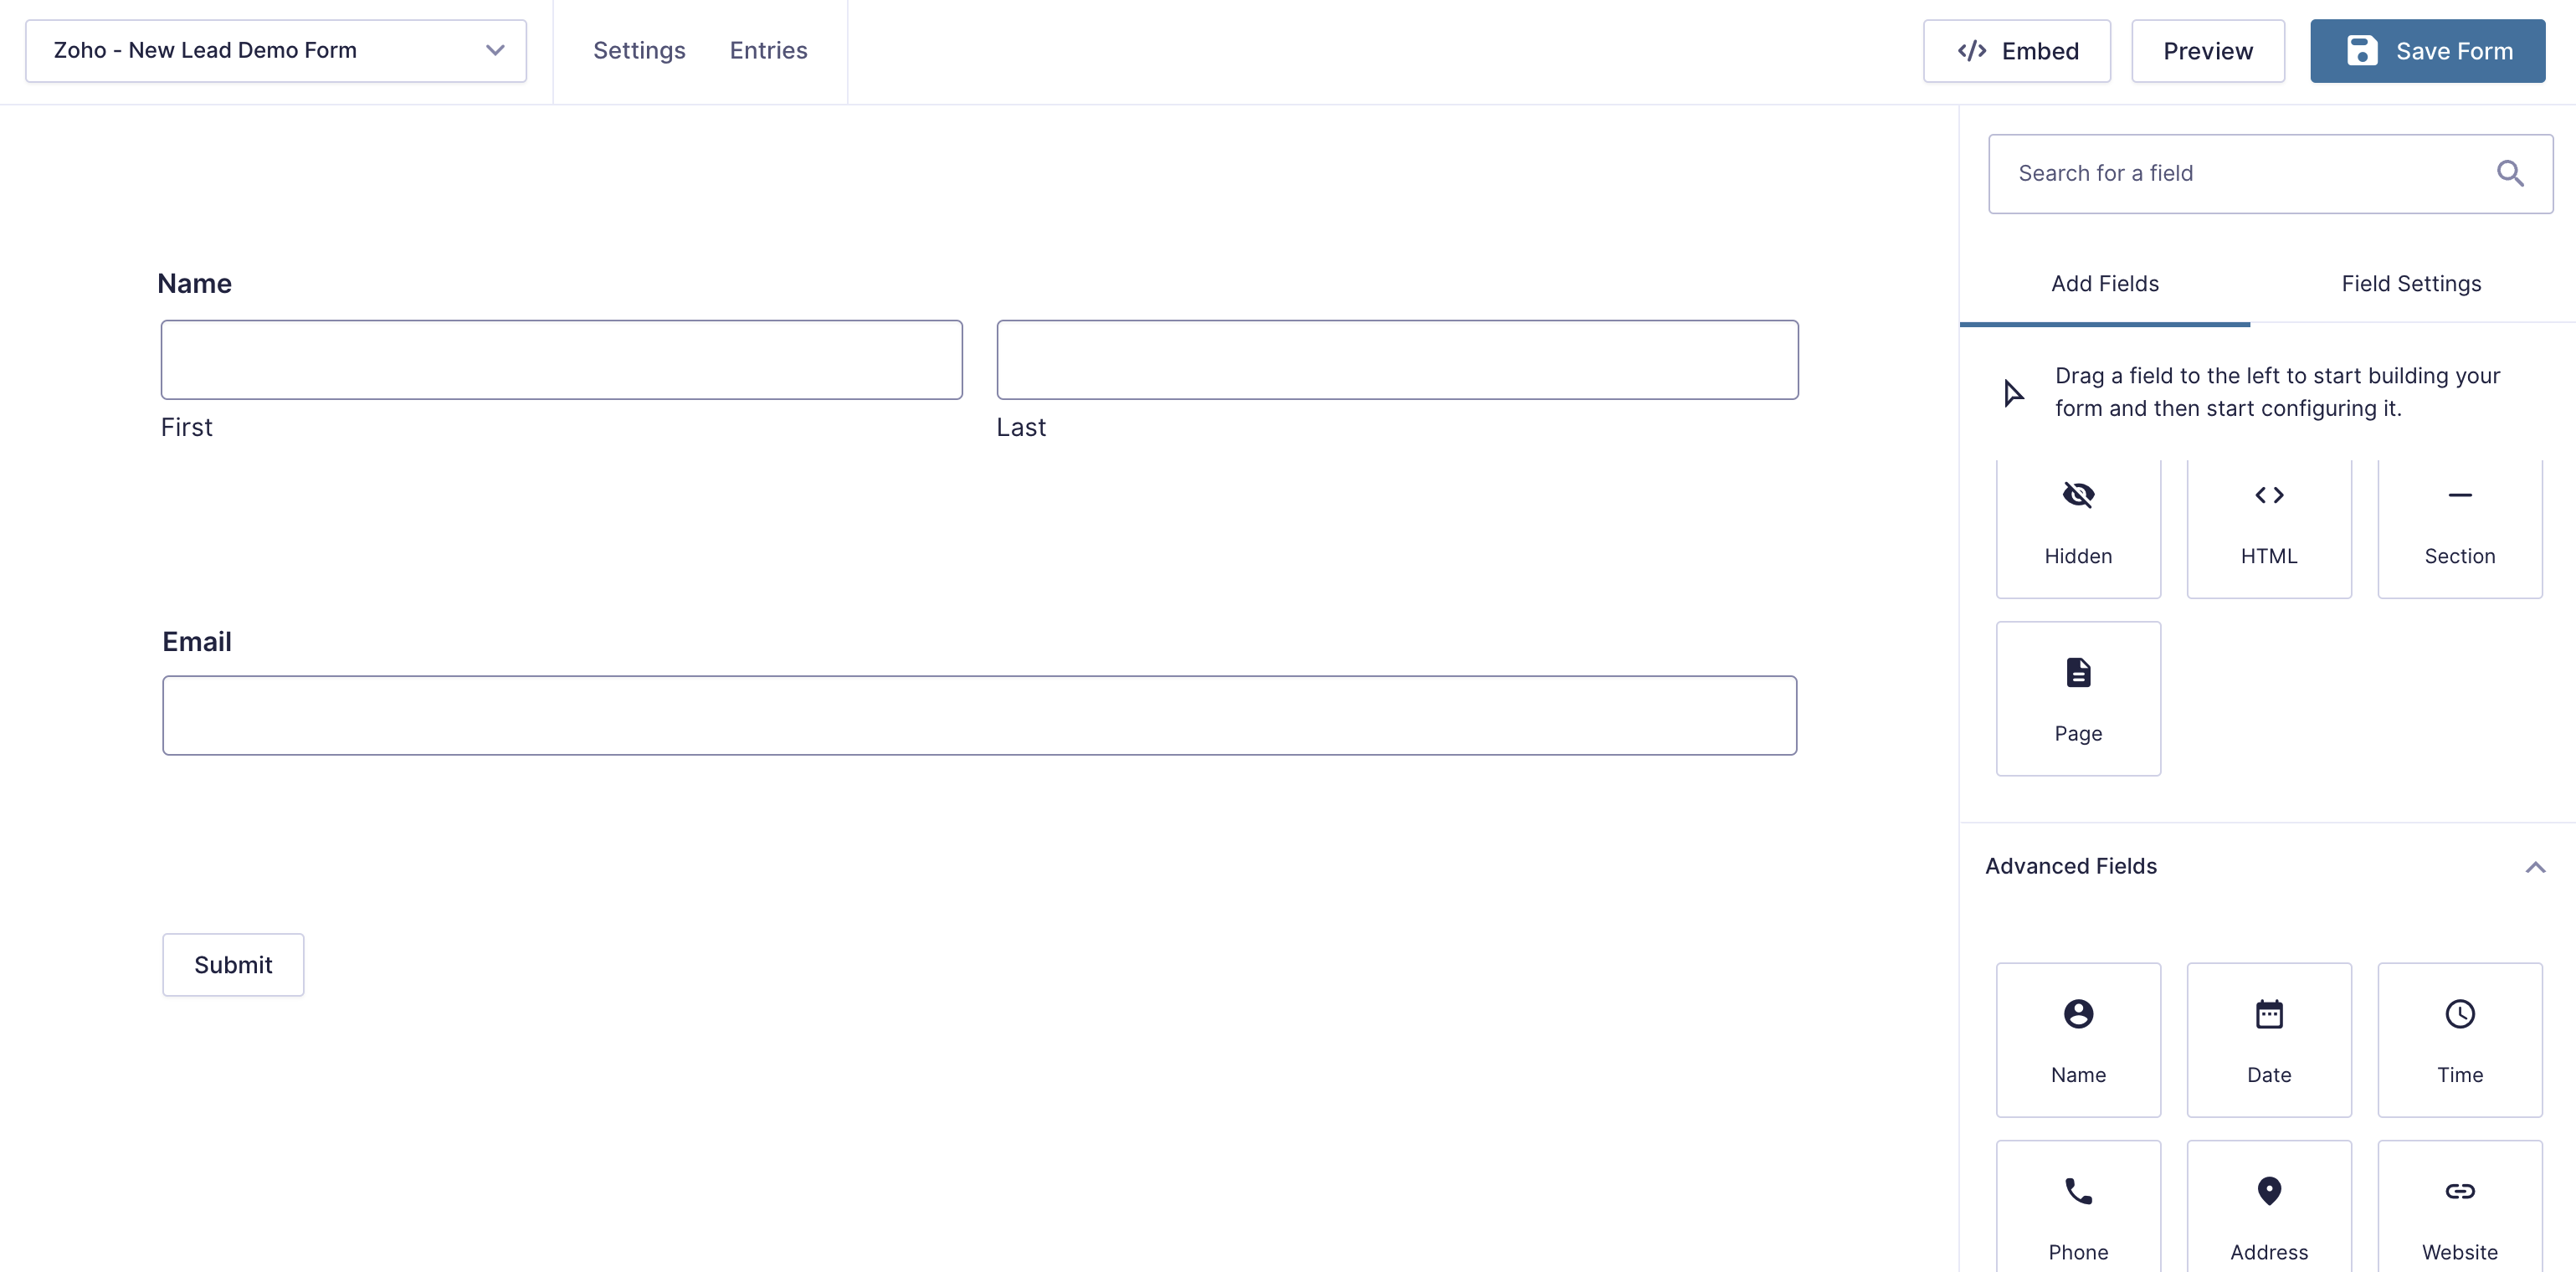
We are just keeping it simple and using First Name, Last Name and Email for our new leads. Once your form is built, click on the Embed button to add it to your page or your desired location.

Step 3: Send the form entries to Zoho’s API
We have our endpoint setup and our form setup on our website, now we need to add a snippet of code that will capture the data from the form and then send this to the Zoho API. The snippet needs to go into your themes functions.php file or you can also use a code snippets plugin to add the code.
function wpgetapi_send_lead_to_zoho( $confirmation, $form, $entry, $ajax ) {

	// gets the data that is entered from the user
	$first_name = rgar( $entry, '1.3' );
	$last_name = rgar( $entry, '1.6' );
	$email = rgar( $entry, '3' );

	$lead_data = array(
		'data' => array(
			array(
				'First_Name' => $last_name,
				'Last_Name' => $last_name,
				'Email' => $email,
			)
		),
		'trigger' => array(),
	);

	// call our zoho 'new_lead' endpoint
	$result = wpgetapi_endpoint( 'zoho', 'new_lead',
		array(
			'debug' => false,
			'body_variables' => $lead_data
		)
	);

	// output our message to the user
	$confirmation = '';
	$confirmation .= '';
        $confirmation .= 'This data can be formatted anyway you like.';
        $confirmation .= json_encode( $result );

        return $confirmation;
    }
    add_filter( 'gform_confirmation_8', 'wpgetapi_send_lead_to_zoho', 10, 4 );
Testing the results
Below is the live form linked to our test Zoho account. You can add some dummy data to the form to see the results.

