Skip to content
  • Why WPGetAPI?
  • Examples
  • Pricing
  • Plugins
    • PRO Plugin
    • API to Posts Plugin
    • OAuth 2.0 Plugin
  • Docs
  • Support
    • Frequently Asked Questions
    • Feature Request
    • Support Ticket
  • account_circle
PRO Plugin
Howdy! How can we help you?
  • Introduction

    • Quick Start
    • Frequently Asked Questions
    • Will this work with my API?
    • Understanding API docs
    • Step by Step Example
  • Setup

    • Setup Page
    • Endpoint Page
    • Parameters - Query String
    • Parameters - Headers
    • Parameters - Body POST
    • Shortcode
    • Template Tag
    • Gutenberg Block
  • Connecting your API

    • API Key in Headers
    • API Key in Query String
    • Authentication & Authorization
  • Output API Data

    • Format API to HTML
    • Format API to HTML Table
    • Format API to Image Gallery
    • Format JSON Data
  • Integrations

    • Send form data to API
    • WPForms to API
    • Gravity Forms to API
    • Contact Form 7 to API
    • WooCommerce to API
    • WooCommerce API Product Sync
    • wpDataTables to API
    • Connect WordPress to OpenAI
    • Connect RapidAPI to WordPress
    • Connect Zoho CRM to WordPress
    • Page Builders (Elementor, DIVI)
    • Formidable Forms to API
    • Elementor Form to API
    • JetFormBuilder to API
    • Fluent Forms to API
    • WS Form to API
    • Ninja Tables to API
    • Easy Digital Downloads(EDD) API Product Sync
    • Ultimate Member Forms to API
  • Tips & Tricks

    • Filters & Action Hooks
    • Code Snippets Plugin
    • Troubleshooting
    • Code Snippets
  • PRO Plugin

    • Installation
    • Actions
    • Tokens
    • Caching
    • Nested data
    • Chaining API calls
    • Dynamic Variables
    • Format API to HTML
    • Call API on user registration
    • Using AJAX to trigger API call
    • Base64 Encoding
    • Licensing
    • Filters & Action Hooks
  • OAuth 2.0 Plugin

    • Installation
    • How it works
    • Grant Type - Client Credentials
    • Grant Type - Authorization Code
    • Licensing
  • API to Posts Plugin

    • Installation
    • Getting Started
    • Multiple Endpoints
    • Mapping Fields
    • Filters & Action Hooks
    • Pagination

This article will run through the steps required to import and save data from your API(s).

For this article, we will assume that you have installed WPGetAPI and have setup your API and the endpoints that you wish to save. View the WPGetAPI Quick Start guide if you need help setting up the API and the endpoint.

Step 1 – Installation & activation

When you purchase the API Importer plugin, you will need to install and activate the plugin – see our installation guide. You also need to have the free WPGetAPI plugin installed.

Step 2 – Setup your endpoint

After installation you will see a new field called Import & Save added to the end of each endpoint. To activate an endpoint for saving, simply select the Yes option and then save the endpoint.

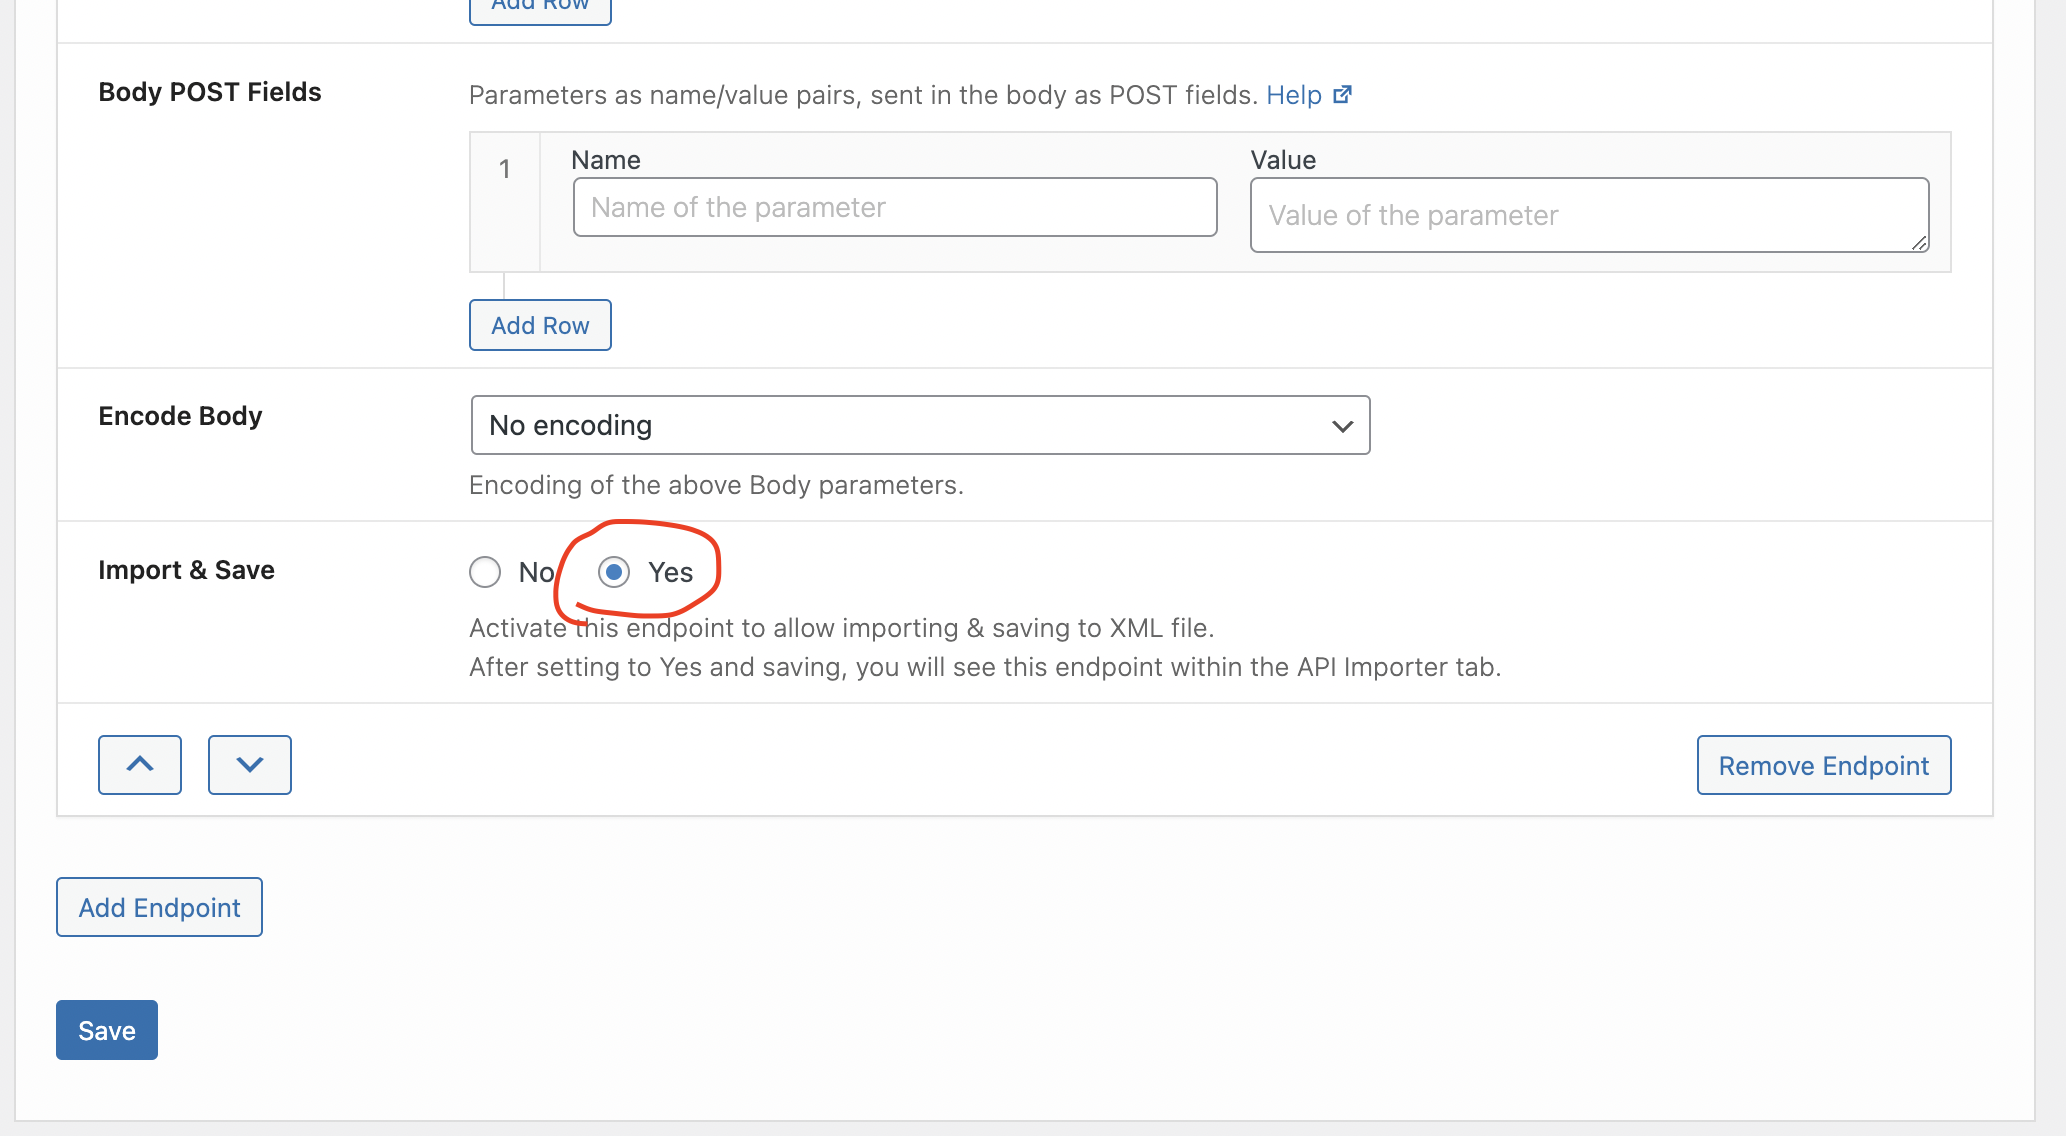
Within your endpoint you must also ensure that the Results Format is set to PHP array data, or XML array data if your API is an XML formatted API.

Step 3 – The API Importer tab

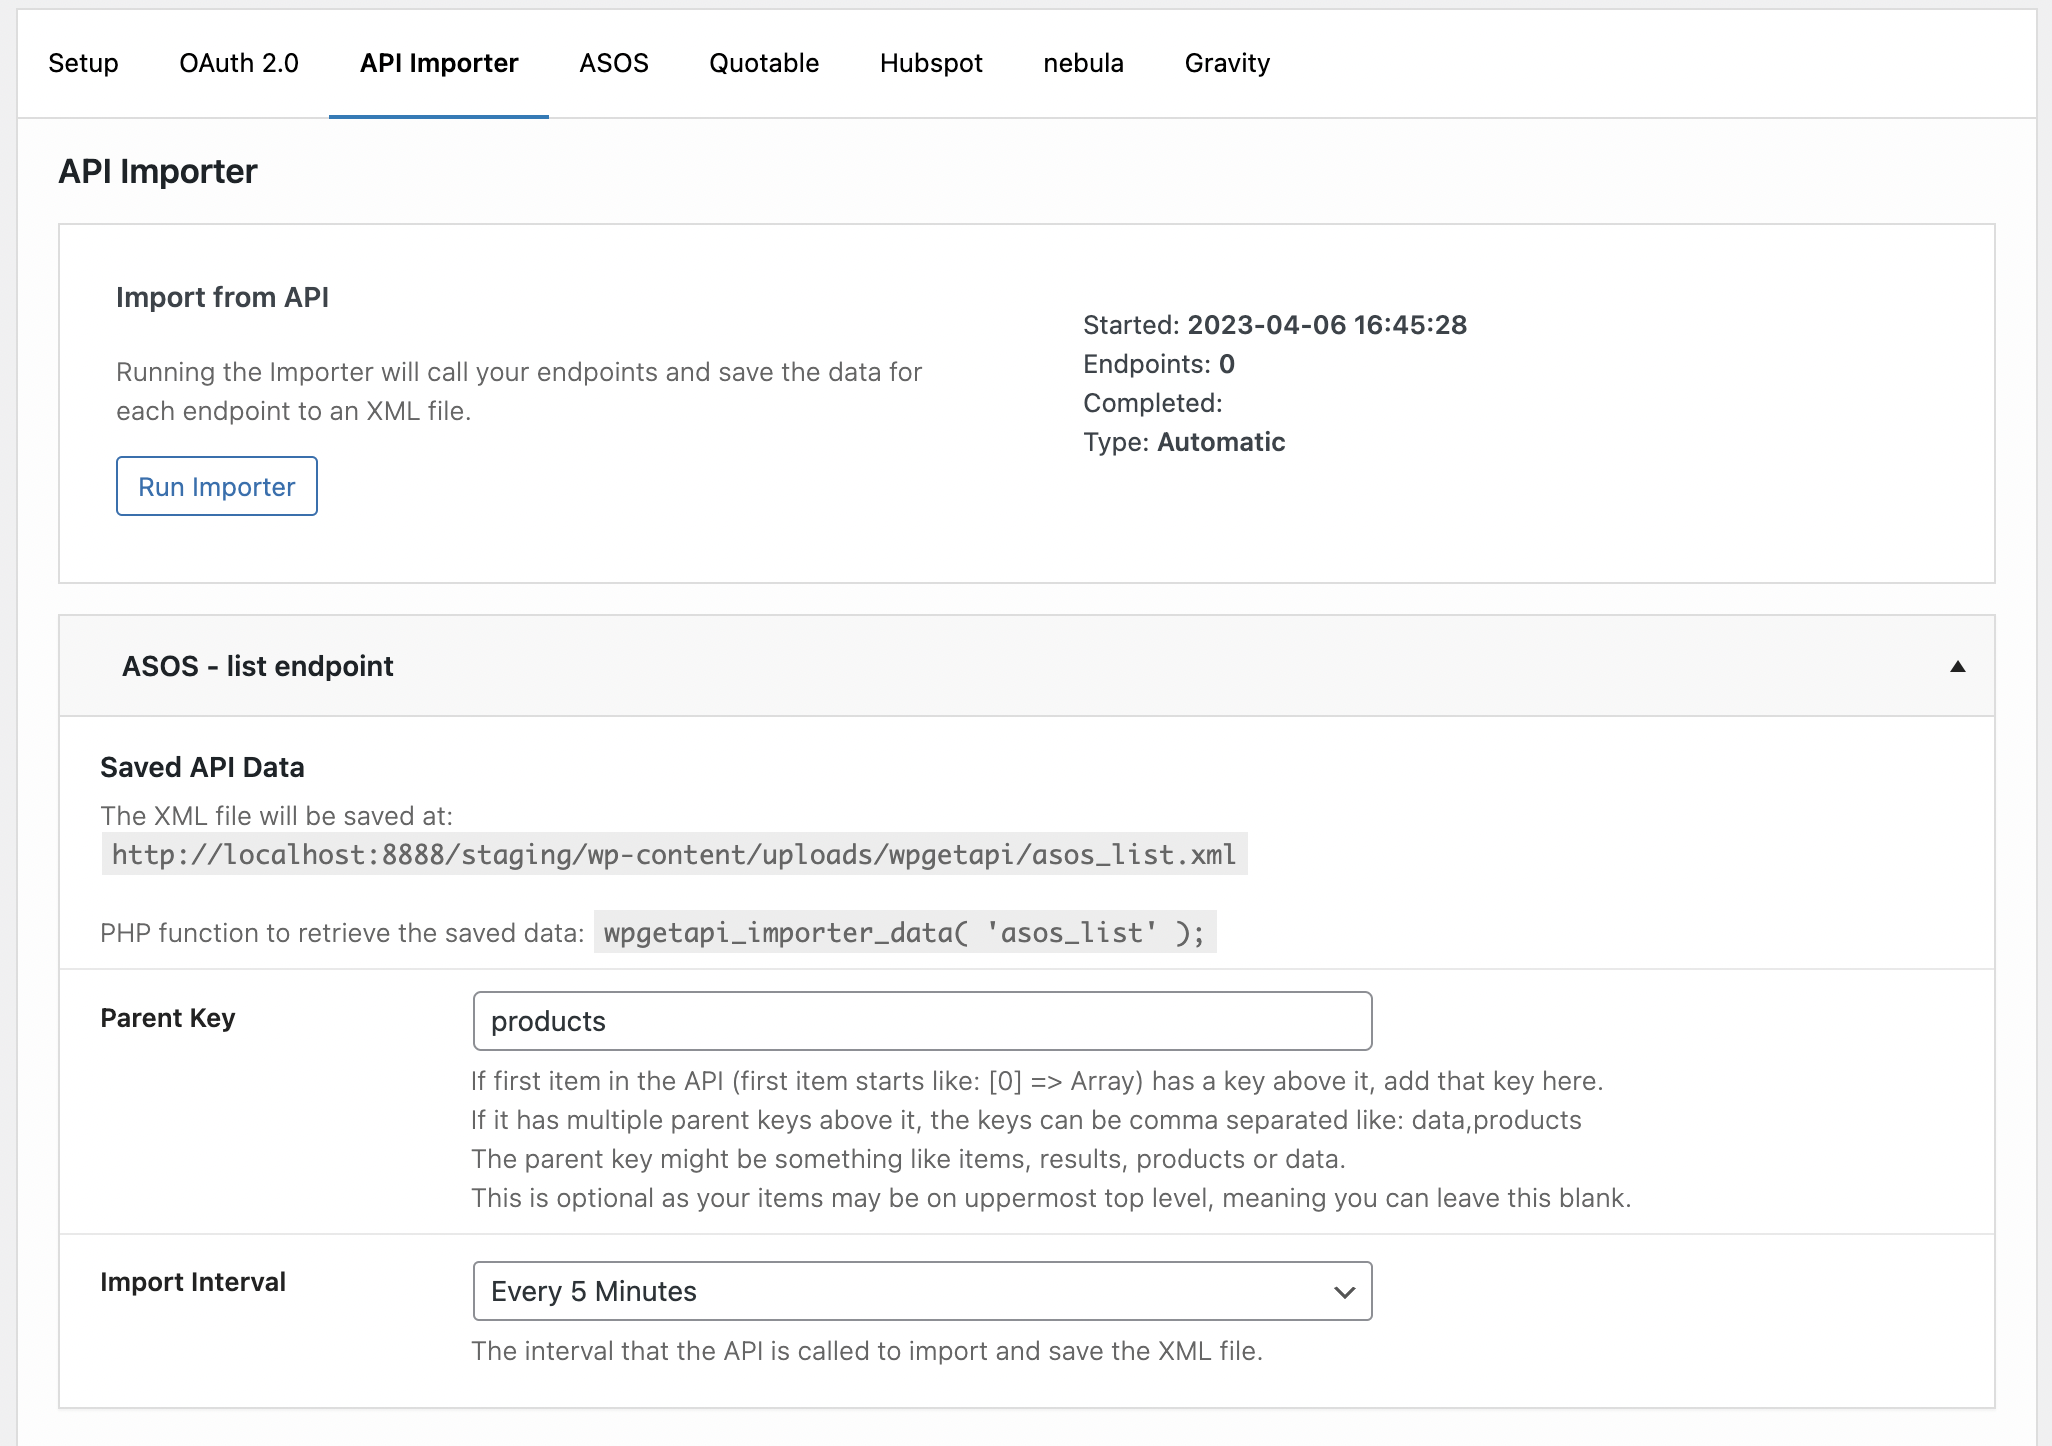
Once you have activated your endpoint(s), visit the API Importer tab and you will see the endpoints that you have activated and there will be 2 fields for each endpoint that are optional to setup.

You’ll also see the Run Importer button which when clicked, will call your endpoints and save the data to an XML file as well as saving the data in your WordPress database.

Your endpoints should first be setup and saved before running the importer.

The Parent Key field

This field is optional. If you simply want to import and save the entire API data, leave this field blank.

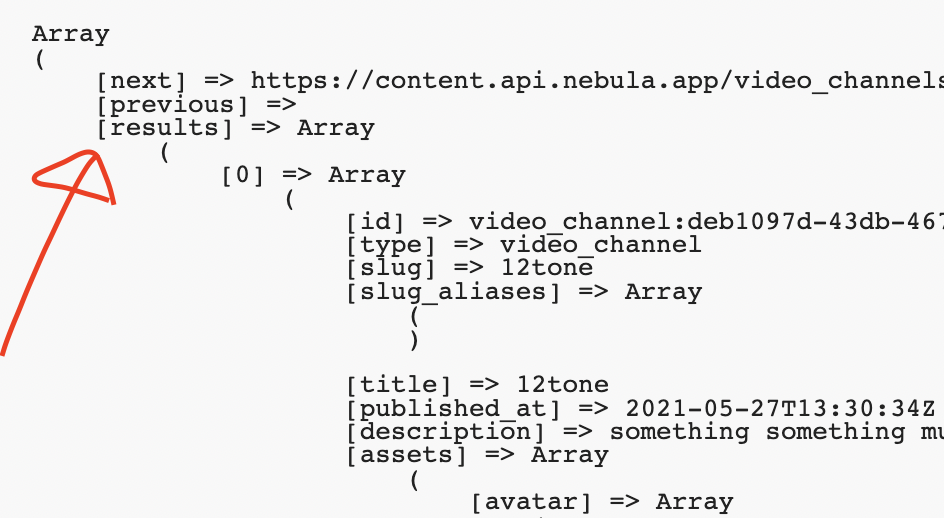
If you only want to import some certain data, such as the list of products or items and these items have parent key(s), you can add the key(s) in this field.

Looking at the array below, if you wanted to just import the items that are below the results field, you would simply add results into this field. And if you wanted to just import the first item, you would add results,0 (comma separating the keys).

The Import Interval field

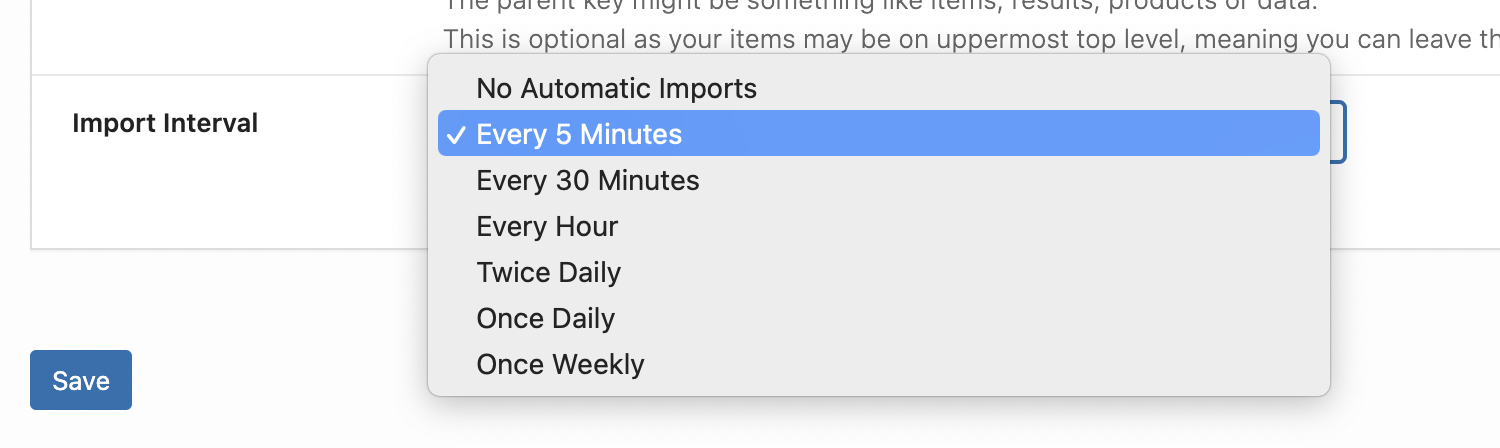
This field is optional. You can set this to No Automatic Imports and the endpoint will only ever be imported and saved by manually pressing the Run Importer button.

Selecting any of the other options will set the importer to run automatically at your chosen interval, which could be 5 Minutes, 30 Minutes, Every Hour, Twice Daily, Daily or Weekly. The importer will run at your chosen interval and will save the endpoint data at this interval, allowing you to keep your API and your imports in sync.

Step 4 – The saved API data

Once the Importer has been run, your XML file will be saved within the location as shown on that endpoint. You can then use that file to run an XML Importer plugin to create posts or WooCommerce products. WP All Import seems to be the most comprehensive option for this.

The endpoint data will also be saved within your WordPress database and to retrieve this, you can use the function as shown within the endpoint. You will need some basic knowledge of PHP to work with this function, otherwise you may need to hire a web developer for this.

On this page
contact_support

Still not sure?

APIs can be daunting and sometimes downright confusing.

But we are here to help! Our support is amazing and we can assist you with any setup required and ensure your API integrations are a success!

Ask Us Anything

Connect your WordPress website to external APIs without writing a single line of code. Send data from WordPress to your API or display data from your API within WordPress.

Support

  • Documentation
  • Support Ticket
  • Refund Policy
  • Contact Us
  • About Us
  • Affiliates

Articles

  • Quick Start Guide
  • WooCommerce Orders to API
  • WooCommerce API Products Sync
  • Contact Form 7 to API
  • WPForms to API
  • Gravity Forms to API
  • WordPress to RapidAPI

WordPress API Plugins

  • Free WPGetAPI Plugin
  • PRO Plugin
  • API to Posts Plugin Plugin
  • OAuth 2.0 Authorization Plugin

© 2025 WPGetAPI. All Rights Reserved.

"*" indicates required fields

Name*
This field is for validation purposes and should be left unchanged.