Creating your own version of ChatGPT that you can host on your WordPress site is very easy using WPGetAPI. ChatGPT uses the OpenAI API, which is available to anyone.
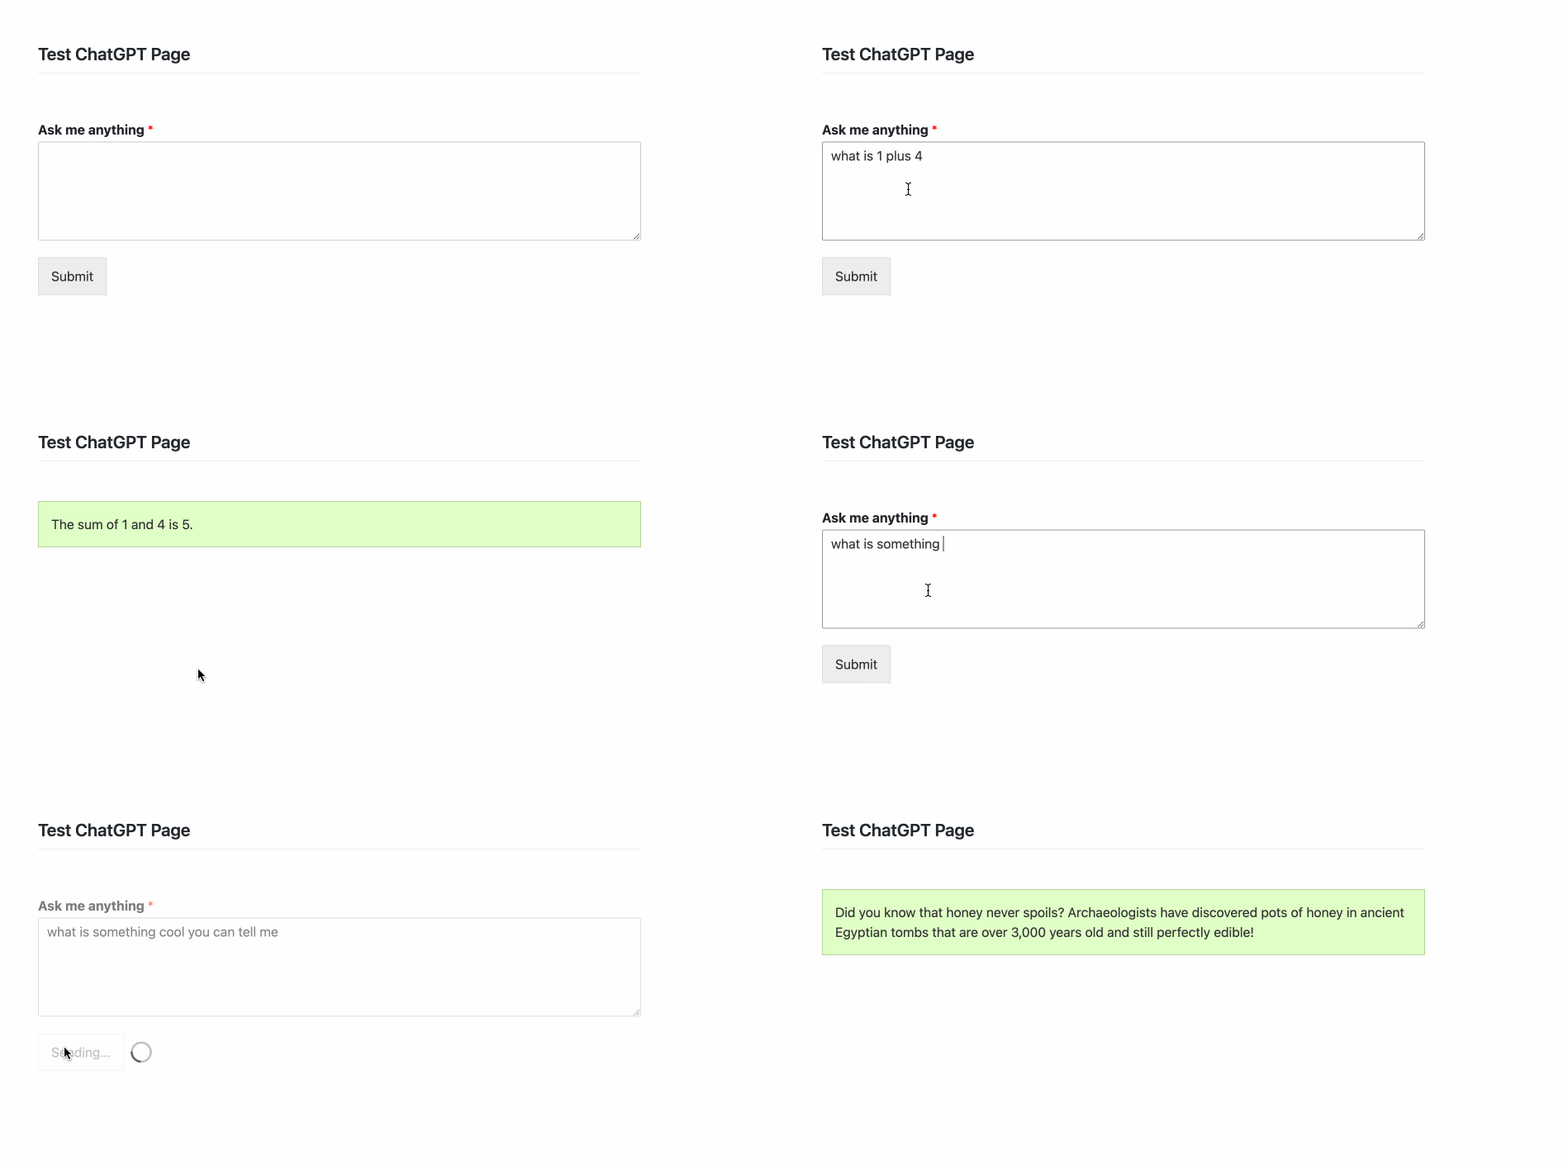
Preview of our WordPress ChatGPT Form
Here is a preview of what our mini WordPress ChatGPT clone will look like. There is plenty of scope for being able to improve this with styling and the way it is set up. This is just a quick little example.
Requirements
- A free OpenAI account
- WPGetAPI installed
- Our PRO plugin installed
Step 1: Setup API
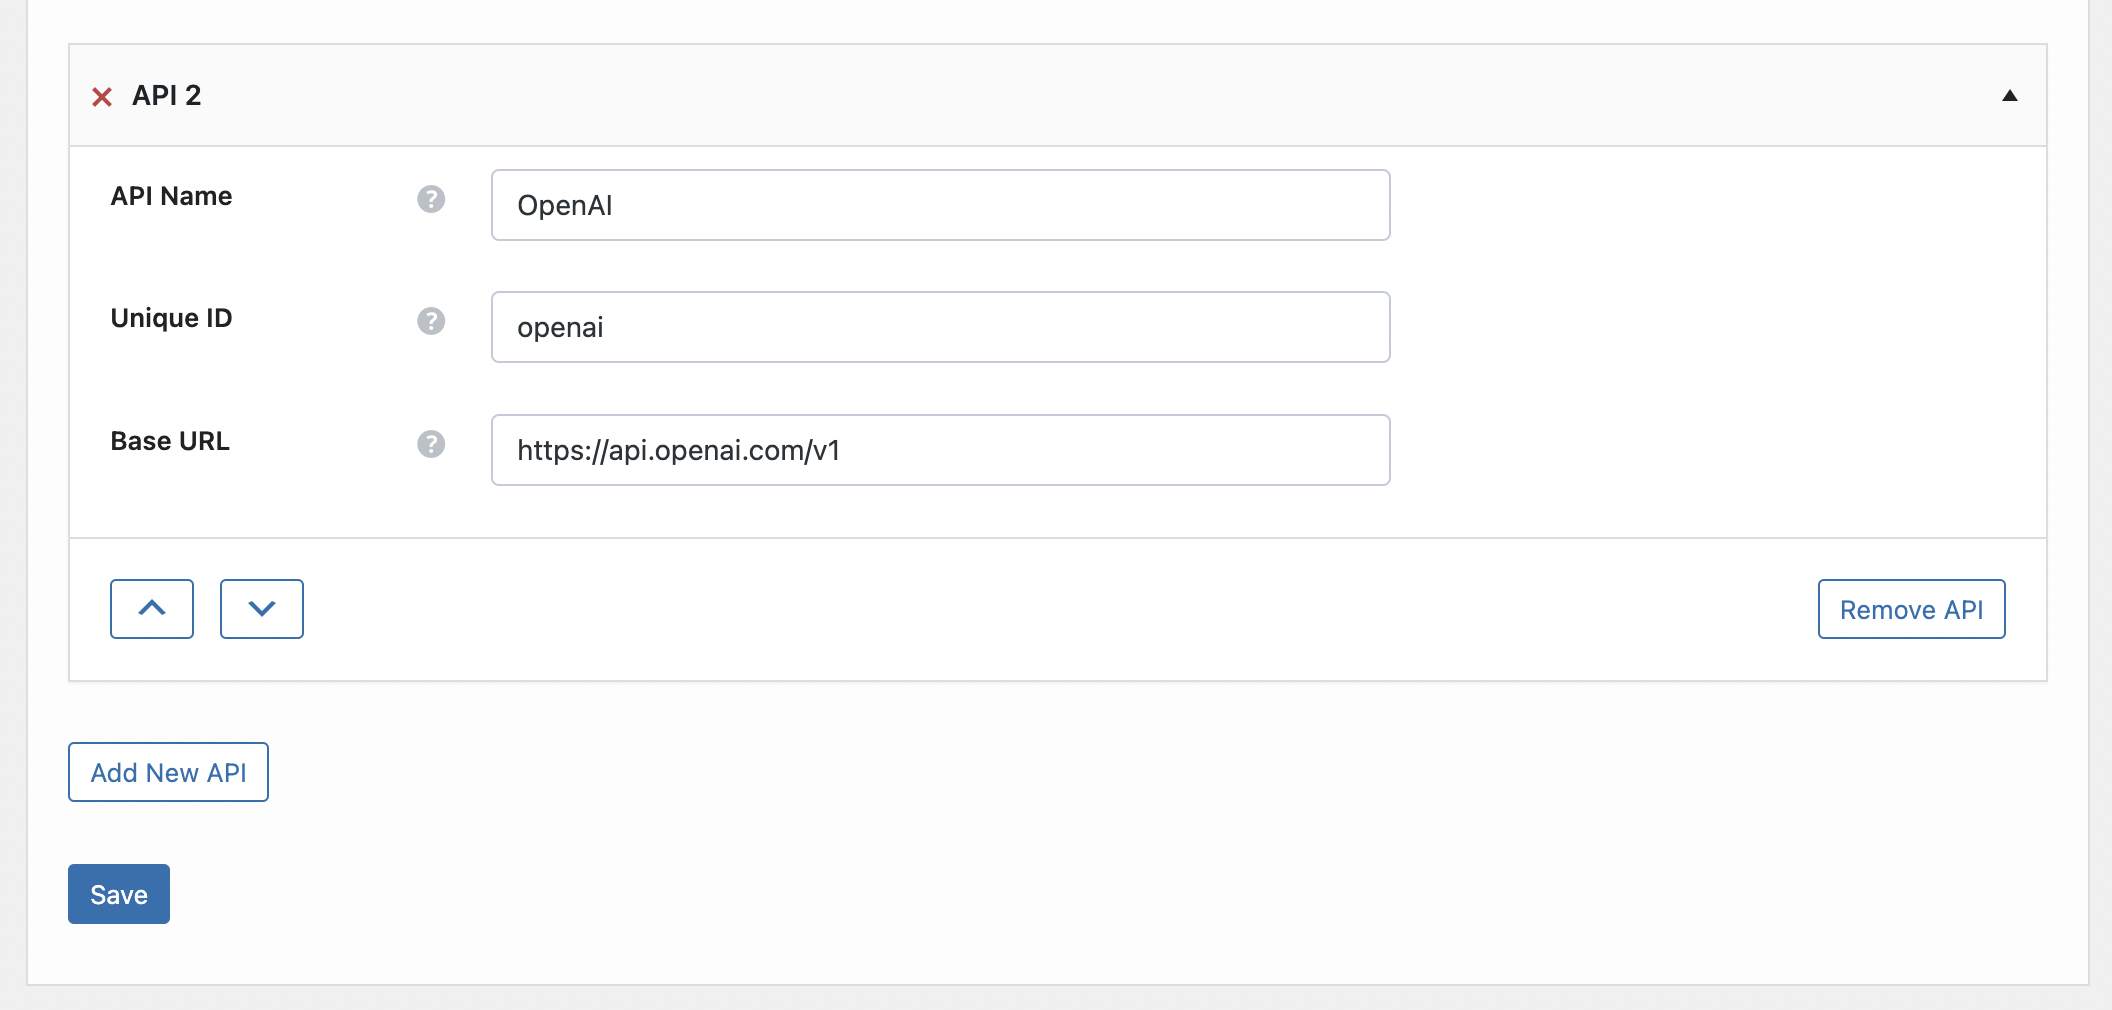
The first step is to setup the OpenAI API within WPGetAPI using the details as shown in the image below.
Step 2: Setup the endpoint & headers
This is where we configure the data that is sent to OpenAI.
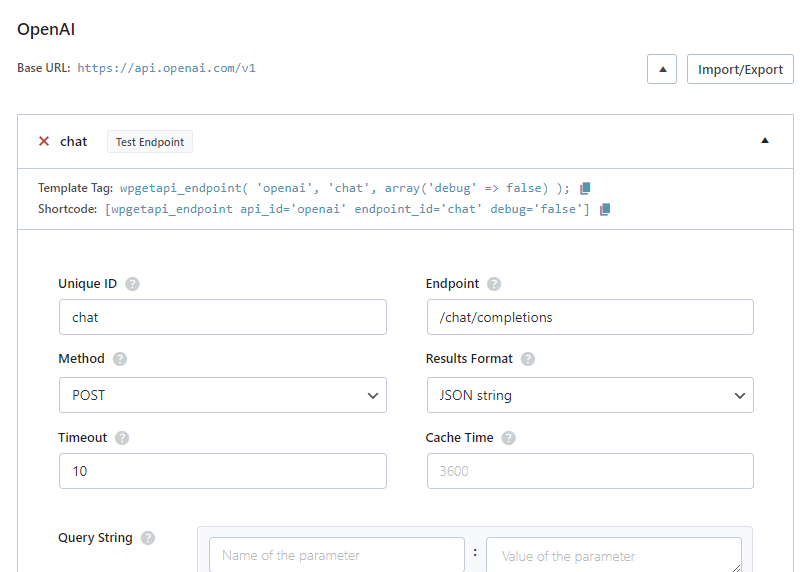
The endpoint we need to use is the Create Chat Completion endpoint. Docs for this endpoint are here: https://platform.openai.com/docs/api-reference/chat/create
The first part of our endpoint is very simple and the settings looks like the below:
Getting your API key
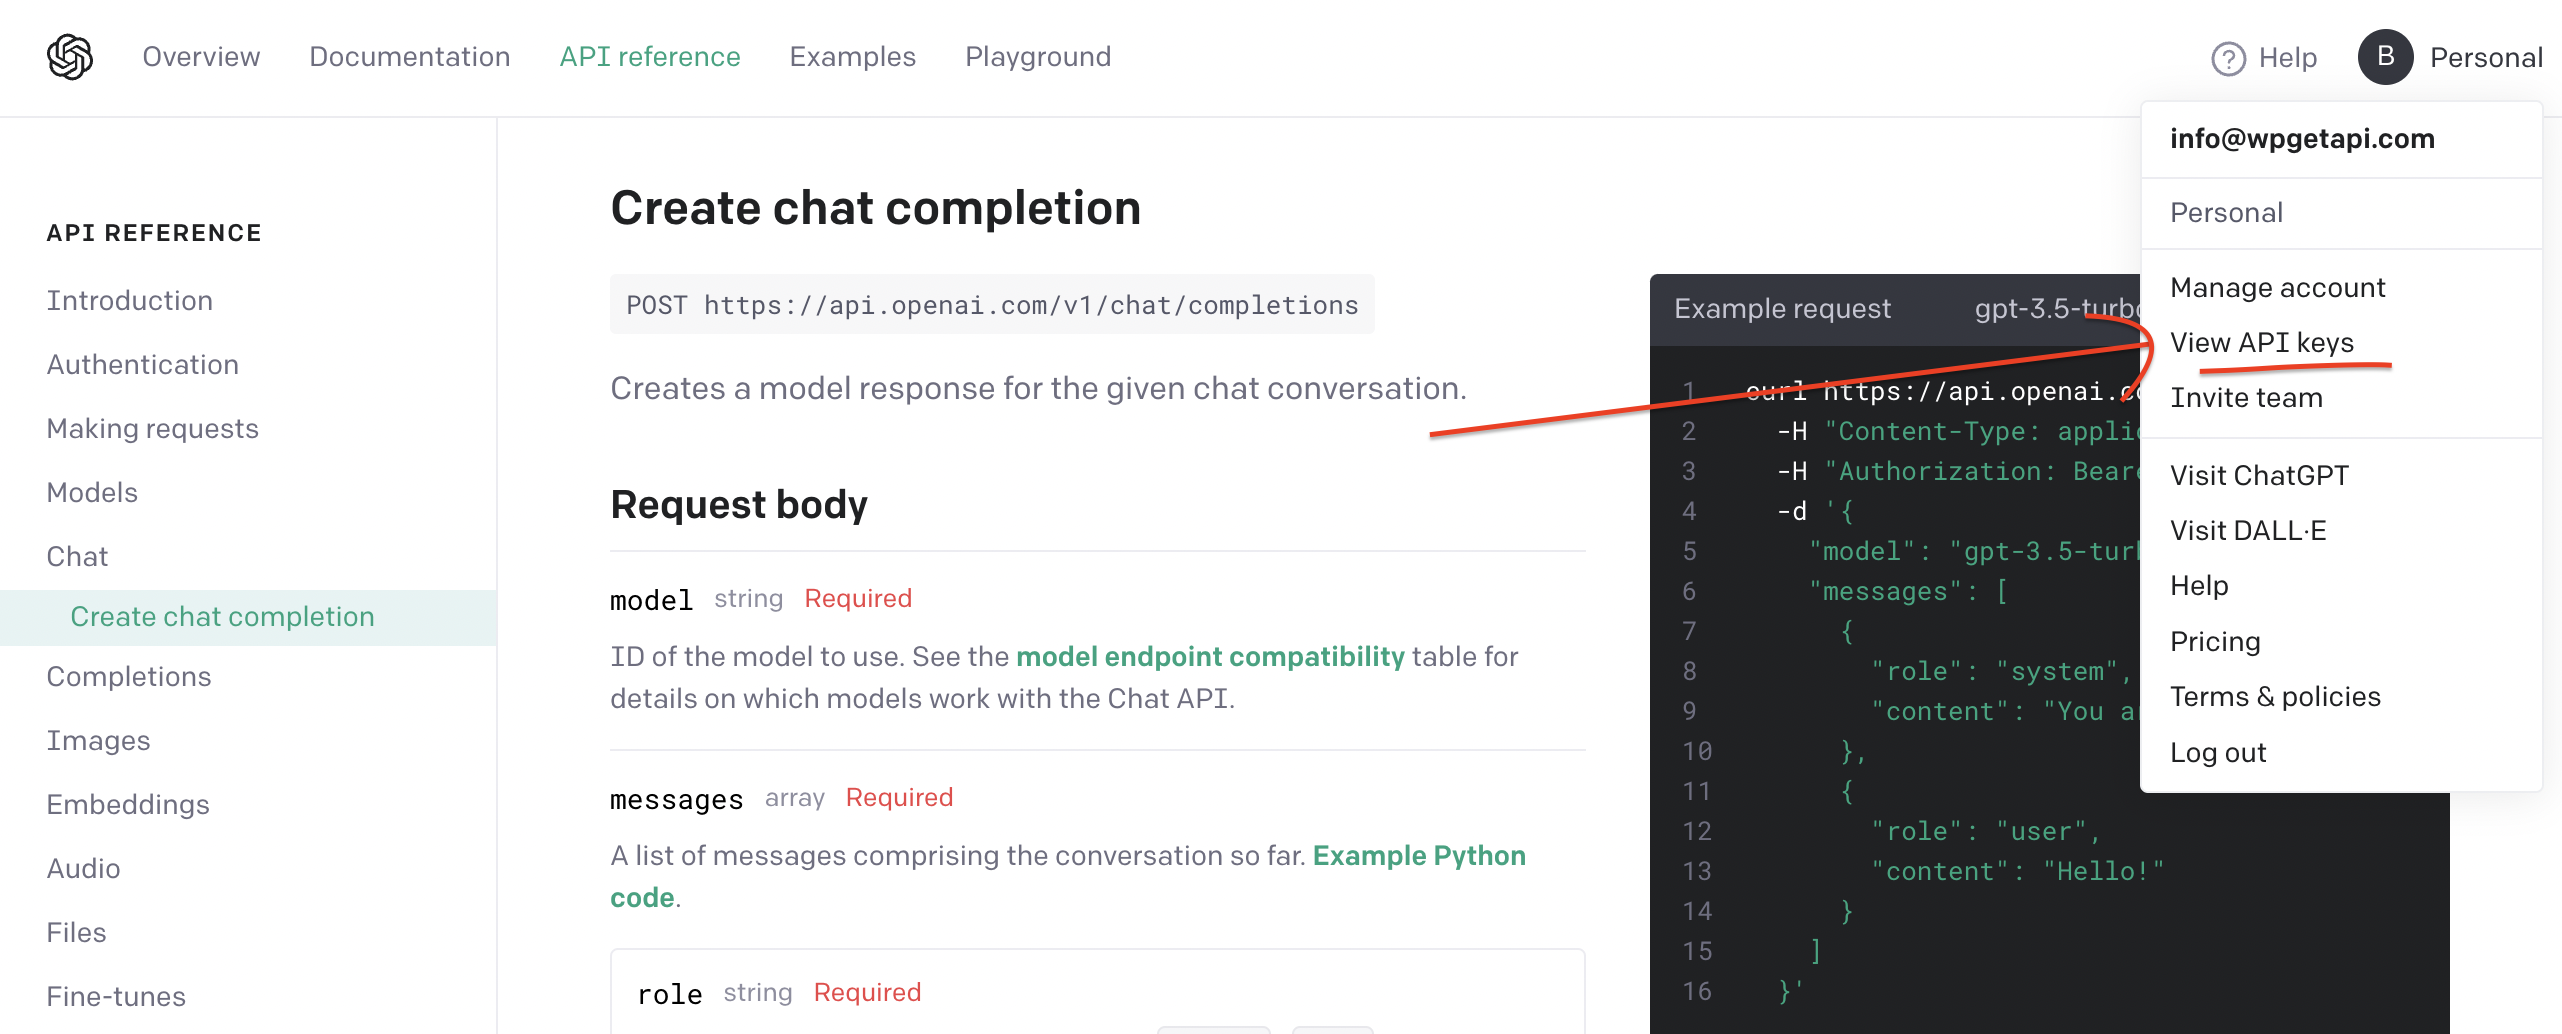
You need to grab your own API key from OpenAI which can be found by logging into your OpenAI account and clicking on your profile at the top right of the page.
Headers
Next we need to include the Authorization header that includes our API key. We can then add the API key with the word Bearer in front of it as shown below.

We also need to include the Content-Type header as shown.
Step 3: Add our prompt
Now in the Body POST Fields, we can choose the model that we want to use and the prompt that we want to use. We also need to set the Encode Body option to JSON encode.
You can see that our prompt is: “Hello! What is 10 plus 10”. You just need to modify this and change it to whatever you want your prompt to be.
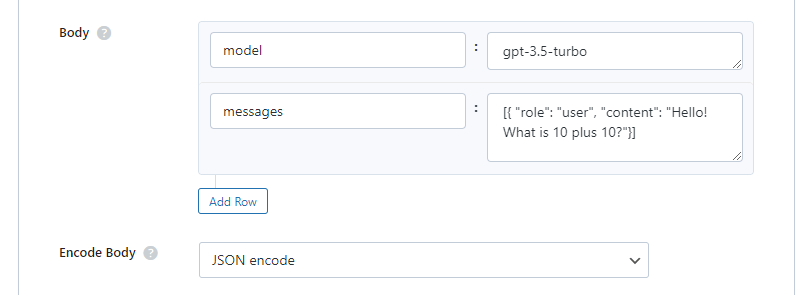
That is all we need to setup in our endpoint, so we now hit the Save button.
Step 4: Test the API
After we have saved the endpoint, click on the Test Endpoint button and we see that the response from OpenAI is a success and it is returning the correct answer to our question.
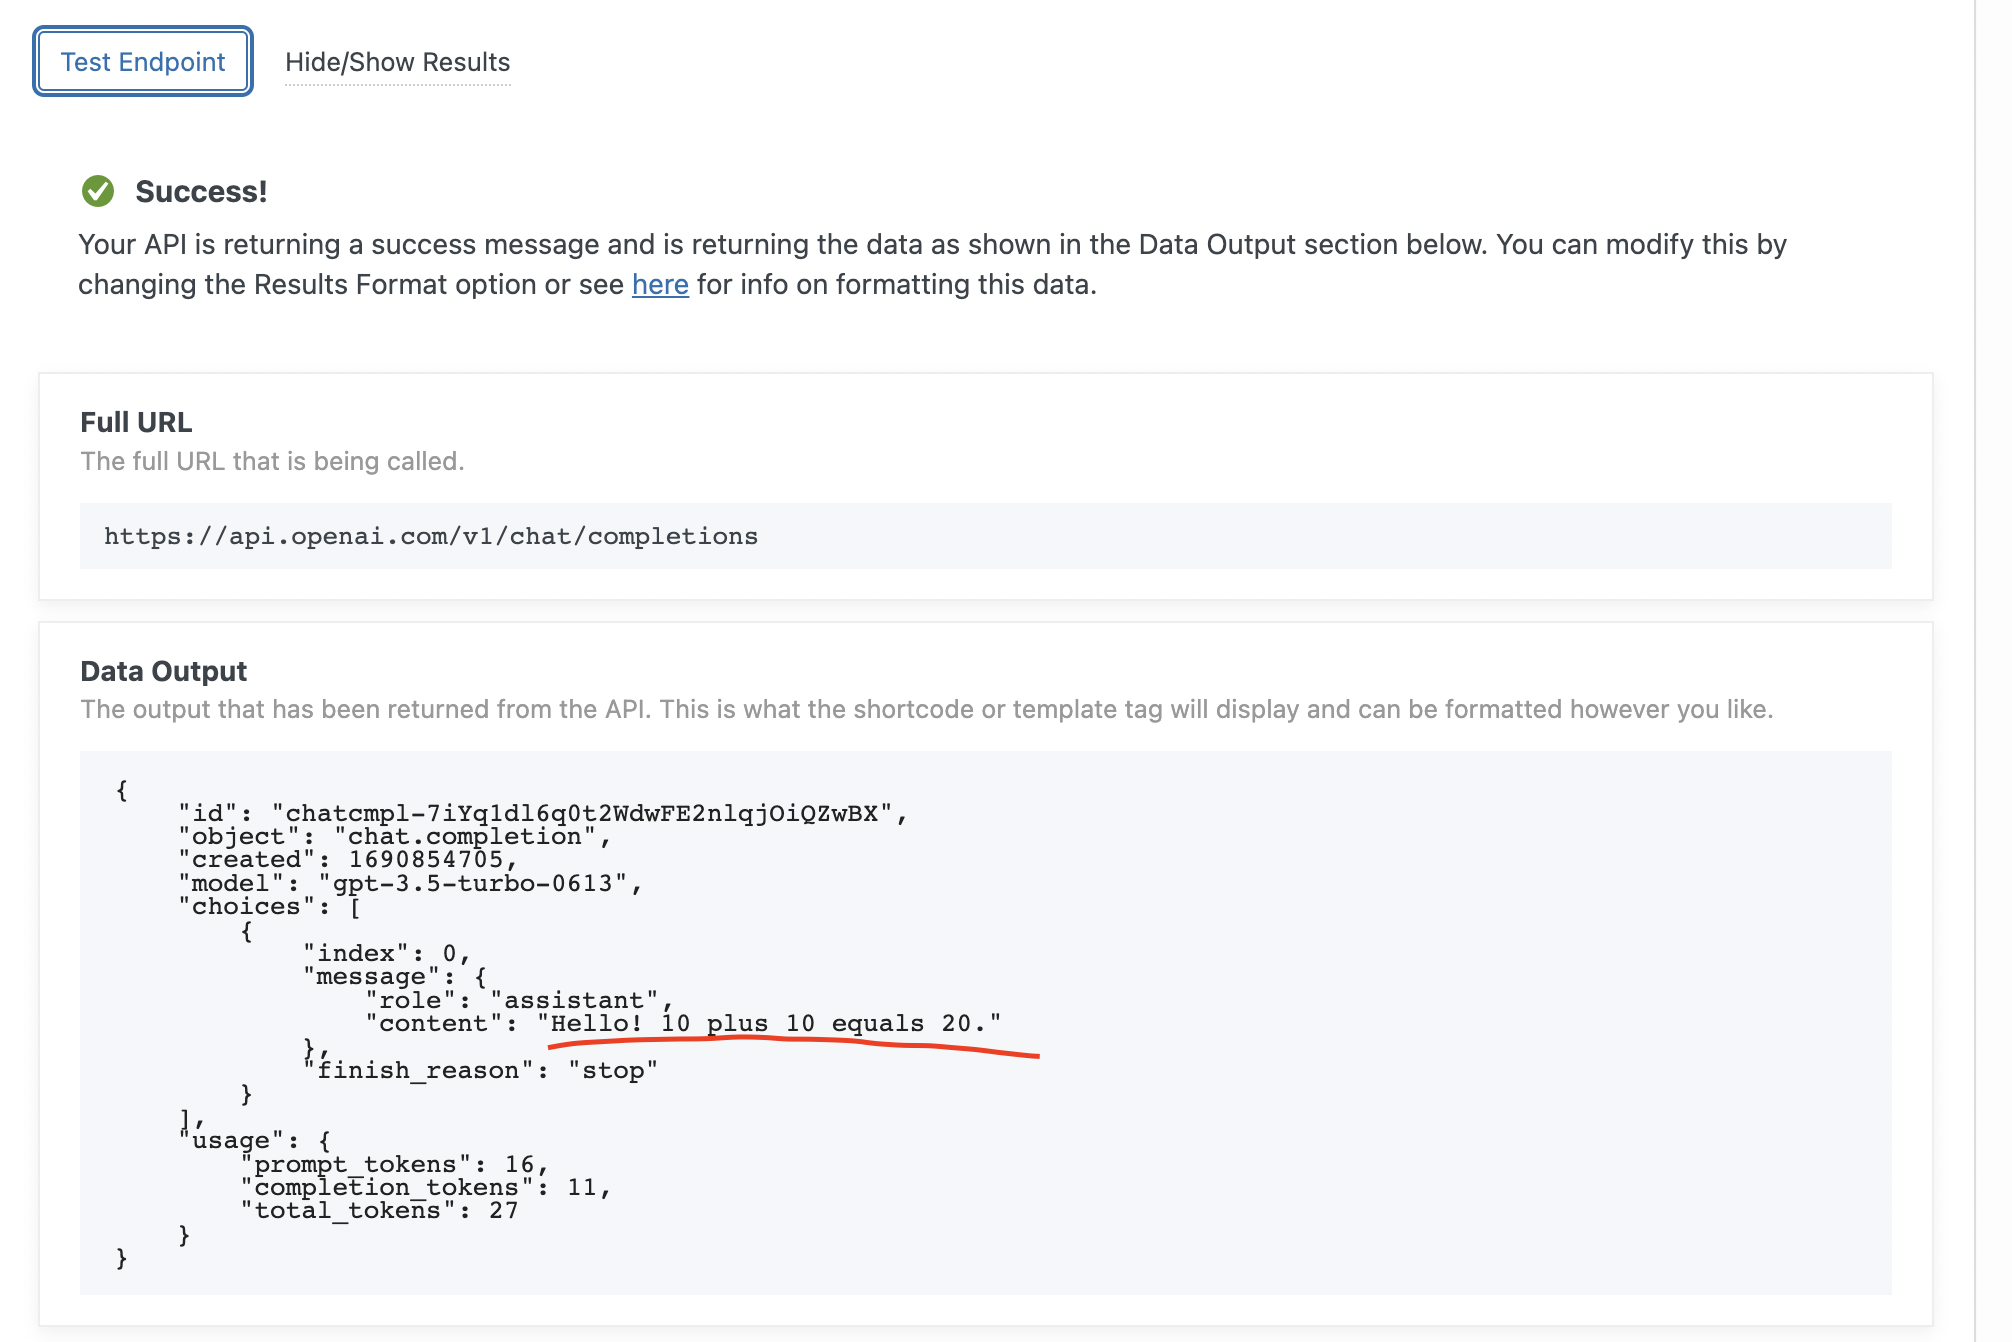
This is cool and all, but we want users to be able to enter their own prompts on the front end of the site.
To do this, we need to use a forms plugin such as WPForms, Gravity Forms or something similar. We will use WPForms in this example as it is free and works really well for this case.
Step 5: Setup our form
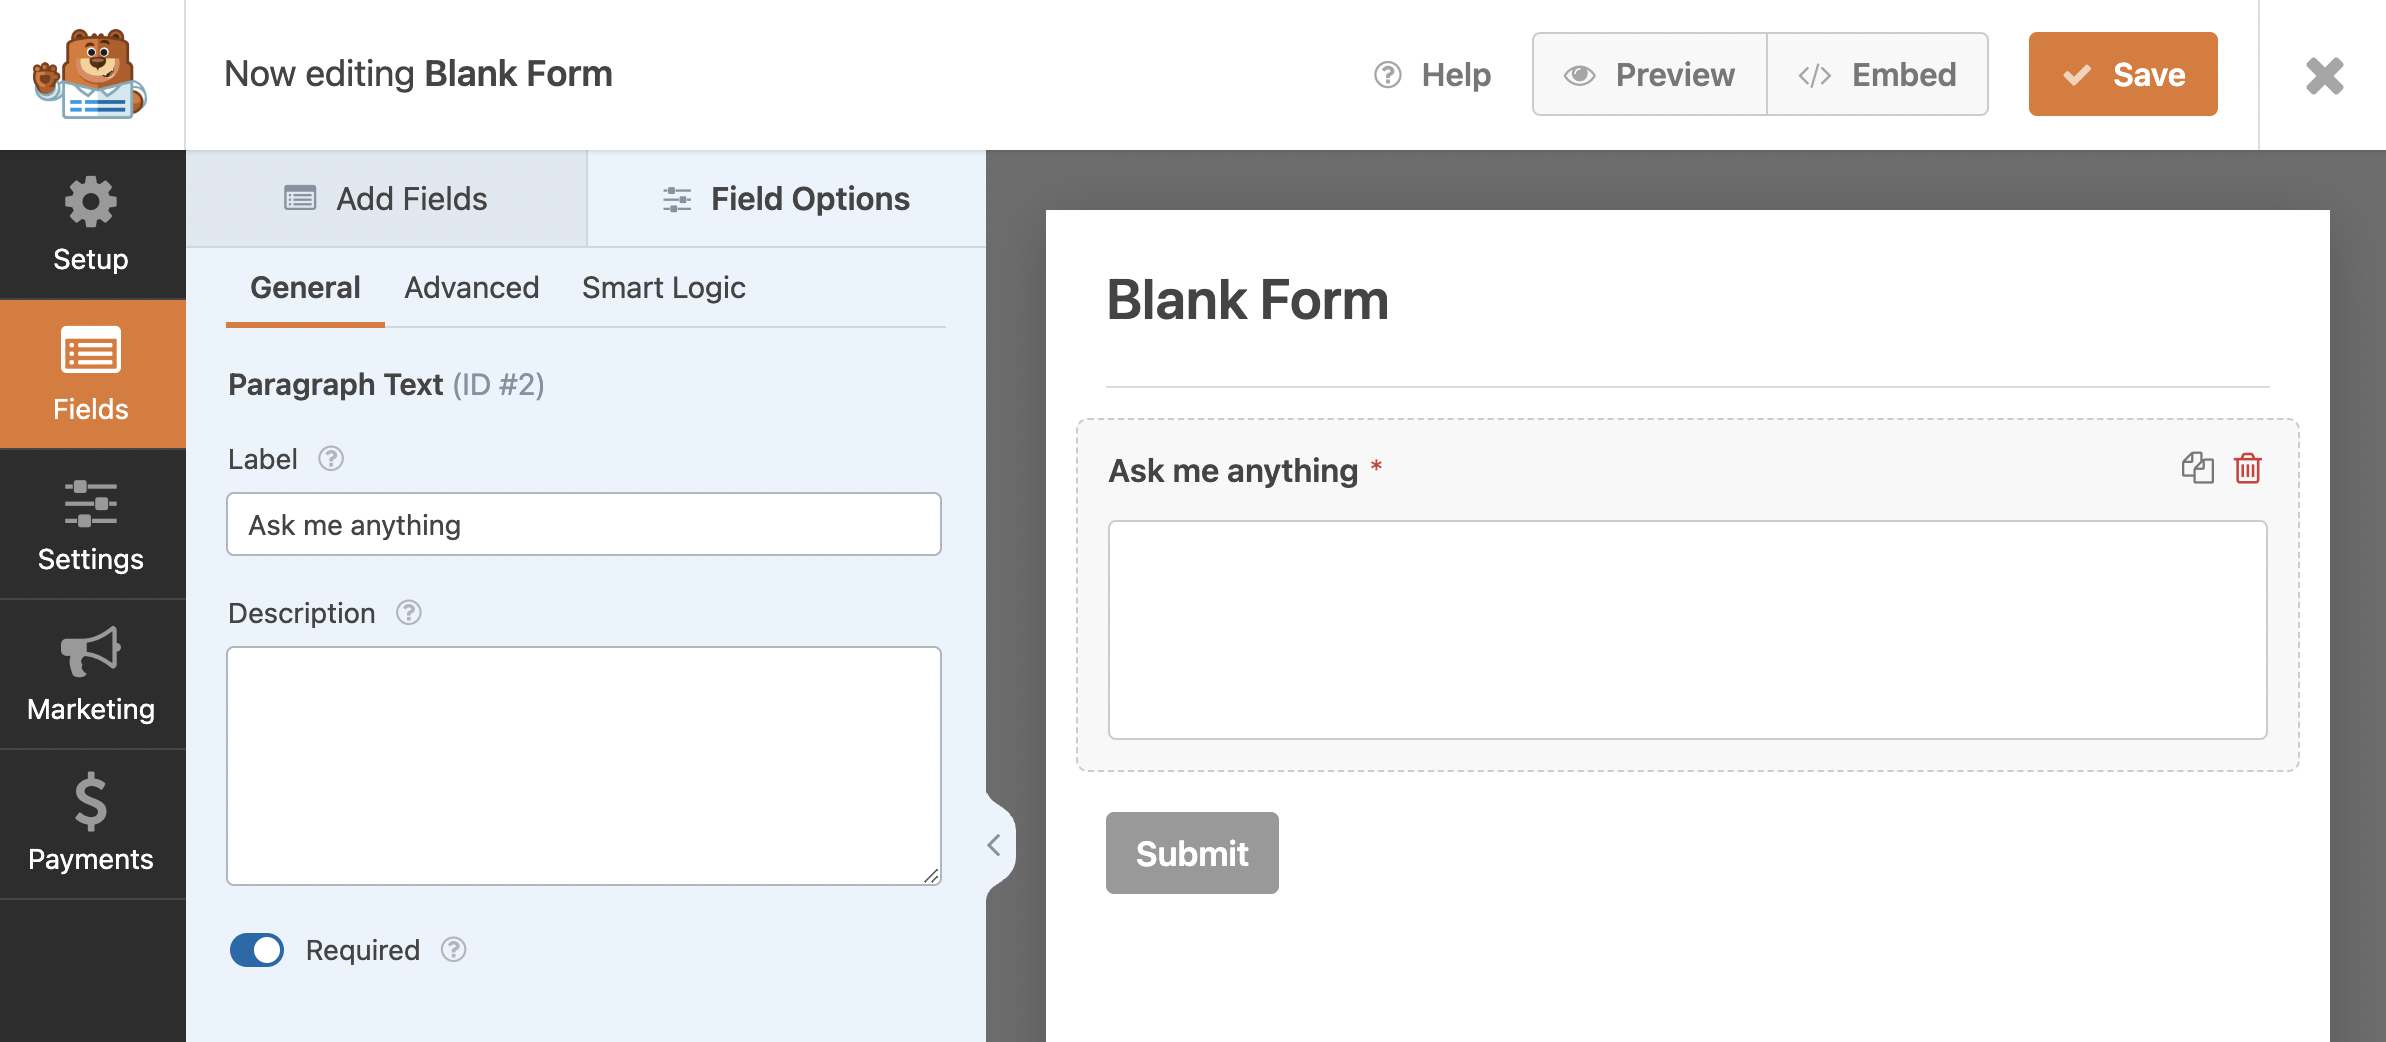
We just need to add a new form and a single paragraph field.
Note the ID of our field here is ID #2. This is important as we will need to know this in our next steps so that we can grab the value of this field.
Form confirmation
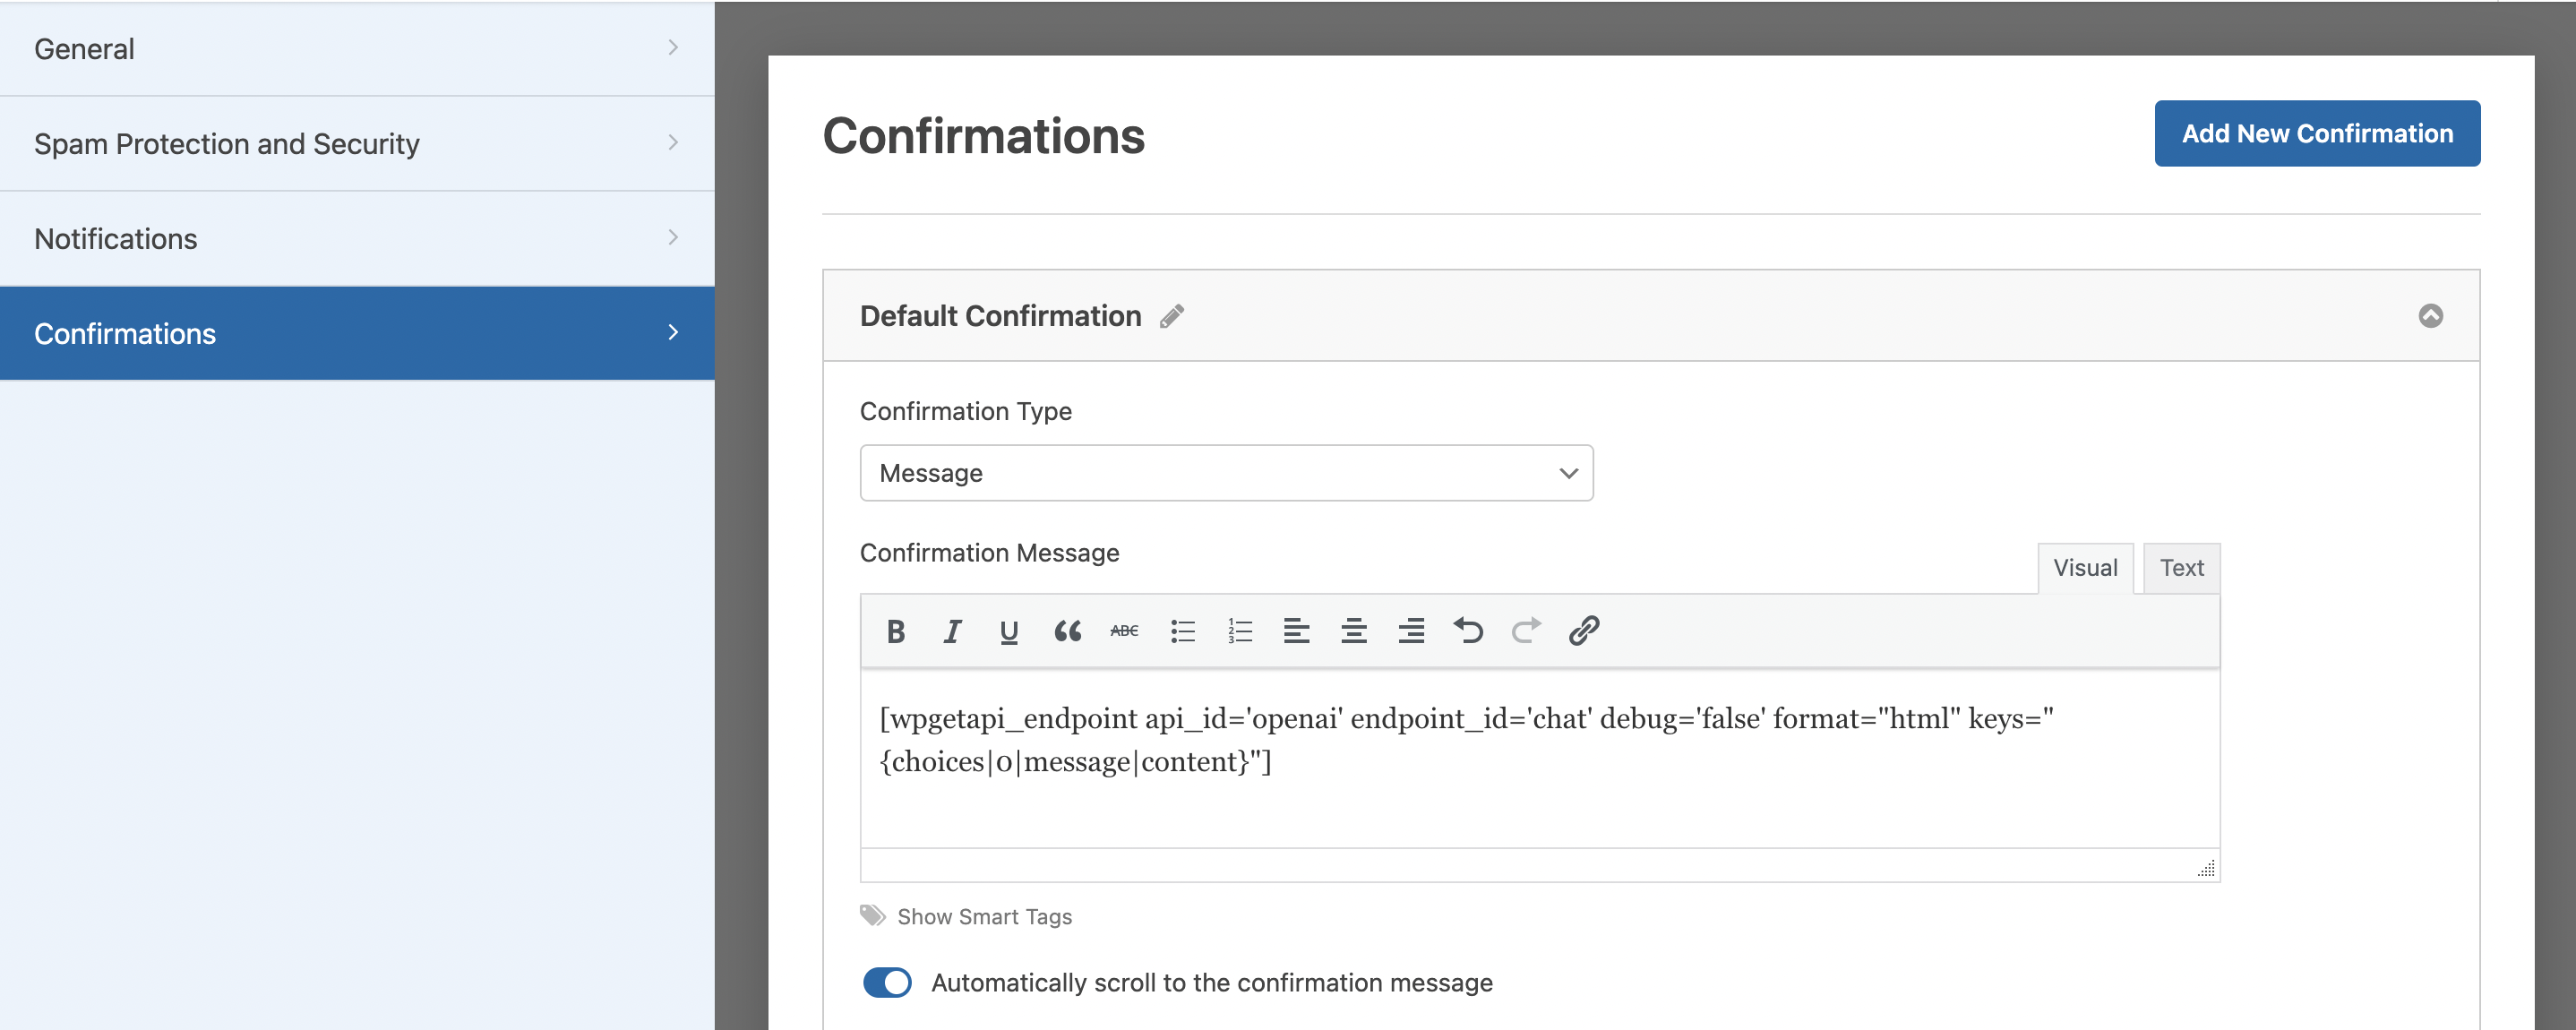
In our forms confirmation message, we need to copy the shortcode from our endpoint and paste it in here as shown below.
We also add these extra shortcode attributes: format=”html” and keys=”{choices|0|message|content}” which will just grab the content part of the response from OpenAI and will format it as HTML.
Now save the confirmation.
Step 6: Send form data
In our previous endpoint setup, we had just hardcoded our prompt. Now we want to go back to the endpoint and change the prompt to be: [{“role”:”user”,”content”: “(system:post:2)”}]
We are changing the content value to be a Token which grabs the POSTed value from the field with ID #2.
So this is where have hooked up our form to our endpoint.

Test it out
All that is left to do is test out the form. You just need to add the form shortcode to your page and then test it out.
