What is RapidAPI?
RapidAPI is the world’s largest API hub where over three million developers find, test, and connect to thousands of APIs — all with a single account and API key. It is basically a giant marketplace of API’s, with the majority of them being free to use and test out. It is a great starting point to discover and test API’s.
In this article we will show you how to connect your WordPress website to any API from RapidAPI using WPGetAPI. The beauty of using RapidAPI is that it uses the same credentials (your api key) to connect to every single one of their API’s.
With RapidAPI and WPGetAPI, connecting your WordPress site to RapidAPI couldn’t be simpler. We won’t need to write a single line of code!
Requirements
A free account on RapidAPI and the free WPGetAPI plugin installed on your WordPress website.
Step 1: Subscribe to an API
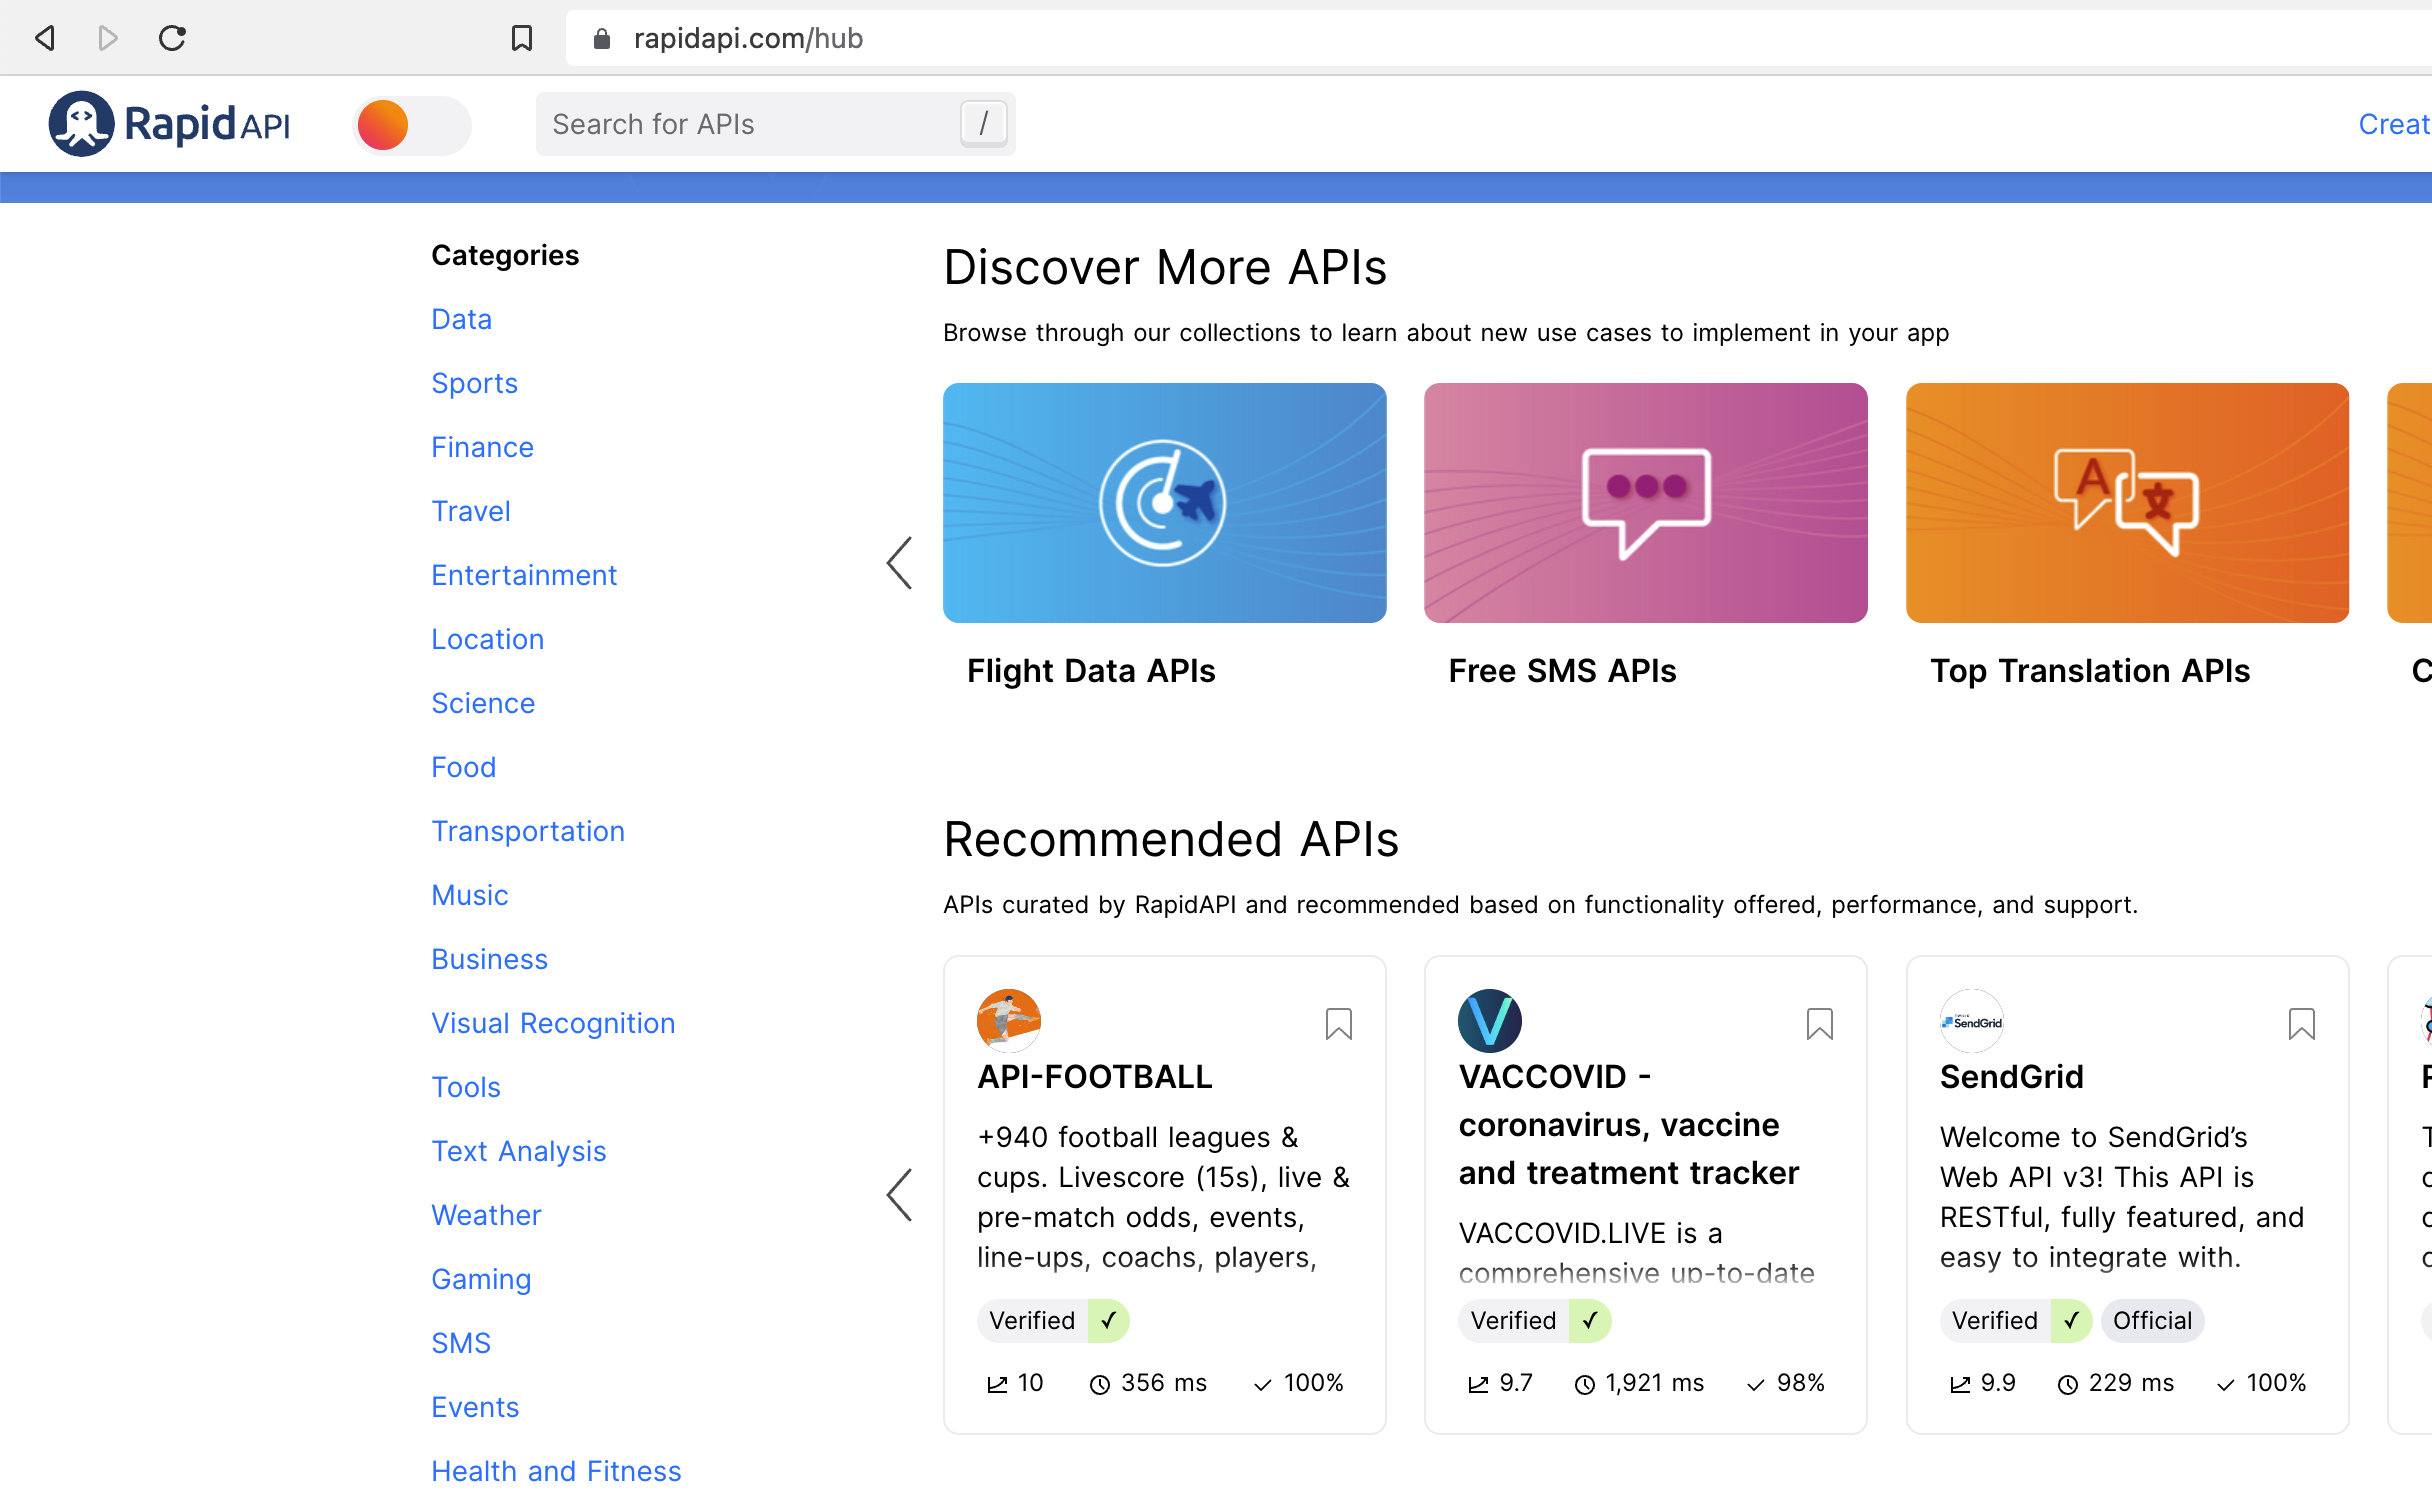
There are thousands and thousands of API’s on RapidAPI that we could test out and they are all categorised as you can see from the image above. We’ve decided to go with an API in the Entertainment category called ‘Dad Jokes’. View the Dad Jokes API on RapidAPI. This is a very simple API and we will use the Random Jokes endpoint.
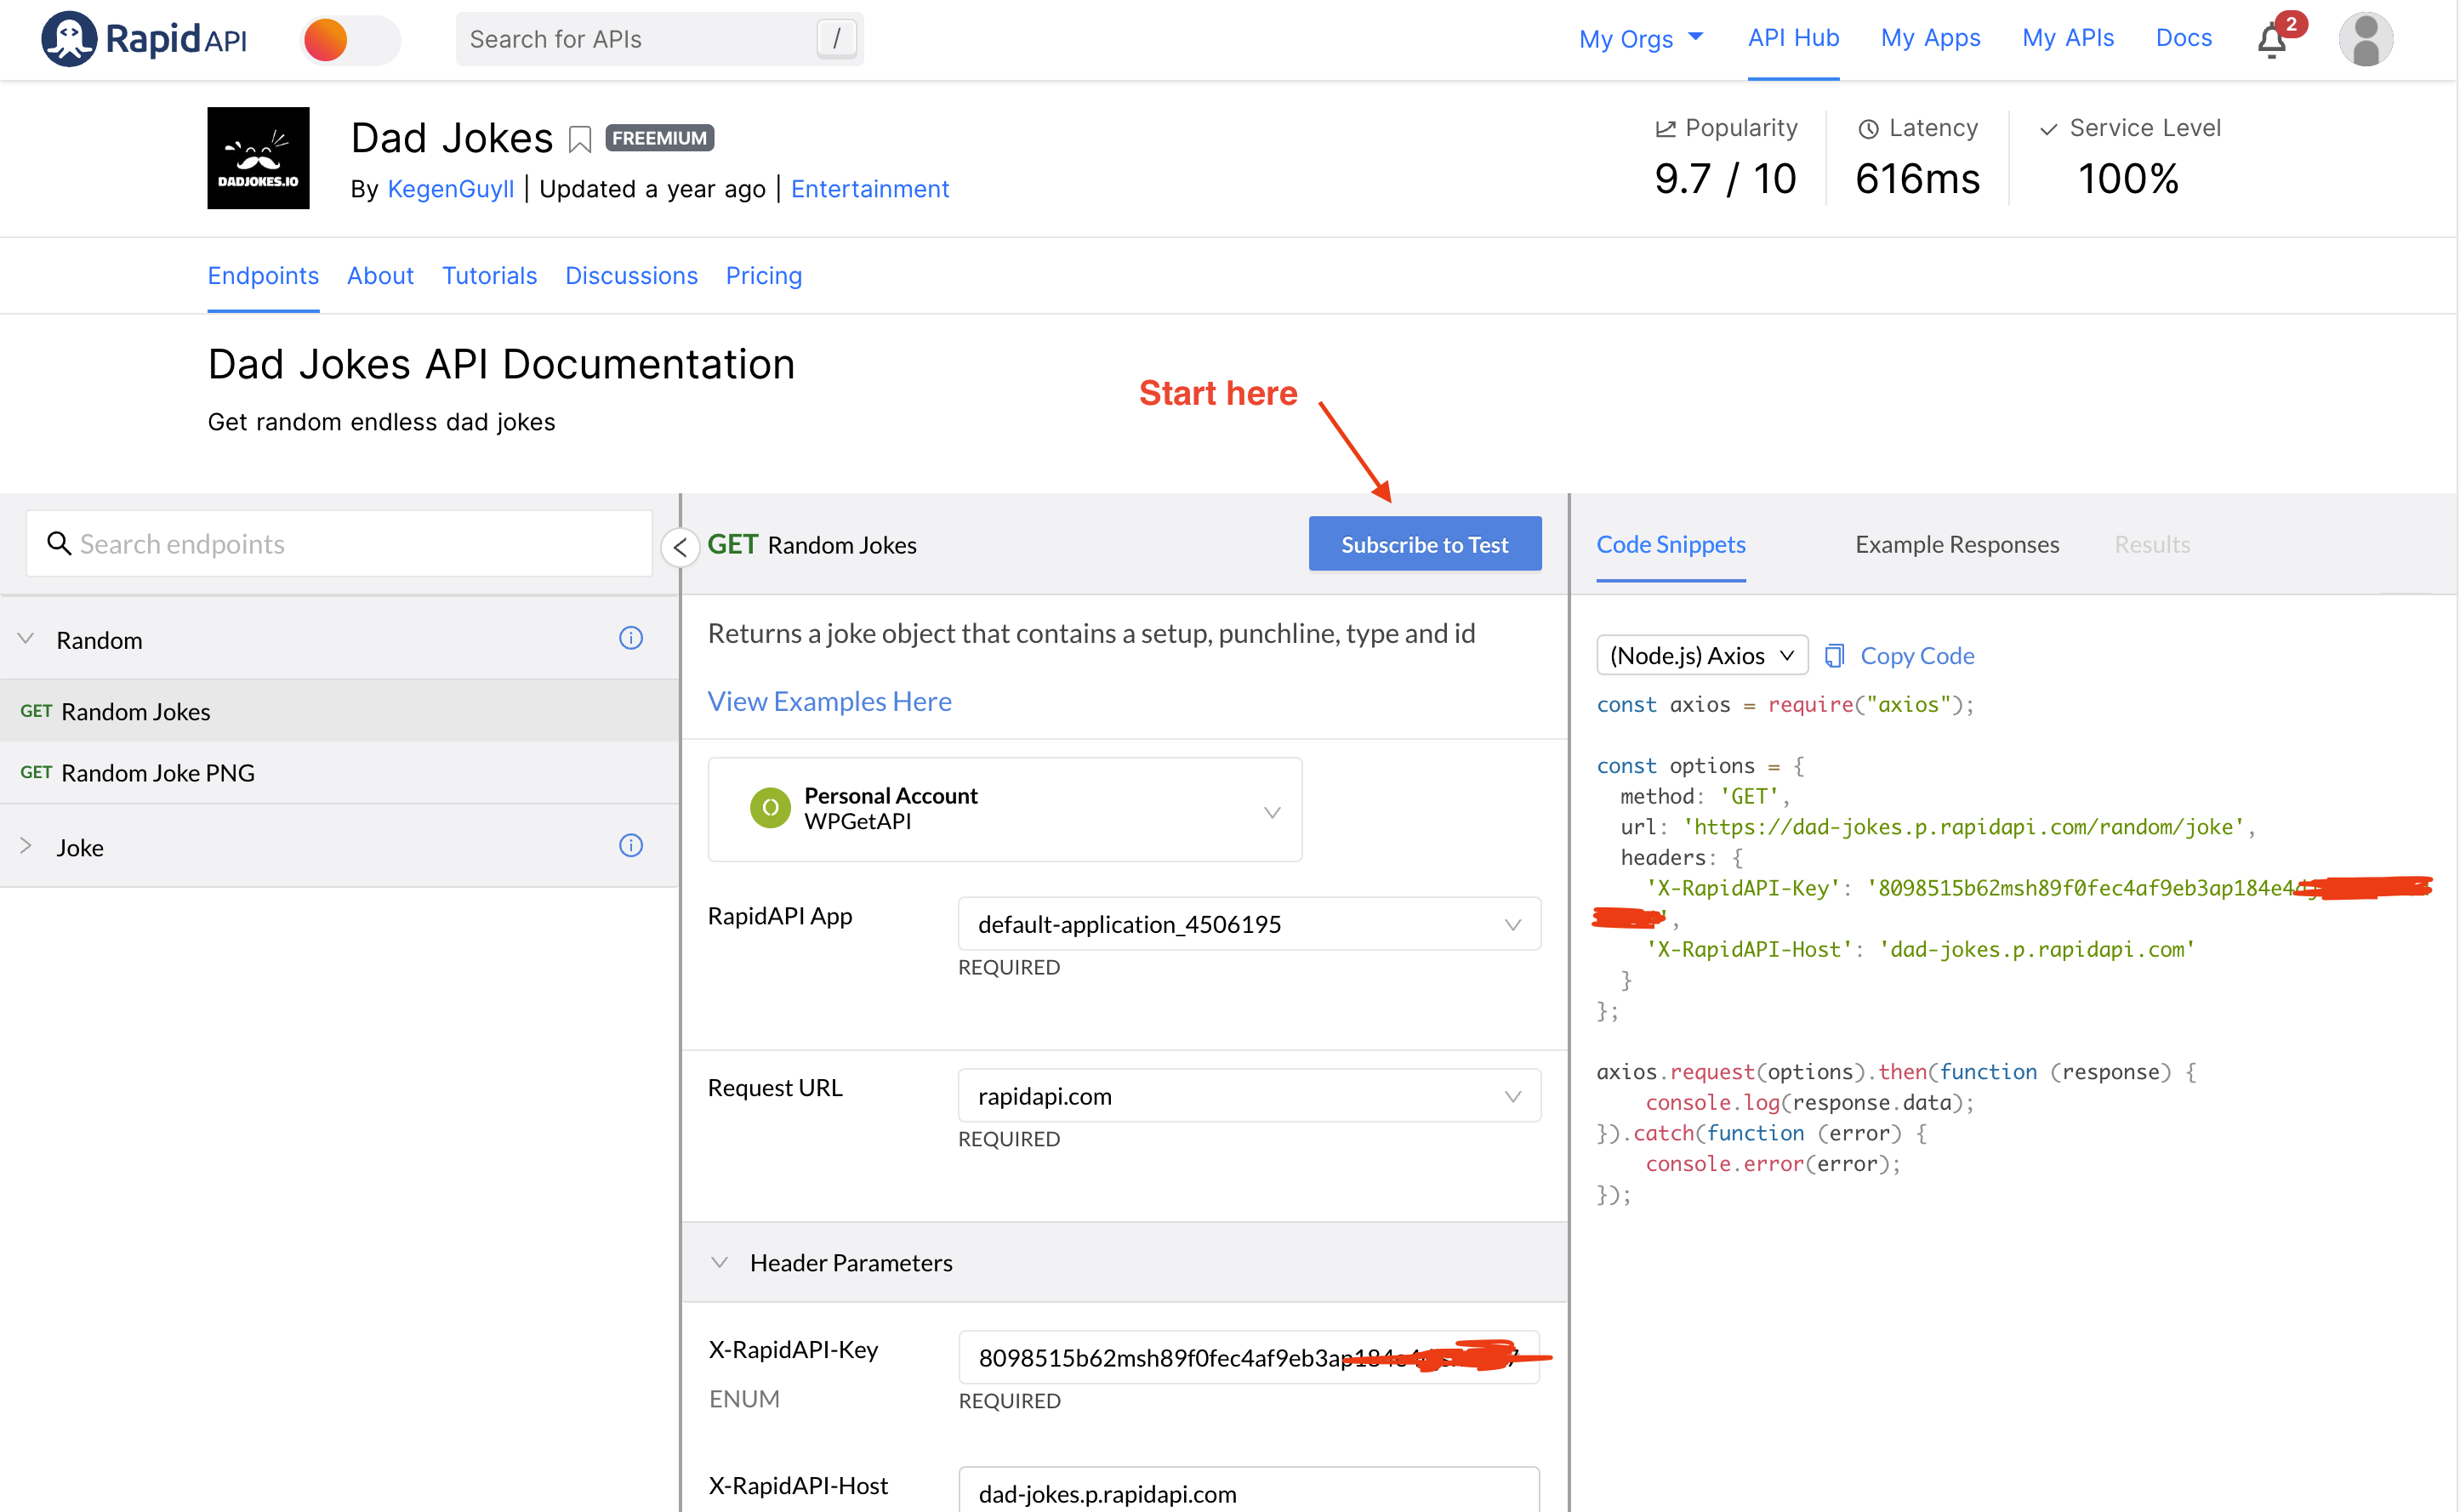
Clicking on the Subscribe to Test button will take you to the Pricing tab where you can choose a plan to subscribe to. We will just choose the free plan to test this out. Every API we have seen has a free plan.
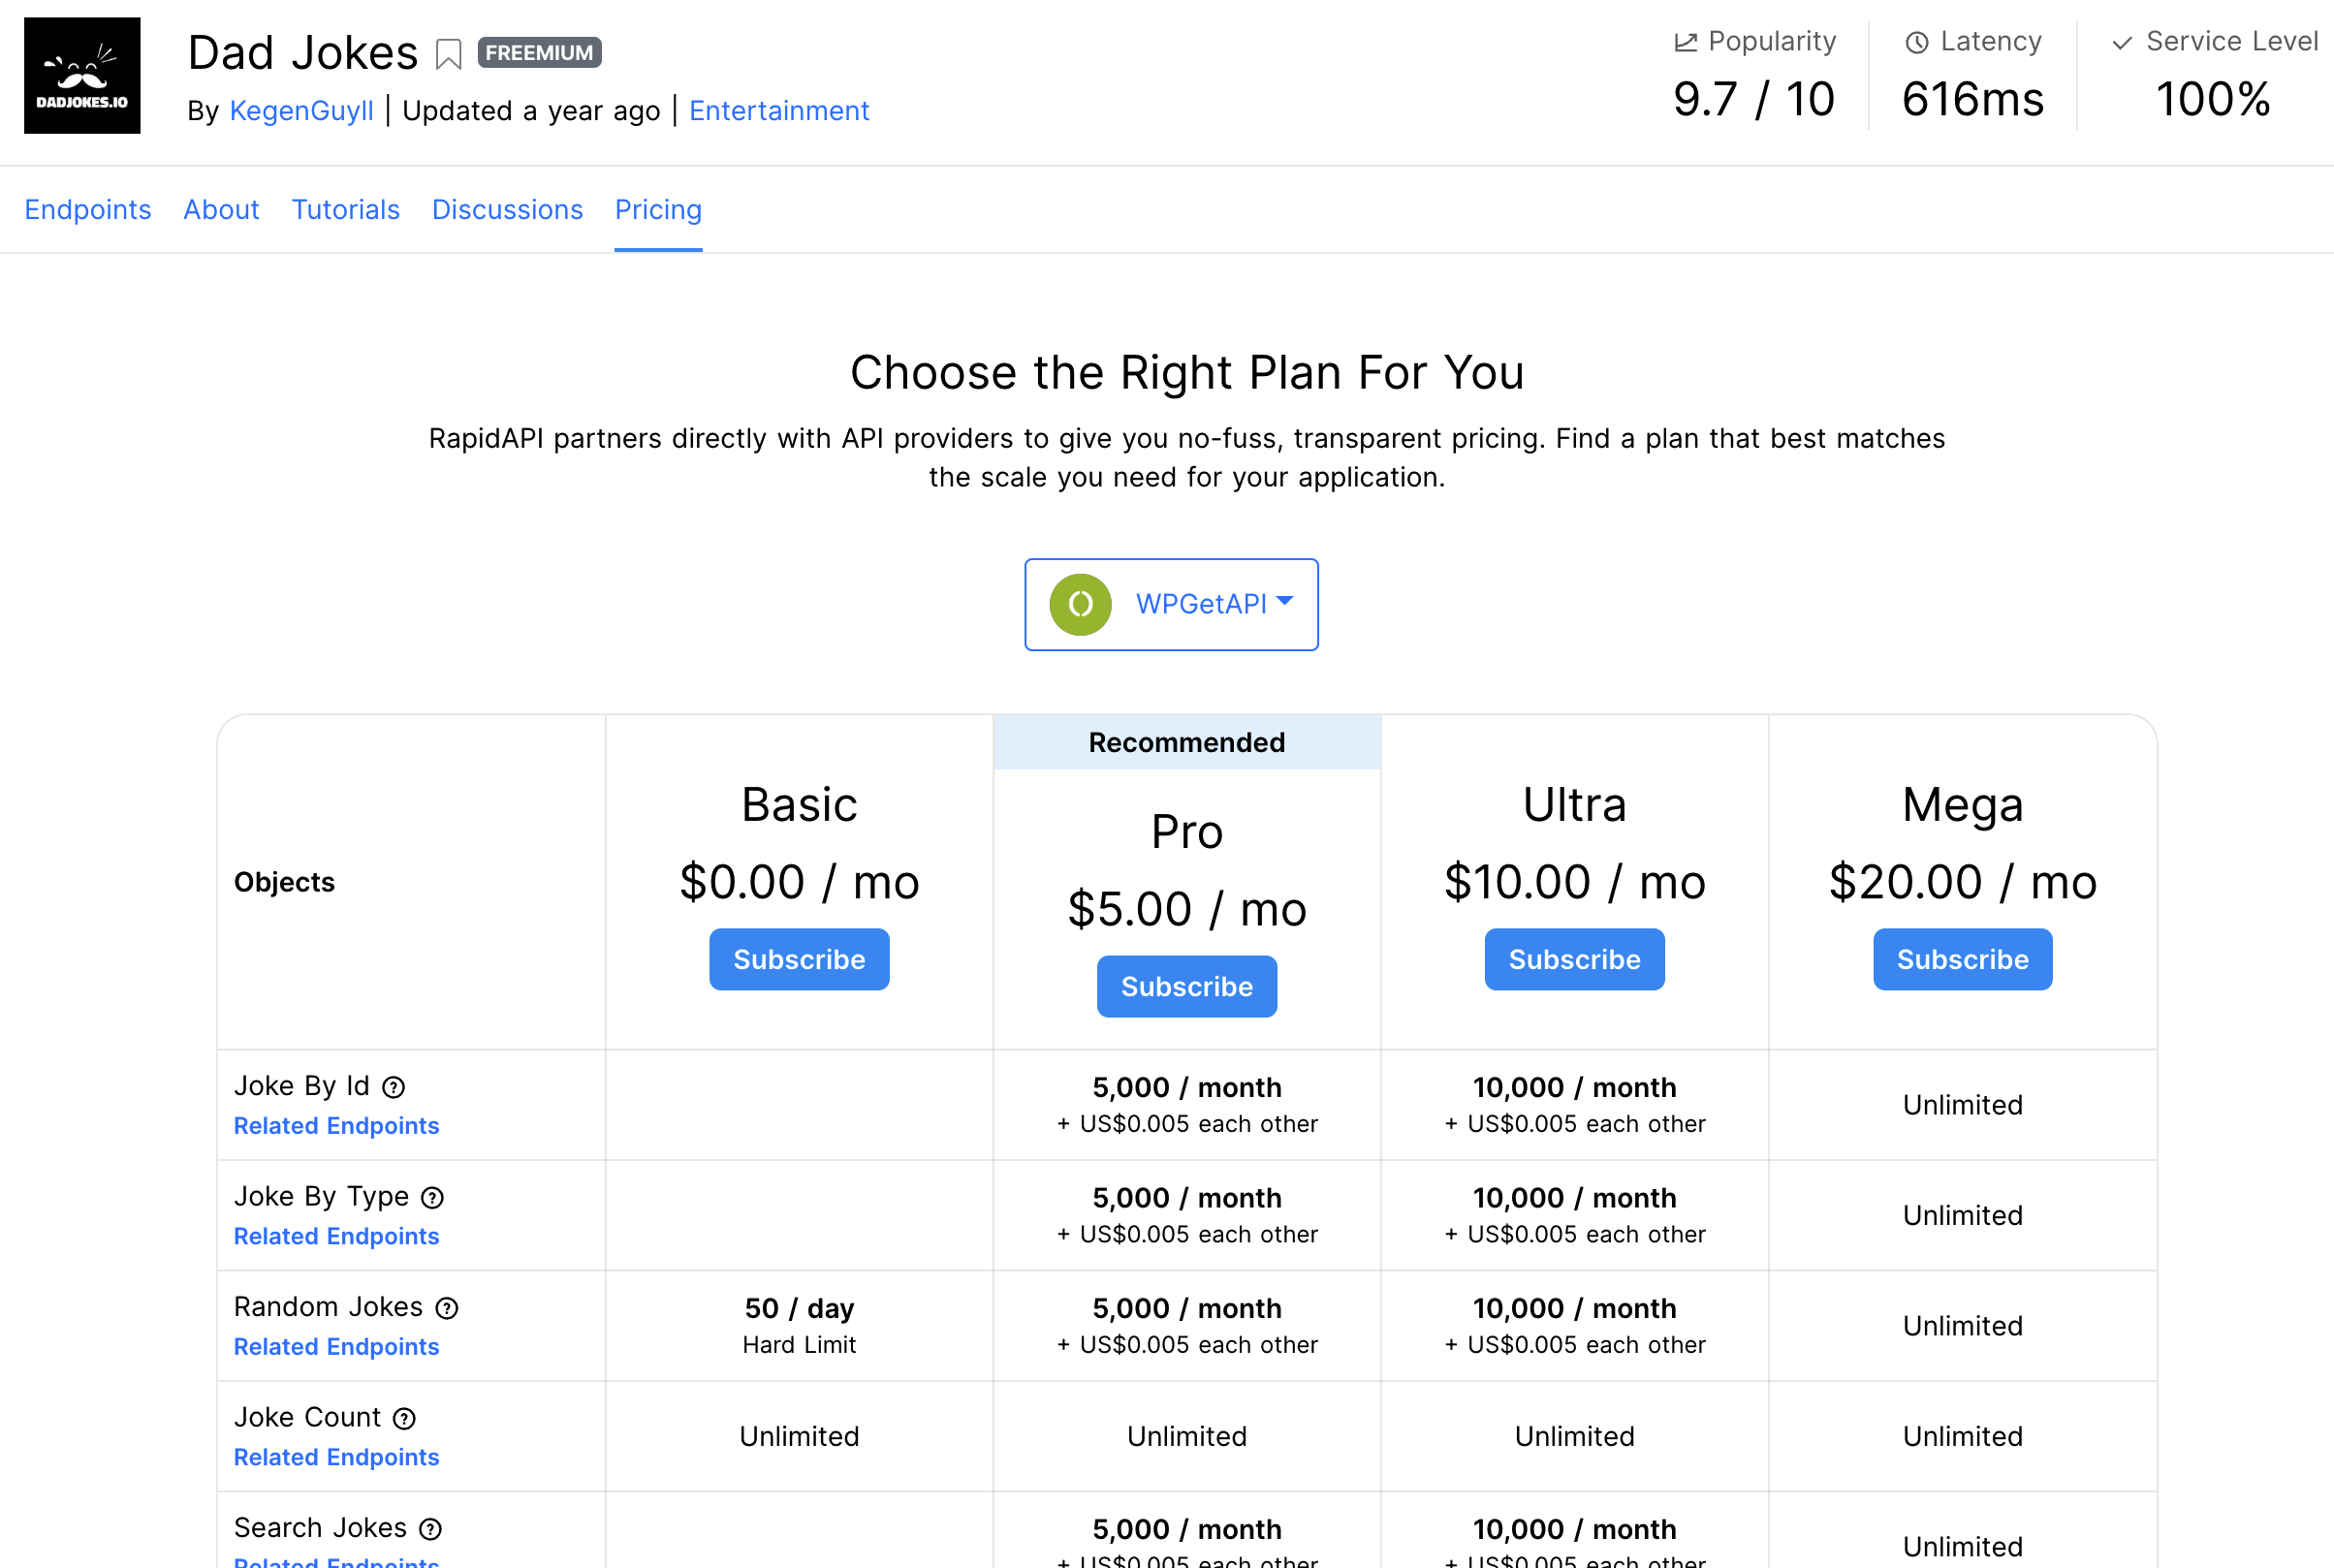
Note the 50 / day Hard Limit on the free plan. This indicates that we can call this API a maximum of 50 times per day, which wouldn’t really work if we placed this on a page of our website and we had over 50 page views a day – it would call the API on each page load. We have a caching solution for this which is explained down in Step 4.
After subscribing to the API, return back to the ‘Endpoints’ tab.
Step 2: Test the API at RapidAPI
Now that we are subscribed to the API, we can simply hit the Test Endpoint button and we should get the results as we can see below. Cool, that works, now let’s setup the WPGetAPI plugin and add the details of this API.

Step 3: Setup the API in WPGetAPI
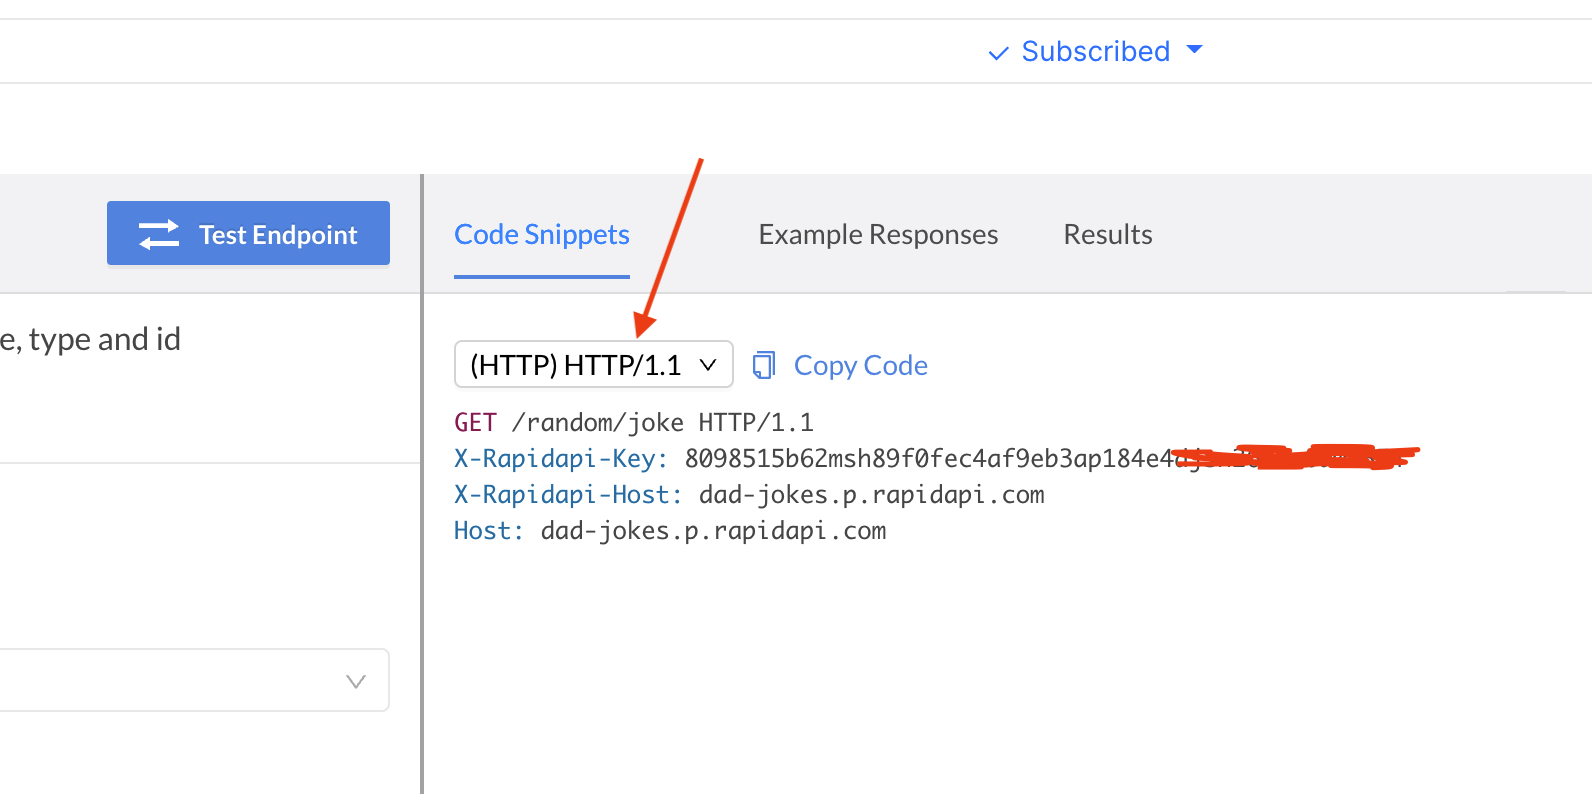
Firstly I like to set the Code Snippets language to (HTTP) HTTP/1.1 as this just gives the cleanest and clearest view of the settings we will need to add.
Now in our WordPress admin, we need to click on the WPGetAPI tab in the sidebar and we will be taken to the Setup page where we can add our Dad Jokes API details.
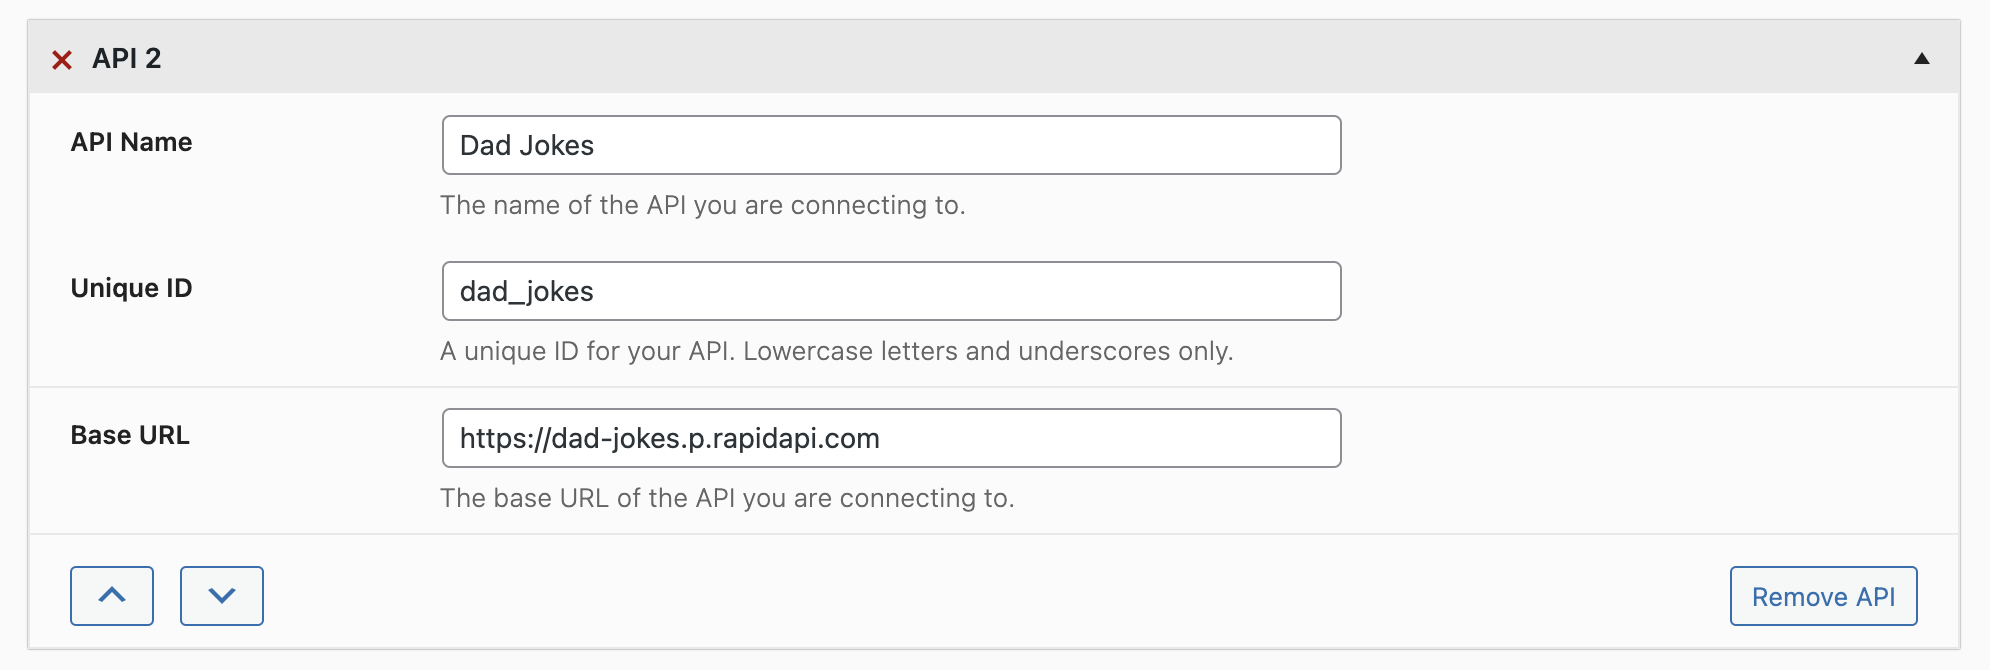
The fields we need to add are as follows:
- API Name – Dad Jokes
- Unique ID – dad_jokes
- Base URL – https://dad-jokes.p.rapidapi.com
- The Base URL will be the Host as shown in the image from RapidAPI above.
After we have set up these fields, hit the Save button at the bottom of the page and a new ‘Dad Jokes’ tab will be created. Click on the tab where we can now set up our endpoint.
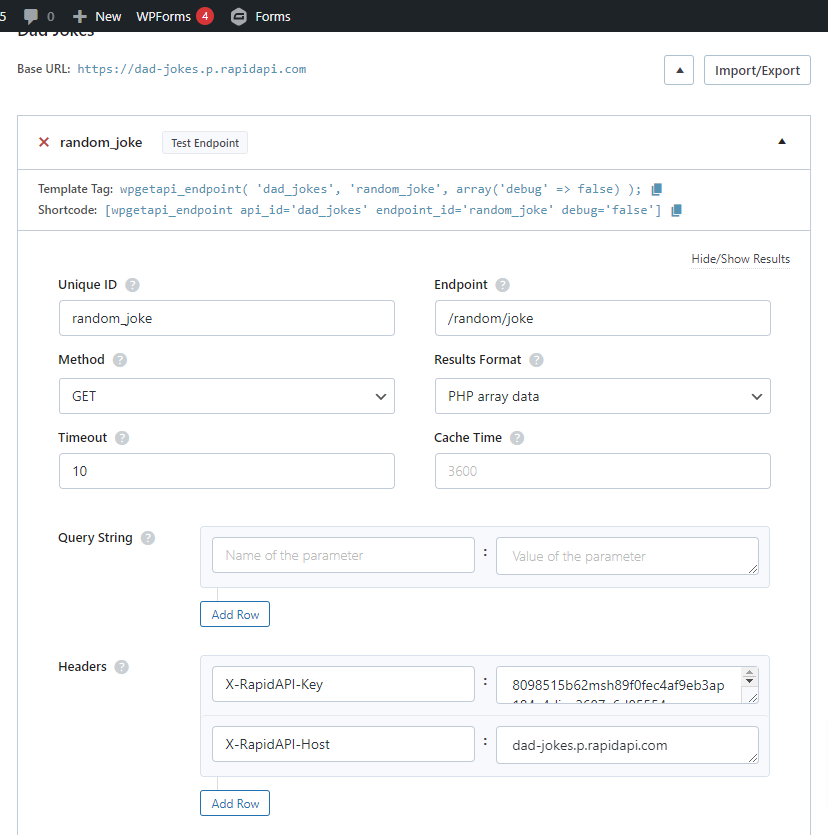
Step 4: Setup the endpoint
Now we can add the details of the endpoint. These details can be found in the Code Snippets image above and the fields should look like this:
- Unique ID – random_joke
- Endpoint – /random/joke
- Method – GET
- Cache Time – 3600
- this is optional and only available in the Pro Plugin – it will limit calling the API to once every hour to easily avoid our limit of 50 calls/day
- Results Format – PHP array data
- Headers #1
- Name – X-Rapidapi-Key
- Value – xxxxxxxxxxxxxxxxxxxxxxxxxxx (your own api key)
- Headers #2
- Name – X-Rapidapi-Host
- Value – dad-jokes.p.rapidapi.com
Once these fields are done, hit the Save button at the bottom of the page and the Test Endpoint button will become active.
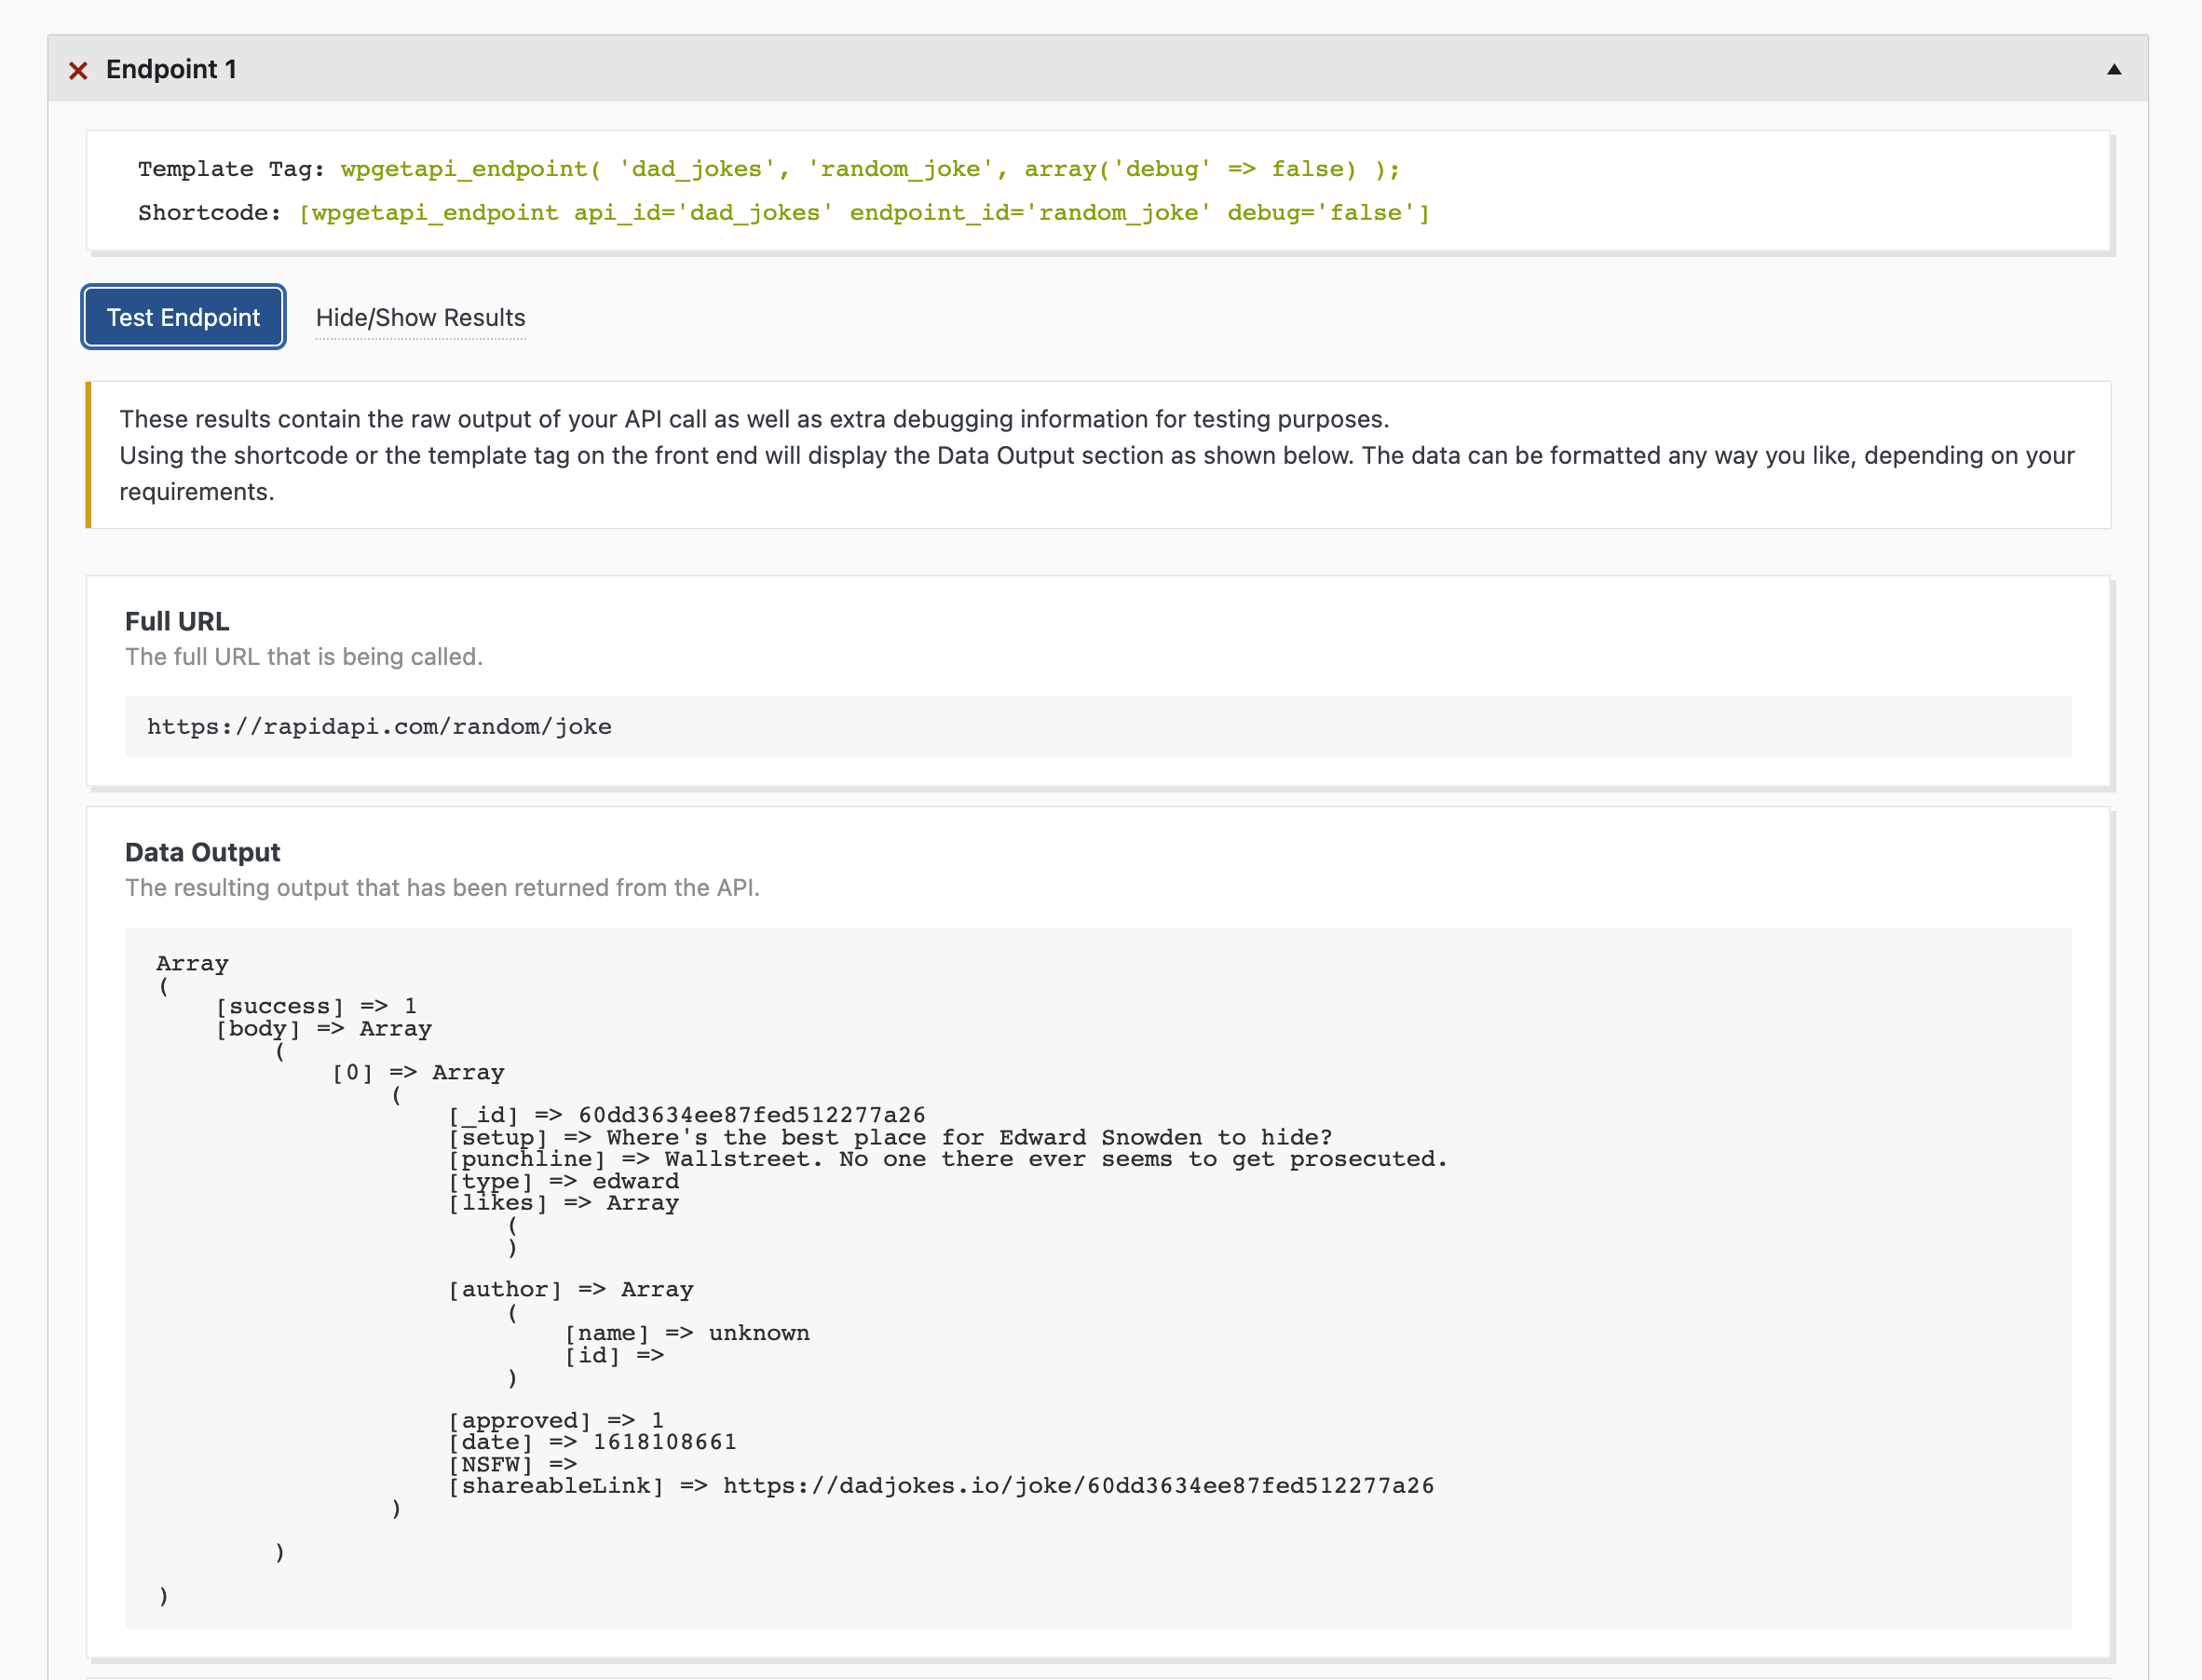
Step 5: Test the API on WordPress
With our API and our endpoint now setup and saved, click the Test Endpoint button and you should see the results of the test like below.
Awesome, we have now successfully deployed an API from RapidAPI into our WordPress website!
This is just one example that uses just a simple API, but the way that RapidAPI and WPGetAPI are built makes it extremely simple to just copy/paste this method (changing a couple of values) with any API on RapidAPI and easily integrate it into your WordPress website.
Step 6: Formatting the API data
We haven’t touched on how best to display this data as this is just a tutorial on how to connect RapidAPI with WordPress, but here are some other articles that deal specifically with formatting and outputting API data on your WordPress website.